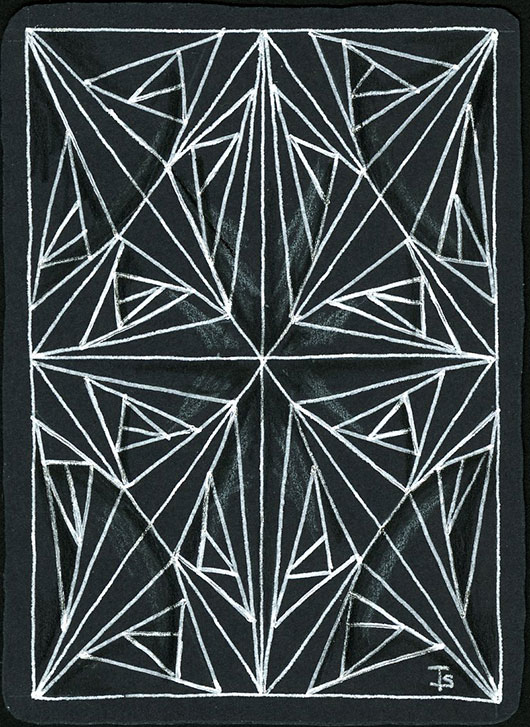
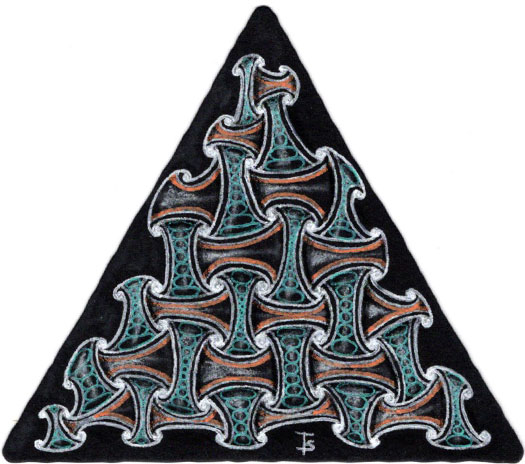
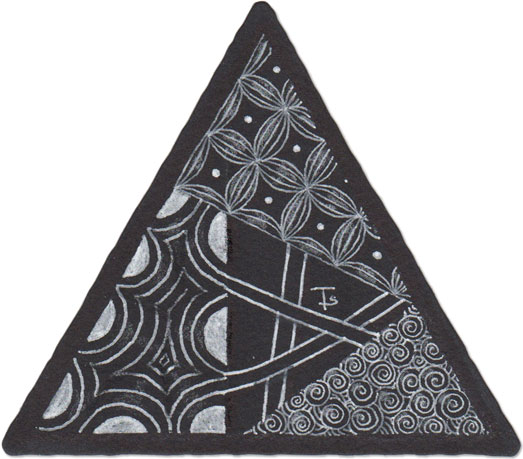
Did you notice that I skipped a number in this series of ATC cards? While this one was actually the sixth one I did, I saved it for the last because of the way it came out.
Ok. I had this idea about using Paradox to make a symmetrical design. I think it sort of worked… but not at all what I imagined it would look like!
ATC #6. Project done!
Last Monday, I wrote a post about my New Zentangle Voyagers class. This is a set of 3 classes that I am teaching at cARTel Studio. The same students are in each class.
This week, the students learned about drawing on black tiles. They did a monotangle on a black Bijou tile. The second project was this Crazy Huggins, with tangles in each hug-shape. The third project was a 3-dimensional stand they can use to display a tile on their desk at work or home.
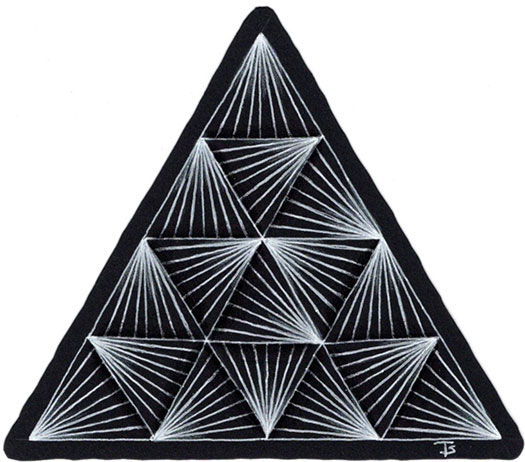
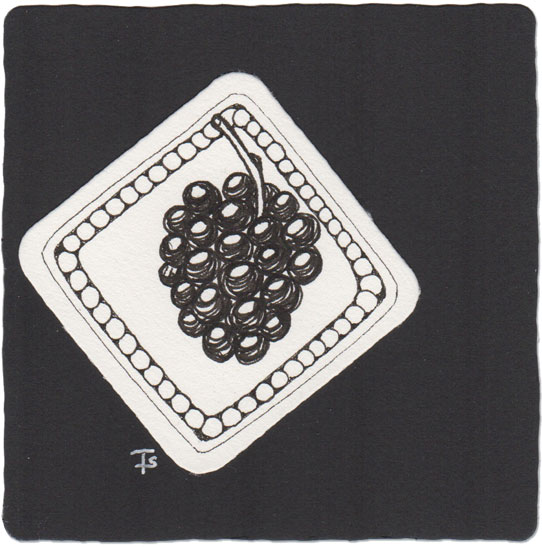
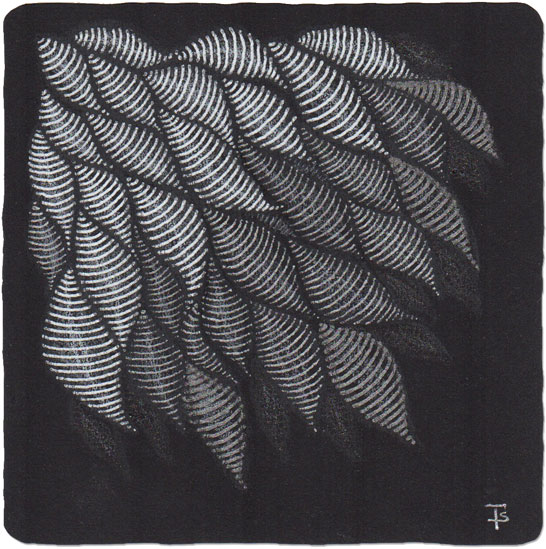
Sometimes, we look at a tangle and think “that’s too simple” or “what a boring tangle”. But you shouldn’t take a tangle for granted, just because of it’s simplicity!
Munchin is one of those tangles. I specifically chose it for this monotangle to highlight it’s amazing depth and beauty when done large. Just a little subtle shading and highlighting make it pop right off the tile.
Your challenge, today, is to use Munchin with other tangles on your tile in a way that highlights this simple tangle!
I did a grey and pink tile using Indy-Rella a while back, where I used them as fish-like shapes.
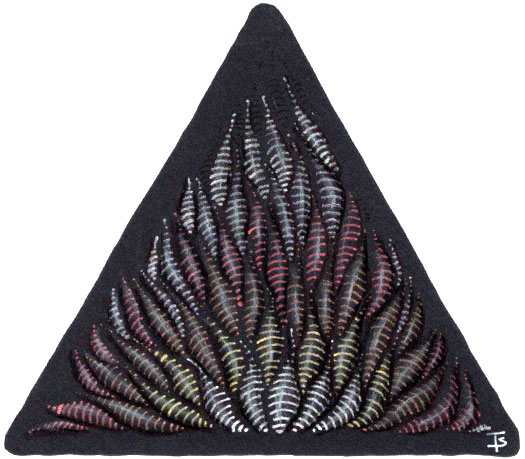
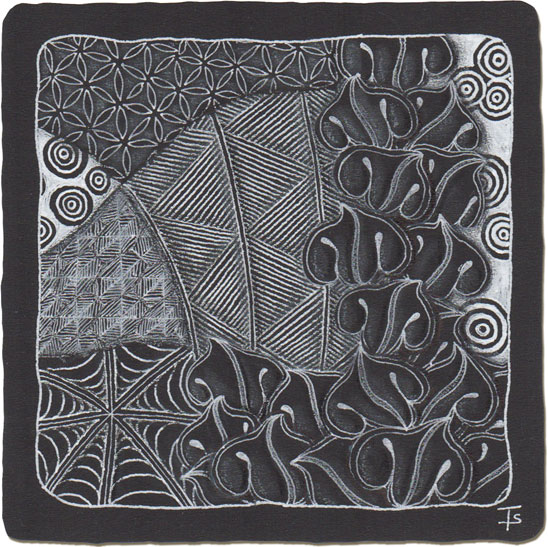
Here, I wanted to create the feeling of flames, using metallic markers and going from bright silver to red.
It reminds me of a camp fire, so I think it is a success!
Zentangle drawn on Strathmore, black, ArtRage paper various, metallic, gel pens. Shading done with colored pencil and Copic marker.
Crazy Huggins is a tangle that I often turn to when I’m not sure what to do. It’s fun to draw, has a wonderful, meditative rhythm and allows for all different kinds of variation.
I recently did a version of regular Huggins on a black tile, with no extra embellishment that you can compare to this one by clicking on the link.
If you want to see even more examples, going all the way back to 2017, click here .
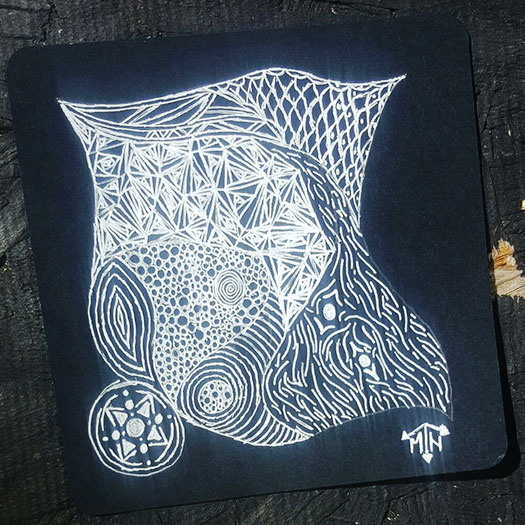
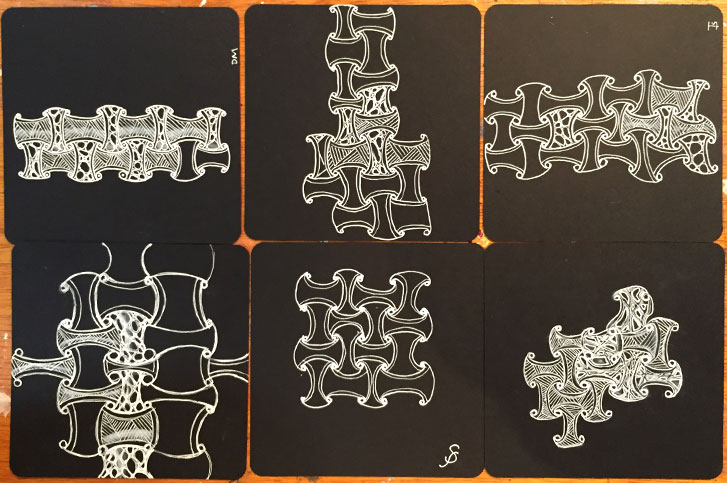
Over the weekend, I received this picture of a tile Matthew created!I’m not sure of all the tangle names… perhaps some of them don’t even have names. But it doesn’t matter… It’s still a great tile!
Zentangle drawn on a black Official Zentangle Apprentice tile using a white Sakura Gelly Roll. Highlights done with white charcoal pencil.
Tangles: Paradox Aura Leah Tipple
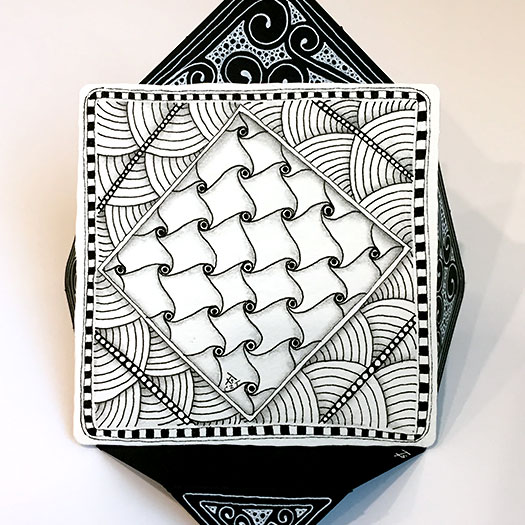
You’ve seen this tile with Cadent in the center before. It was featured in a post on July 5th . And also in the post about the upcoming classes for August .
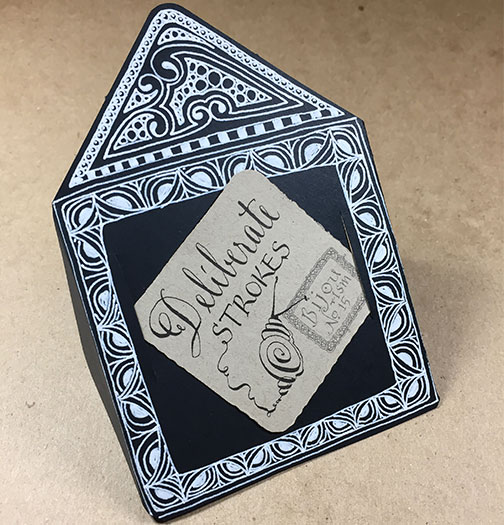
But here’s another sneak peak for the Beginner's 2: New Strokes class ! You may have noticed that the description mentioned a 3D project?
We’re going to be making a display stand to show off your favorite tile on your desk at work or home!
How do you Mooka?
I am playing around with the various ways of drawing Mooka.
Here, I’ve drawn half a little bijou-sized tile using a traditional style and then just added some dots to create a bit of texture. I also decided to add some auras in the empty spaces to fill in the design.
On the other half of the tile, I’ve drawn Mooka using a simplified method. Then I filled in the spaces with Tipple.
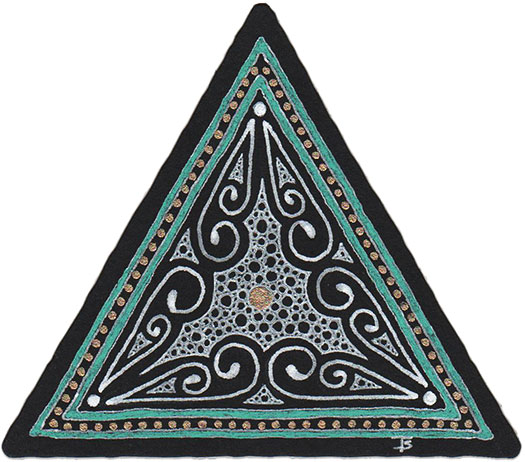
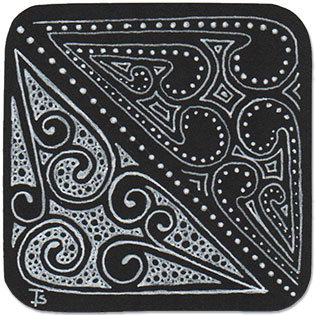
Folk art.
A few years ago, I was looking at various examples of American Folk Art. One of the things I liked about it was the bright colors and how the simple designs combined to create a more complicated finished product.
Here, I decided to use simple auras, perfs and tangles to create a more folk-art like tile. I like the simplicity of this design. Actually, if you look at the Zentangle Gallery , I’ve used it on another tile, (in a slightly different form,) recently!
If you recall, a while back I posted a couple of Bijou tiles with Muchin shaded in different ways. I thought that it would be fun to post the same thing, but this time, showing the shading and highlighting on a black tile!
Zentangle drawn on a black, Official Zentangle Bijou tile using a white, Sakura Gelly Roll pen. Highlighting done with white chalk pencil. Shading done with Copic markers and black colored pencil.
No mistakes.
That’s right… There are no mistakes in Zentangle. Unexpected things DO happen, but they aren’t mistakes. They are opportunities to explore another direction. You don’t give up. You don’t throw away the work you’ve already done. Following a different fork in the road can take you to new vistas and allows you to discover new techniques. Some of the best tiles I’ve made come from unexpected twists and turns during the process.
We have learned to appreciate and focus on each thing, one stroke at a time.
I love this frame made from an Apprentice tile. I also really love the bijouism that was added to it by our guides! You can get your own collection of 24 bijouisms by following the link. The little tin actually contains two of each… one for you to keep and one to give away!
Do a little.
I’m still have a little trouble getting back into the swing of my daily routine. So I did this first thing yesterday morning, just so that I would accomplish something. I find that I can always fall back on the basic tile, that we all make in our first Zentangle class for a comfortable, meditative experience. In this case, I changed it up a little by using a black, 3Z tile.
If you recall, I posted a similar tile a couple of days ago. It was the same tangle, in almost the same size and layout, but drawn with black ink on a white tile. That tile was drawn in July, 2010, when I was first learning how to tangle.
I decided to recreate that tile, but using everything that I’ve learned since then. To begin with, I reversed the coloring and used white ink on a black tile.
Velvet Elvis.
This odd-shaped tile is totally experimental. A couple of months ago, my older daughter came for a visit. One of the things we did while she was here involved using Oxide Distress Ink on scraps of black card stock. Besides just having fun, we were trying to see if the inks would work on black, since they contain white pigment under the dye ink. I had a couple dozen scraps of 4" x 3" paper, and we inked most of them.

Dance.
I love sayings about dance. For example, one of my favorites is “Dance like nobody’s watching.” So dance is my inspiration for this tile. It’s as if all the Mookas are having a midnight party, each one dancing to the music and all of them together creating a wonderful ballet of shape and color.
This is probably my last tile in this series of Mookas for the time being.
Amanda asked me, the other day about Indy-Rella. I told her I hadn’t used it very much because I always end up drawing it so tiny. She did it on a white tile, using black ink, making the elements rather large, which inspired me to try this. I started with the white pen. But I still didn’t get mine as larger as hers. So I thought it might be fun to add different color inks that would make it look like they were fading out on the tile.
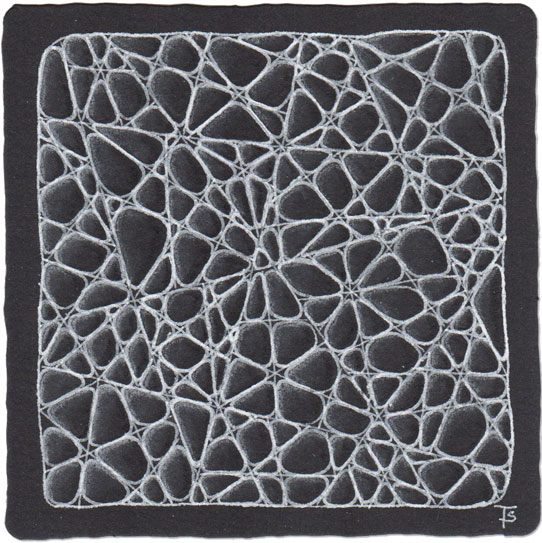
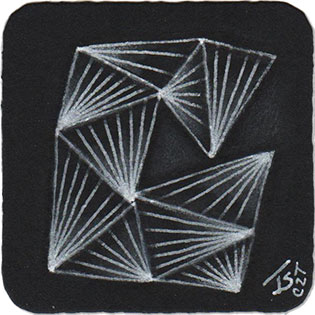
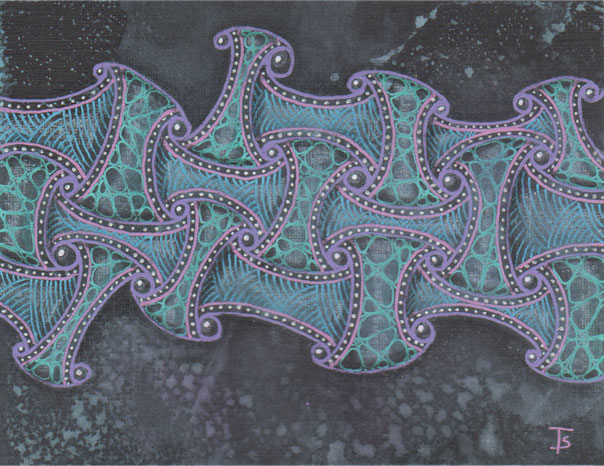
I look at this tile and I see many things. From a layer of stones arranged as the floor of a patio to stretched out Cat’s Cradles or perhaps a section of lace. Maybe I’m looking at some sort of atomic level structure under the microscope. Who knows what it is?
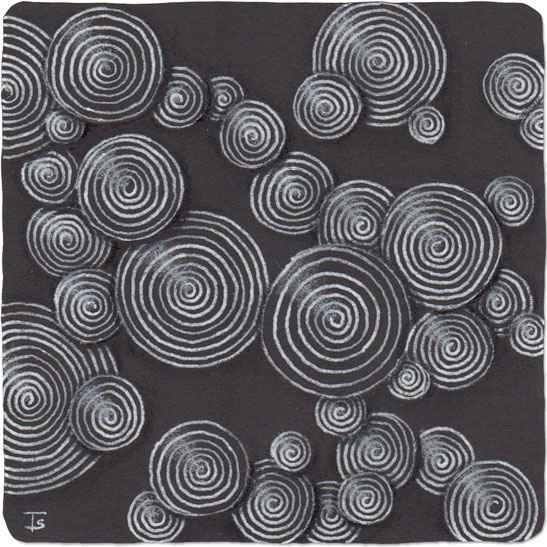
Crazy N’Zepple works as a fill for sections in a design or as a full design in it’s own right.
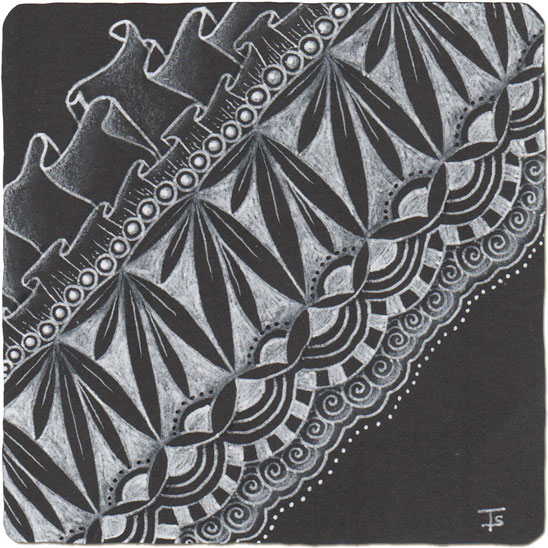
Embellishment.
This Zentangle came from watching a video published by Sakura of America in which Molly begins with the tangle Zenith and then embelished it. The end result was this fabulous diagonal design that looked like the hem of a beautiful skirt!
I pretty much followed the video exactly until the end of the tangling part. There, I added the Ruflz tangle to the upper, left side because I felt it needed something more.
Take two.
This Zentangle uses the same tangles that were used on Friday's tile . They are done, however, in a different string and on a black tile. I was curious to see how they would look.
I think Quandry looks good either way, and so does Shattuck. I definitly don’t like Toodles on the black tile. If I’m going to use it on black, I need to go about it a different way than I did here.