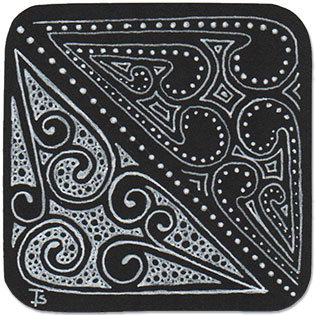
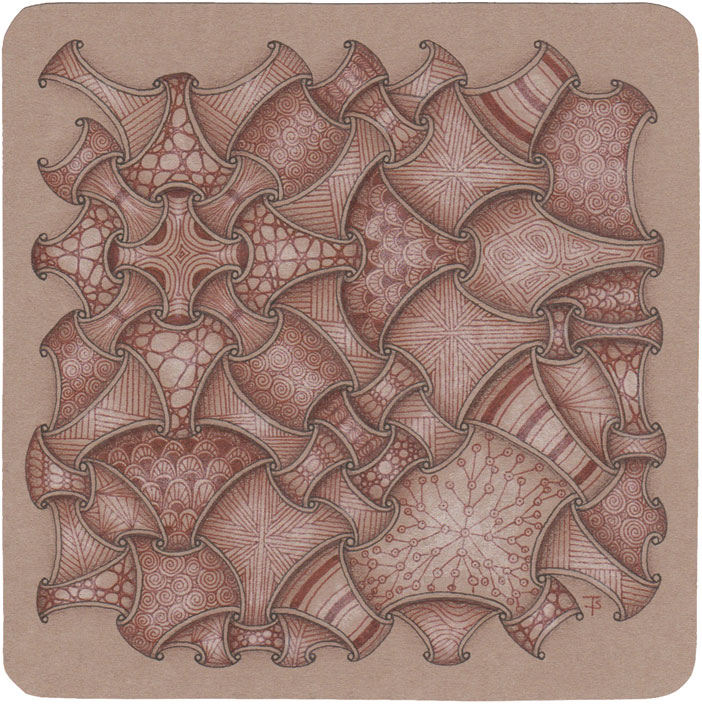
How do you Mooka?
I am playing around with the various ways of drawing Mooka.
Here, I’ve drawn half a little bijou-sized tile using a traditional style and then just added some dots to create a bit of texture. I also decided to add some auras in the empty spaces to fill in the design.
On the other half of the tile, I’ve drawn Mooka using a simplified method. Then I filled in the spaces with Tipple.
Amanda created this tile with the help of her family! She has four children that range in age from 7 to 17 years old.
She started by creating the string and then, each child would roll a dice and select a random tangle. The child would also choose where the tangle would go in the string.
The kids got a big kick out of challenging Mom, and they had a ton of fun.
Folk art.
A few years ago, I was looking at various examples of American Folk Art. One of the things I liked about it was the bright colors and how the simple designs combined to create a more complicated finished product.
Here, I decided to use simple auras, perfs and tangles to create a more folk-art like tile. I like the simplicity of this design. Actually, if you look at the Zentangle Gallery , I’ve used it on another tile, (in a slightly different form,) recently!
Tiny bubbles (tiny bubbles) In the wine (in the wine) Make me happy (make me happy) Make me feel fine (make me feel fine)
Leon Pober Sorry, I just couldn’t resist!
Zentangle drawn on an Official Zentangle Tile using a black, Micron pen. Shading done with graphite pencil. Highlights created with white colored pencil and white acrylic paint pen.
Tangles: Tipple
We have learned to appreciate and focus on each thing, one stroke at a time.
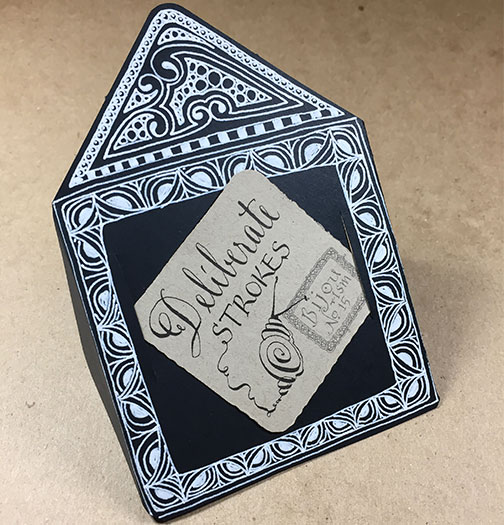
I love this frame made from an Apprentice tile. I also really love the bijouism that was added to it by our guides! You can get your own collection of 24 bijouisms by following the link. The little tin actually contains two of each… one for you to keep and one to give away!
Remembrance.
As we walk on this path, I am reminded to spend time with others I’m walking here with. The time will go so fast and we will, literally, be scattered to all the corners of the earth. But we will remember each other, and this special time here.
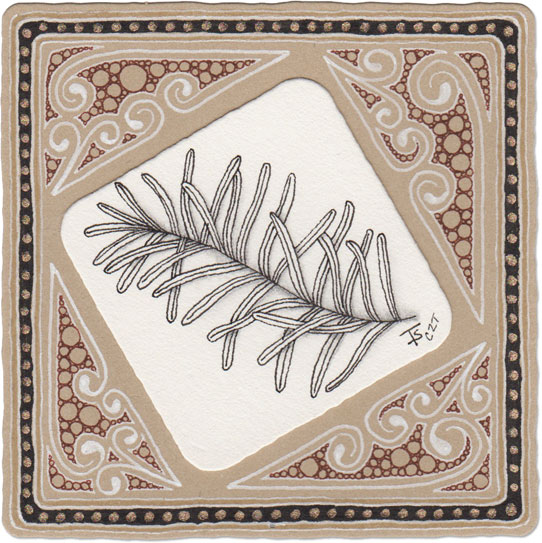
This beautiful, rosemary stem is drawn using the tangle Verdigogh. Rosemary is for rememberance. I wanted to add something to it, but I couldn’t decide what.
This wonderful tile was created by my daughter. She is my student and protégé! She is such an amazing artist and she loves to be my class tester. It never ceases to amaze me what she will do and whether she will change something because she likes her way better. I’m so proud of her and so happy we will both become CZTs at the same seminar!
She saw my similar tile and asked me to teach her how to do it.
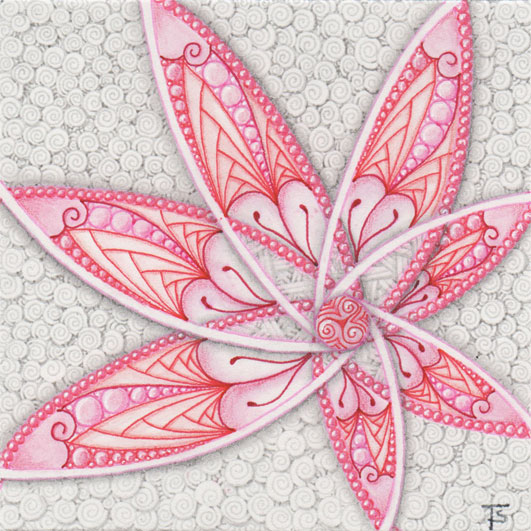
This ValenTangle 2018 tile was created using Spoken as the basis, as we were instructed for Day 1.
Hearts were added to the top and bottom of each arm and then the centers filled with Betweed and Tipple.
I wanted something textural, yet simple for the background, so I used grey marker to fill it with tiny Printemps.
Over all, I love the way this came out. I didn’t have a particularly clear concept in my head when I started, so I just went where the artistic muse took me, and it worked out.
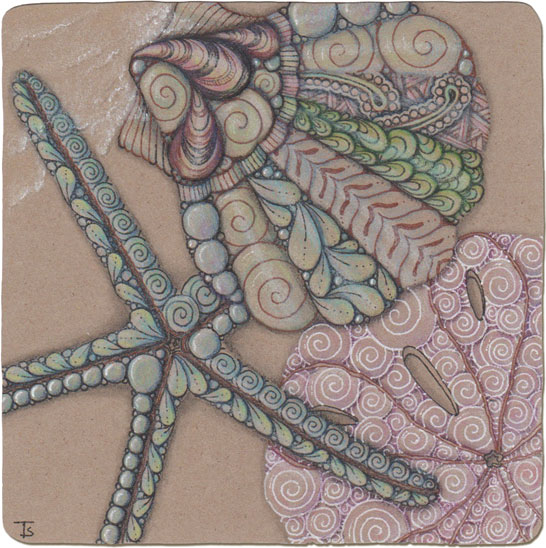
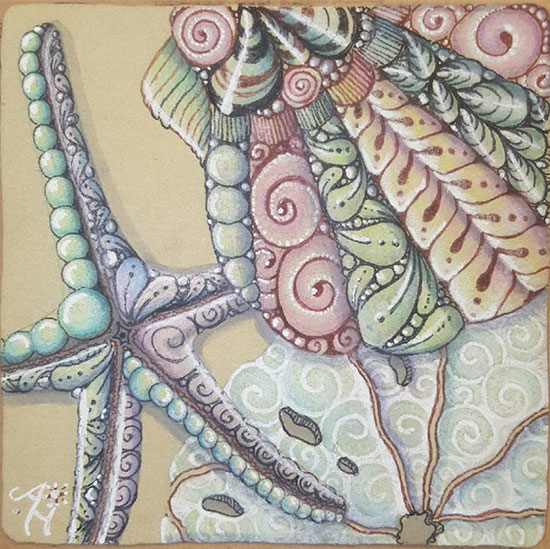
This is the final, official tile for the Tints on Tan, beach series.
These tiles, combining colored pencil and tangling have been so much fun to do. Technically, these would be considered ZIAs (Zentangle Inspired Art) rather than standard Zentangles. However, if you like this type of thing, they can be just as “zen” and relaxing to do. I particularly like the subject matter because the ocean reminds of of summer and vacations, happy times and warm weather.
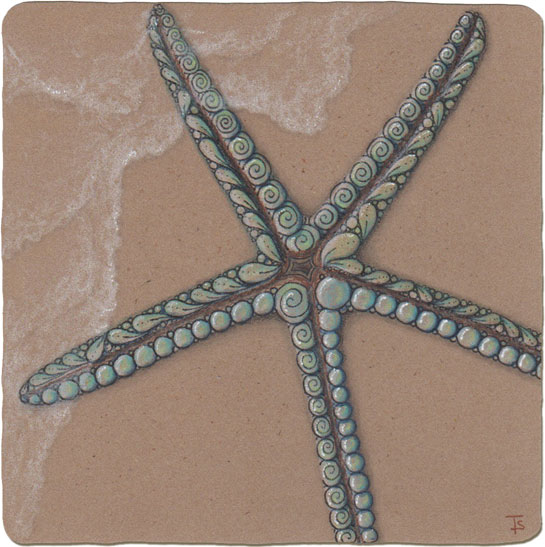
This is my second tile in the Tints on Tan series. I liked doing the starfish. It wasn’t too compilcated, and this time, I planned better and the water is going over the the ends of the arms!
Zentangle drawn on Kraft Stonehenge paper from Legion, using a black and brown, Micron pens. Color is from colored pencils.
Tangles: Flux Printemps Tipple
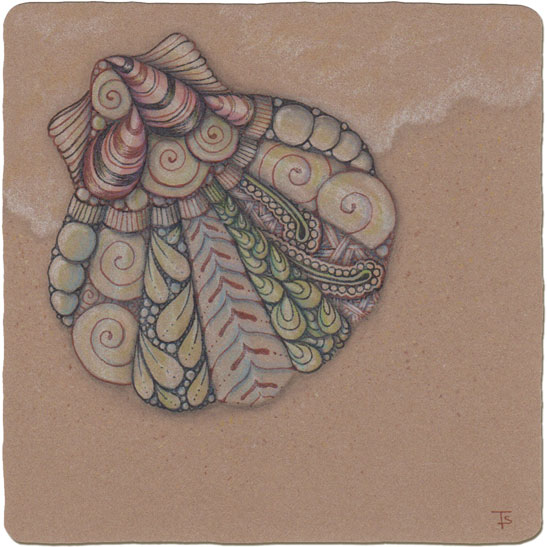
Tints on Tan is a set of classes created by CZTs Marty Deckle and Jenny Peruzzi. It was first presented at CanTangle in July of 2015. Recently, the kit has become available on Etsy, and there is now a Facebook group for this style of tangling.
I decided to do each shape from the beach set on it’s own tile, along with the full grouping. This is my first tile, the sea shell.
This Zendala concept is from Zentangle’s 12 Days of Zentangle and Project Pack 2. On Day Seven, Maria shows us various ways to use Auras to fill in shapes on a pre-strung, Renaissance Zendala tile.
I didn’t have any pre-strung tiles, so I used a blank, white, Official Zendala tile, and filled in with my own design. I chose a simpler string than I used on the last Zendala, which made it easier to draw.
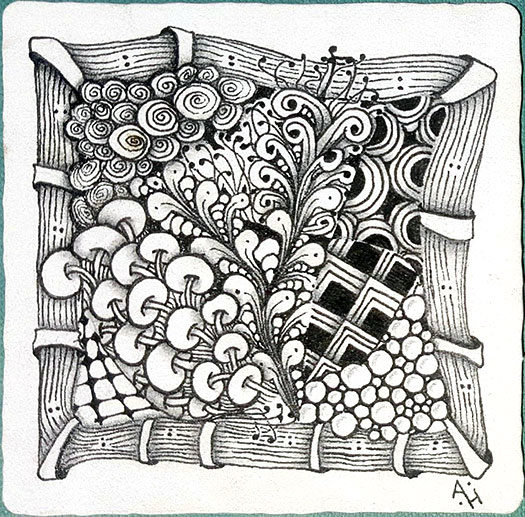
For my final Crazy Huggins sampler, I cut a large, apprentice-sized tile from a new paper I got recently. I filled the tile with Crazy Huggins shapes, then filled each element with another tangle. Somewhere along the line, the design developed a mind of its own, and decided not to be symmetrical anymore. But, honestly, I think that just made it “interesting!”
This tile took quite a while to complete.
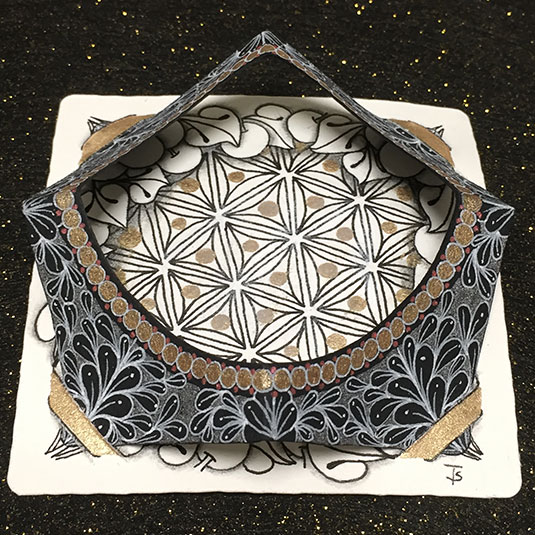
This tile is from Project Pack 2, The Twelve Days of Zentangle. On day two, we are using two Zentangle tiles.
The first tile, which is black, has a hole cut in the center. Then tangling is done around the empty space. I added red metallic gel pen dots around the center frame and I used a grey metallic gel pen to fill in the spaces in the Flux. Metallic ink just doesn’t show up very well in photographs, unfortunately!
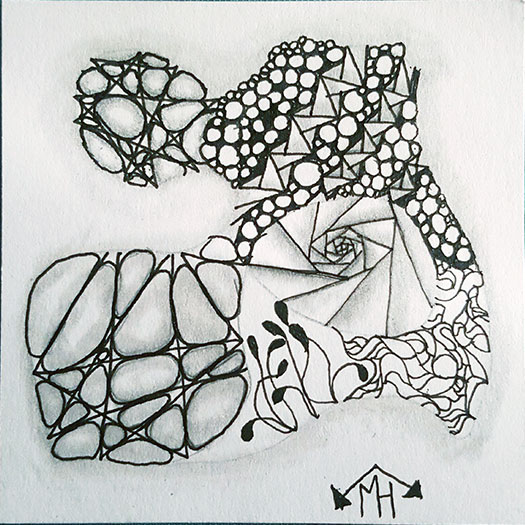
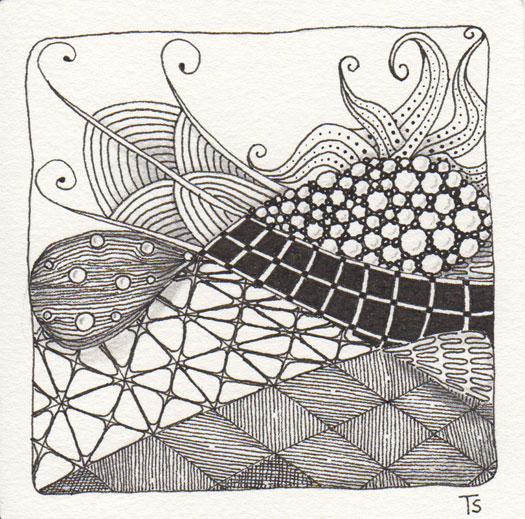
This Zentangle was done by Matthew Higbee. Matt is a 17-year-old high school student and a second-year art student. You’ve seen another tangle he did, here , previously, if you’ve been following this blog.
I love that he decided to take off on his own, and used tangles that we haven’t been practicing yet. I think he made good choices, and the tangles have nice contrast between circular and angular.
Another’s view.
The tiles above and below were created by my husband. If you remember, from yesterday's post , I mentioned that I had asked all of my relatives to draw Zentangles for my birthday in 2010. Recently, I found them again and got to reminisce about that time and to see all the wonderful tiles everyone made.
For this first tile, my sweetheart used a heart as the central string!

Day 2.
For this day, we are adding three new tangles to our repertoire: Fescu, Nekton and Knight’s Bridge. We were also instructed to practice making various strings.
For Amanda’s tile above, as you can see, her string is much more complex than on Day 1. She also used areas of repeated tangles to tie everything together.
Matthew did a wonderfully curvy string that gave him an interesting open space to fill with graceful Fescu!
Amanda’s Day 1.
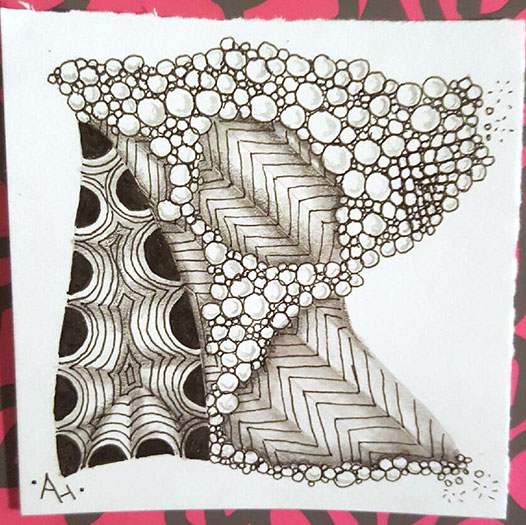
You will recall that I said yesterday I was working on a challenge with another tangler? Well, here is her tangle based on the same lesson! I love how she made the Tipple into bubbles, including a few popping at the upper and lower right!
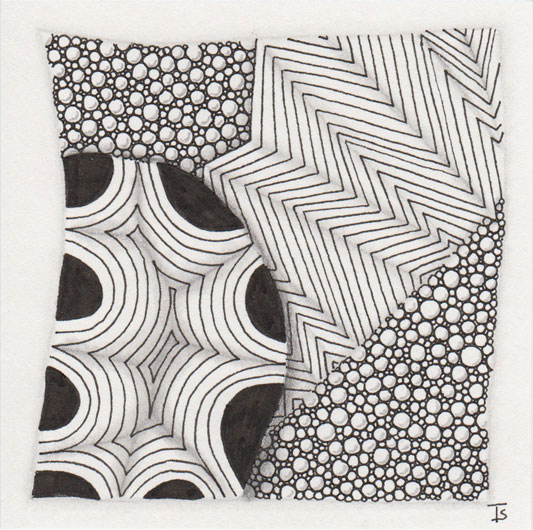
Amanda’s son, Matthew also did the Day 1 exercise!
Matthew is a 17-year old, highschool junior. He is in his second year of art classes and is a very talented artist.
Day 1.
This week, I’m working on a challenge with another tangler named Amanda. We both have the book, “One Zentangle a Day” by Beckah Krahula.
Today’s tangle is for Day 1, which introduces Tipple, Static and Crescent Moon. I chose to follow the standard, Zentangle method, and started with dots in the corners and then connecting them with a frame. I used a simple string and filled each section with a tangle.
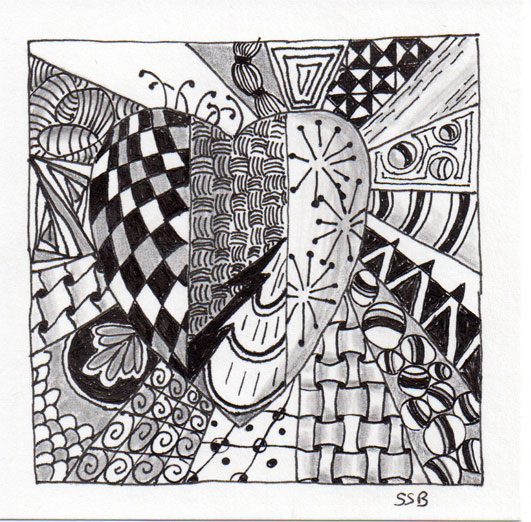
Unknown.
I don’t know what the tangle at the upper right is. I can’t find it in my step-outs. If you recognize it, please join in on Facebook and let me know!
Zentangle drawn on an Official Zentangle tile using a black, Micron pen. Shading done with graphite pencil.
Tangles: Black Box Nipa Nzeppel Shattuck Tipple Wadical Yincut