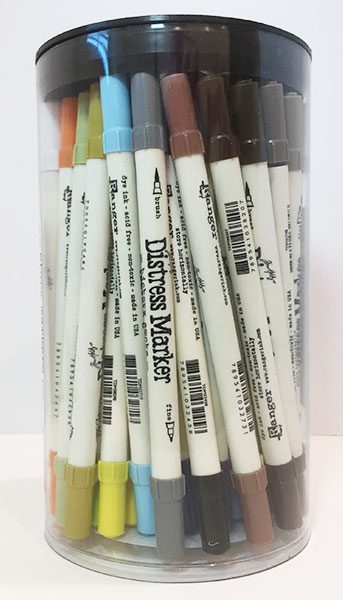
Today‘s marker review is all about Ranger‘s Tim Holtz® Distress Markers 61 Color Canister Set . This is a set of 61 differently colored, double-ended markers. I purchased these on line from Amazon because they weren‘t available in any local store that I knew of. They arrived in a couple of days.
The markers arrived in a cylindrical plastic container with a removable black plastic top.
There were two stickers on the sides of the container reminding the owner to store the markers horizontally.
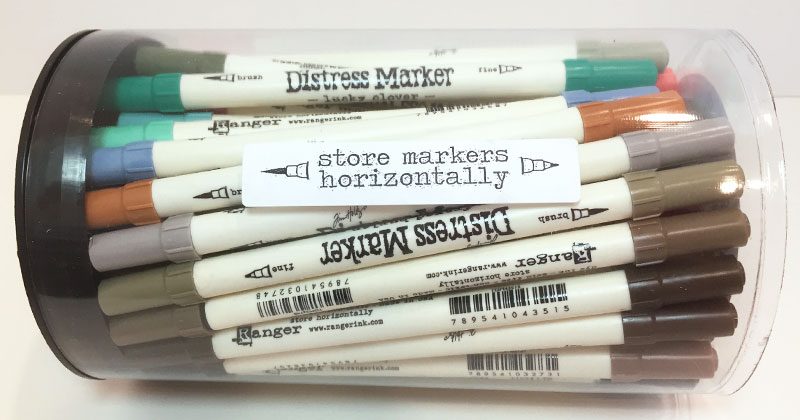
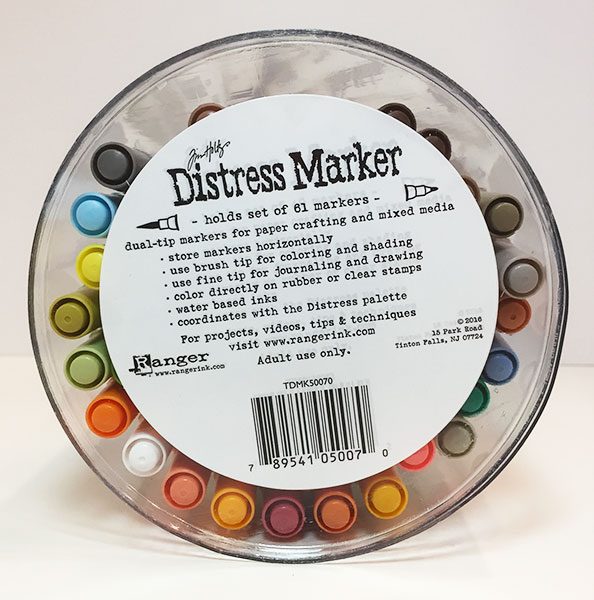
There is also a product information sticker on the bottom of the tube. Along with some other information, it reminds you, again, to store the markers horizontally.
While I get it, they work better stored on their side, packaging them in a round container that rolls is nonproductive. The container is nice and sturdy, and I‘ll repurpose it, but it won‘t be holding my markers.
The markers are off white, with a colored cap on each end. The cap color is coordinated with the color of the ink in the marker. Every marker is imprinted with the words “Tim Holtz Distress Marker”, the color name, and indicators for the type of tip at each end: brush or fine. There‘s also sales and company information printed on the marker.
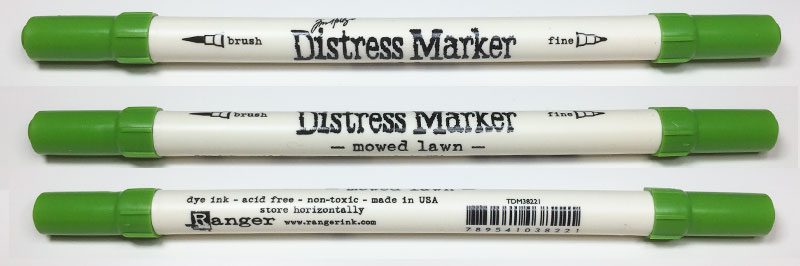
Each marker is just under 7″ long with the caps on, 6-1/2″ with the caps off. Each cap is 1-1/8″ long and 1/2″ in diameter.
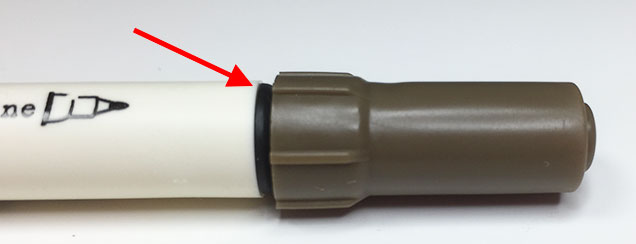
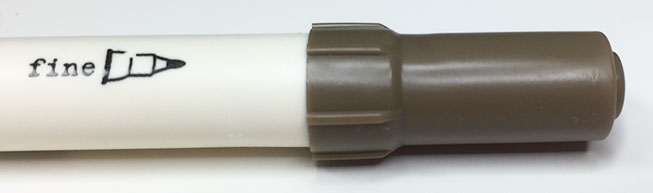
Both caps look identical, but they are not interchangeable. If you have taken both caps off your marker, and the first one you pick up doesn‘t go back on correctly, it probably belongs on the other end!
The caps click into place when they are completely sealed. If you‘re seeing a black ring right below the cap, it‘s not all the way on.
Another nice feature about the caps is those raised lines around the bottom edge. They keep the markers from rolling around on your work area. That‘s a feature I really appreciate.
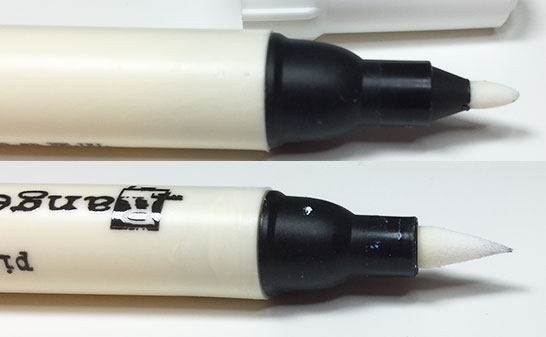
These markers are twin-tipped. One end has a nice brush tip. The other end is a hard plastic nib.
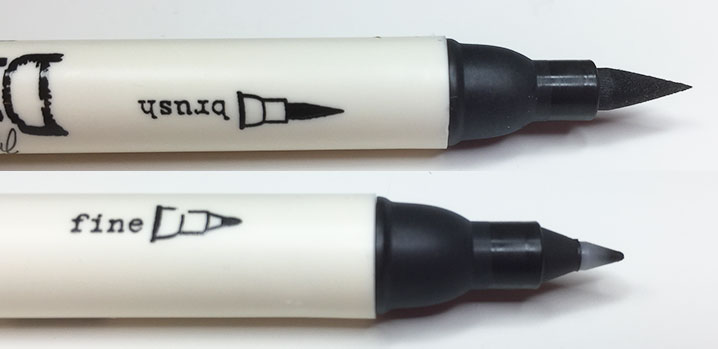
The two different ends give you the opportunity to create a wide variety of lines.
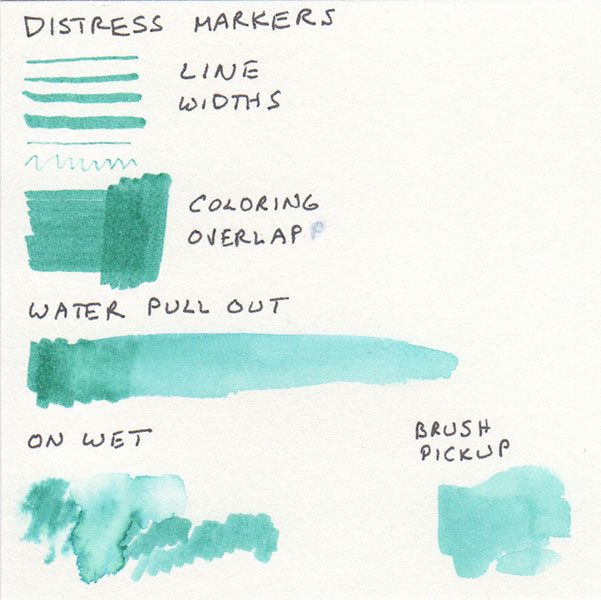
I did the same tests for these markers as for the Crayola markers that were reviewed last Friday.

To begin, I drew a series of lines using the brush end. This end allows you to make a variety of width lines.
The bottom two lines were made with the fine end. Although the nib was a bit dry, you can see the very fine lines this end makes.
The coloring overlap for the pens is very nice. I couldn‘t see any overlap marks on my test examples.
When using these with water, they worked very nicely for all three tests. Pulling out the color with a water brush worked beautifully (1). Working into a wet spot worked very well, and coloring out the nib after getting it wet was smooth and quick (2). The pen I tested was nice and juicy, so it put down a nice layer of color in the plastic palette and picked up well with the waterbrush. When painted on the test paper, there was no dye color separation.
Here‘s another look at my test sample.
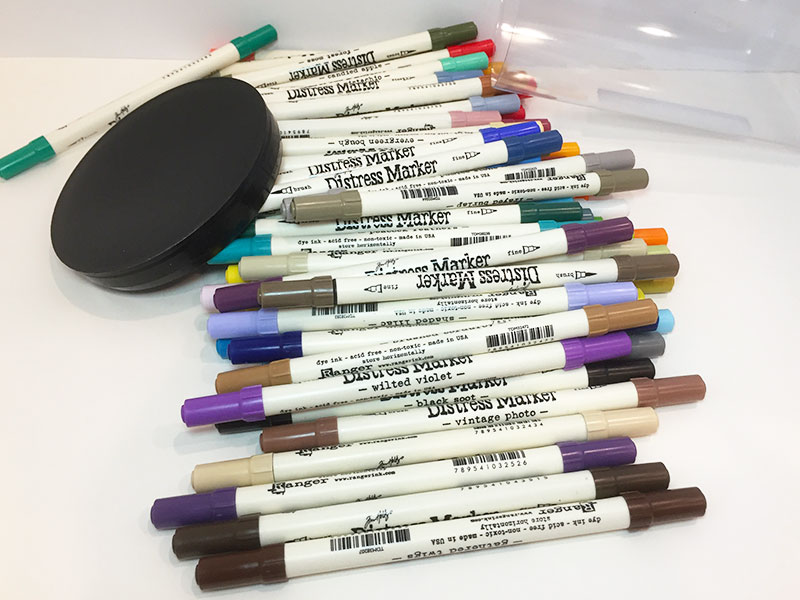
Each of the markers is a different color. All of the Tim Holtz line of products are a bit on the “antique” side, and many of the colors reflect this feeling. However, there are also some nice, bright, basic colors included.

All of the Distress products are color coordinated. In addition to markers, there are stamp pads, re-inkers, stains and paint. You can download a blank color chart from the Ranger Ink website.
I colored in my chart with the markers. Then I used letter-keys to indicate other products I had in the same color. “I” is for re-inker, and “S” is for stain. I also have some stamp pads and some paint, but I haven‘t marked them on the chart yet. When I do, it will be “SP” for “stamp pad” and “P” for “paint”. You can get a full sized version of my color chart here .
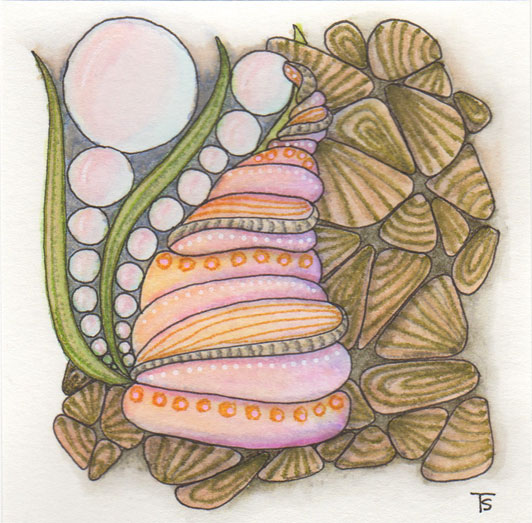
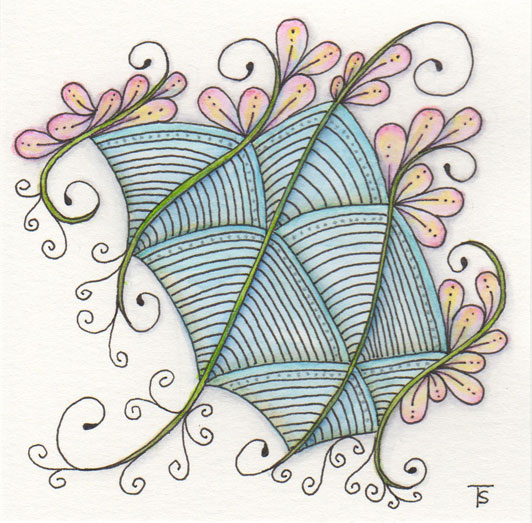
Note: I made the color example(s) by printing the outline on computer cover stock which was then scanned into the computer and processed in Photoshop. Therefore, while all care was taken, the colors are probably not exactly as they would appear in real life.The colors play nice with each other and go well together. They don‘t separate when water is added, unlike the Crayola markers. That makes them a joy to paint with. I used them, exclusively, to color these two Zentangles.
There is one marker that is not like the others. The Picket Fence marker is white. It still has two ends, but the fine end is also a felt tip instead of a plastic nib. The brush end is exactly the same as all the other markers.
When you draw with this marker, the like takes a few seconds to appear. The ink must be dry to show up. Here are the same marker tests, but done with the Picket Fence marker on black paper.
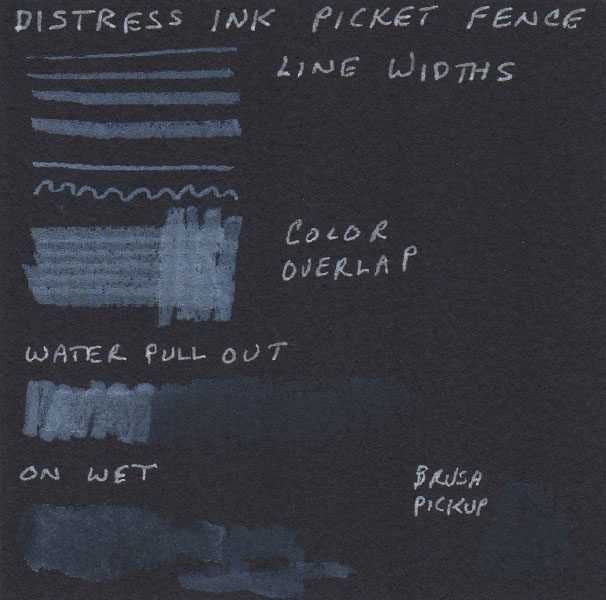
I found this color disappointing. The strength of the white is poor. You can see the difference between it and the wording on the paper which was done with a white, Jelly Roll pen. In addition, I would have preferred the plastic nib because it makes a finer line than the felt tip. Finally, waiting for the line to magically appear is annoying. If you‘re looking for a white marker, I don‘t recommend this one.
Keep in mind that these markers contain dye ink which is not light-fast. That means that, while they should be fine to use in a journal or on Zentangles kept in a book away from sunlight, you don‘t want to use them on anything you want to display on the wall permanently. The colors will fade or change from light exposure, over time.
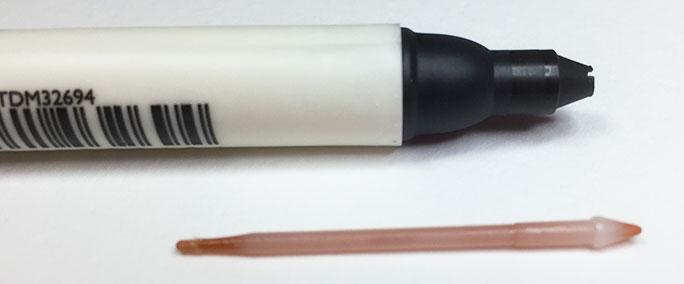
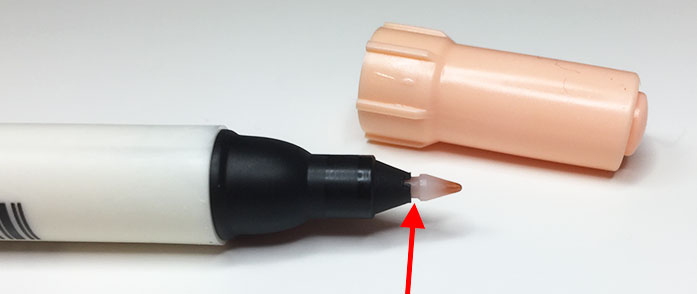
A few of my markers had some issues at first. When I opened a few of them, the fine point fell right out of the end of the marker. While it was interesting to see how the tip was made, it was frustrating to have to put it back together. Some of them had loose plastic nibs. They didn‘t fall out, but they were obviously not all the way in.
Five of the markers in my set arrived dried out. You can see this on the chart that I colored. I wasn‘t too happy about that, but I was able to reactivate them with a few drops of distilled water. There are video tutorials on YouTube showing how to re-activate and refill all different kinds of markers. But here‘s a quick step-by-step:
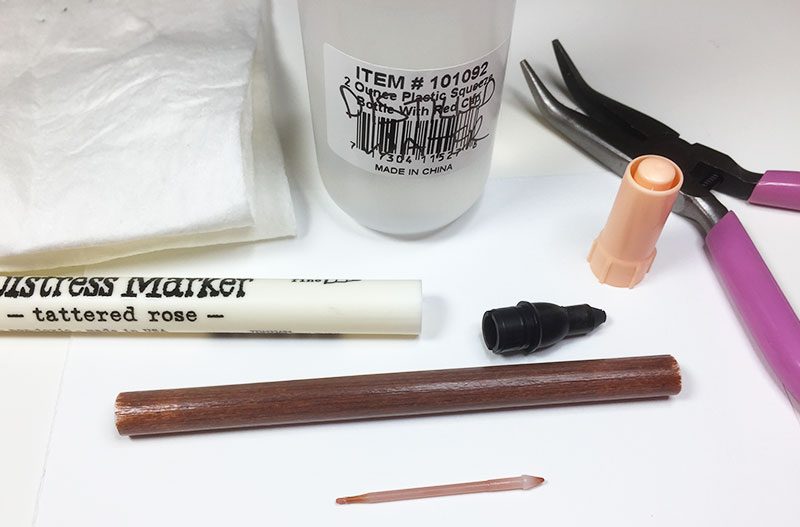
Use a pair of pliers to remove the fine tip and black end of the marker. Inside you will find the ink reservoir which is fiber in a plastic sheath. To reactivate a dried marker add a FEW (maybe 4-5) drops of distilled water. Then reassemble your pen and store it horizontally for a while to let the water spread throughout the ink reservoir before you use it.
If you‘ve used water in your marker several times, and it‘s color is now too light and washed out, you can add a drop or two of stain from a bottle of Distress Stain. (Yes, it works!)
Some of the videos suggest adding some ink from the re-inker, but that might be too much pigment. You would definitely want to add some water to it. Usually re-inkers contain a medium that keeps the ink from drying out quickly. Very often it is glycerin or other sticky chemical, and it‘s not normally in your marker ink. So that‘s another thing to keep in mind if you use re-inkers in your markers.
The best way to keep your markers from drying out is to make sure both caps are completely on and store them horizontally.
Over all, though I really like these markers. The colors are lovely, when the pen is fully inked, it works very well. I love the plastic nib for drawing fine lines, and the brush end is holding up well so far.
Here‘s a tip for you: You probably didn‘t know that you can “replace” a smashed brush tip on your marker. According to Tim Holtz: “simply grab the nib with a paper towel and pull it straight out of the marker. flip the nib over, and reinsert back into the marker with the new nib sticking out (simple as that).”
You can download the most recent Ranger catalog here .
Tim Holtz Distess Markers Tube, Set 61/Pkg - $199.99 retail from the Ranger Ink website
Amazon - $161.42
Dick Blick carries the spray stain for $4.19 per bottle, the small ink pads for $3.75 - $7.99, and crayons for $11.44. They do not carry the markers.
Jerry‘s Artarama - not listed
Michaels - only in sets of 5, $17.99 per set. They also carry other Tim Holtz® products.
Hobby Lobby - sets of 5, $14.99 per set - sets of 12 - $34.99. They also carry other Tim Holtz® products.
Joann sells individual markers for $2.09, sSets of 5 for $14.99. They also carry other Tim Holtz® products
Note: This year, the distress line is adding Distress Oxide Ink, with the same color names. There is a difference between the Distress Ink and the Distress Oxide Ink. The first is an "all dye" ink. The Oxide is a mixture of pigment and dye inks. The re-inkers for the Oxide inks contains a mixing ball to help mix the two types of ink together. For re-inking your markers you want the DYE INK.