
On this final day of 2025, I wanted to try something a bit new as a jump-start for the new year!
This begins with a green, multi-media paper. I have been looking for a green paper to play with because all of the decorator paint colors for 2026 are in the grey/blue-green family.
I was in a local art store, getting a new sketch book to begin the new year. Browsing through the various papers, I came across this pad of green, mixed-media paper from Clairefontaine. The color is lovely, although a little bit darker than I though I wanted. But I decided to purchase it and give it a try for various techniques.
Project Pack 28 - Day 1
The video for this day’s project is located here .
This 12 days of Zentangle Project pack takes insipiration from the drawings of Leonardo da Vinci. The base color of the tiles is a bit darker than the standard tan, Zentangle Renaissance tiles. The colorings and inspiration is taken from various drawings, but then interpreted in the Zentangle style. Below is an example of a page of drawings from Leonardo’s sketches.
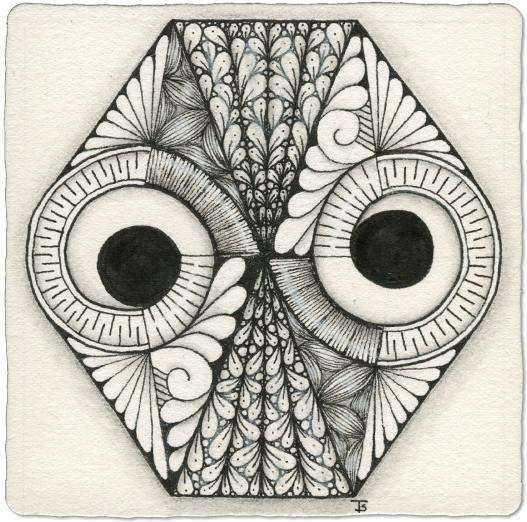
Inktober Tangles - Day 26 - Owlpeek by Susan Yeo CZT
Owlpeek is an interesting tangle that, depending on how you look at it, looks a bit like a stylized owl.
Susan has a couple of examples on her Instagram account of using this tangle as a string! So, I chose to do that here. So although the tangle itself is not use as a design element… it is the entire string. One iteration is drawn to fill the tile, and then the spaces are filled in with other tangles. Keep in mind that this tangle can be flipped upside down, and it will still look the same.

Random String - Random and Selected Tangles
When Leaflet came up in my random tangles for today, I immediately decided to put it in the center, flowing space. I wasn’t sure how it would work out, with quite wide and very narrow areas, but it came out better than I thought it would!
I also immediately decided where to put Fracas when it came up. I chose this spot because it reminds me of a spider web hanging out in a garden.

“One Zentangle A Day” by Beckah Krahula - Day 16 - Organic Patterns
Today’s new tangles are Pepper, Ynix and Squid. These are organic patterns that can fill almost any shape. They are versatile and can be done alone, or have multiple iterations in one area.
For example, the Ynix on my tile above. I have used a grouping of multiple fronds to fill a side and corner area. On the other hand, Each of the Pepper shapes stand alone, but still act as a group to frame the area filled with Nekton. Finally, the Squid at the center, bottom is a singlet, filling an area, but with empty space around it so it stands out.
“One Zentangle A Day” by Beckah Krahula - Day 14 - Decorative Value
The tangles introduced in this chapter are Changing, Dyon and Keeko.
Decorative value involves contrasting shapes and planes of color rather than having an established light source to produce interest and move the eye through the piece.
Tangling on a black tile is usually a good example of decorative value because you’re already starting with the basic shadow of a dark background.
“One Zentangle A Day” by Beckah Krahula - Day 13 - Florz and Onamato
In addition to the two new, dramatic tangles that are introduced, the lesson for this day also includes deconstructing tangles.
I have to be honest here… I don’t generally do well with this concept. I am not sure why, I have tried and tried… But I am just never happy with what I draw. I guess I need a class or two, or find some way to wrap my head around this concept!
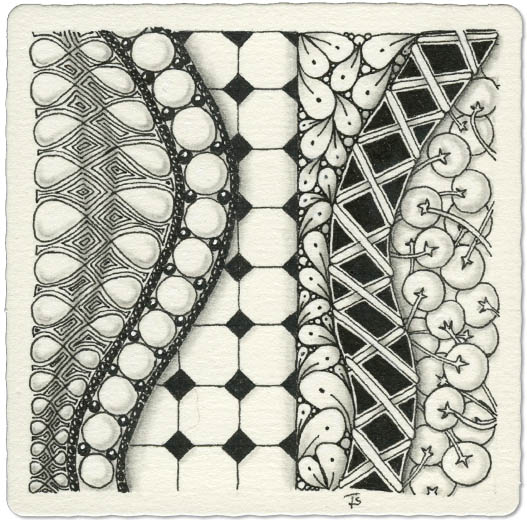
“One Zentangle A Day” by Beckah Krahula - Day 12 - Tangle Values
If you squint at your tile, you will notice that some tangles appear lighter and some darker. The levels from light to dark are referred to as the “value” of the tangle.
In the tile above, the lightest value section is the one with Chillon. The darkest value would be the one with Printemps. The other sections fall in between at various levels.
“One Zentangle A Day” by Beckah Krahula - Day 6
The new tangles introduced for this day are Amaze, Flux and Mooka.
I used Amaze at the top of the tile to fill the space above the focal point design. The random lines create texture and darkness without overwhelming the rest of the tile.
The traditional Mooka shapes work well as a fan-like foundation from which the Flux can emerge.
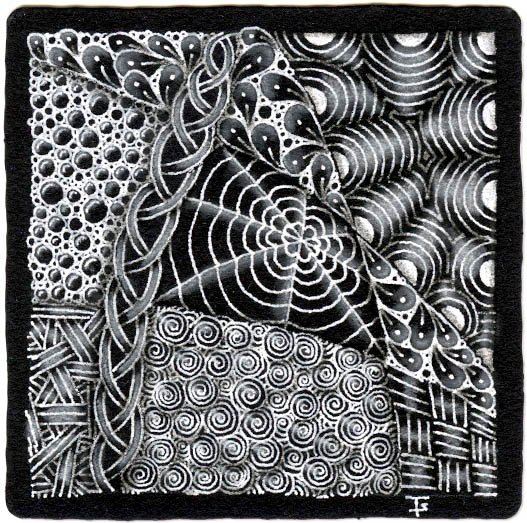
Continuing along the Crazy ‘Nzepple trail…
This time I used a grey tile. I loved the Project Pack that I did with the grey tiles previously and wanted to do something with this “winter” theme… since today, it was over 113 degrees here!
Instead of doing the same thing in each bubble, I chose several tangles and did each one in four or more sections, aiming for them not to touch each other if possible.
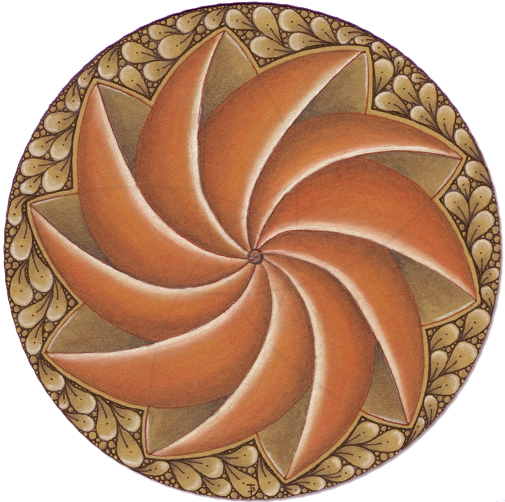
Project Pack 22 - Day 1
For the first lesson of this project pack, (video located here ,) Rick takes us down the path of using a pre-strung Phi tile to make a beautiful spiral design.
I loved the design and it was not difficult to do. Coloring in the various orbs and petal shapes was fun since the Gelly Roll pens just flow out ink that you can kind of push around to make an even colored area.
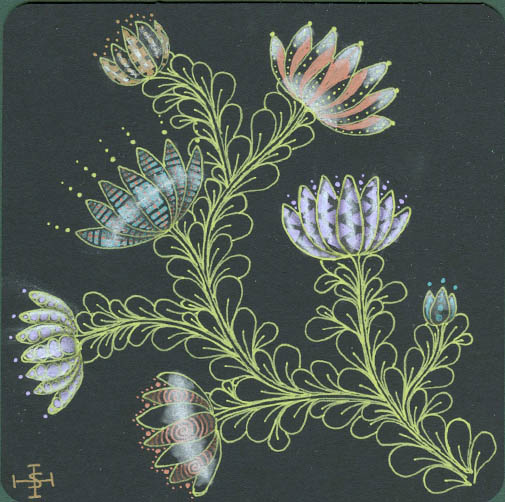
PP08 - Day 7 - Using a Flower-shaped Reticula
In this video Martha and Molly show us how to create a lovely garden beginning with blossoms and ending with Flux leaves.
This whole tile was a lot of fun to create. I actually wished the tile was larger so that I could add even more flowers!
Zentangle drawn on a black Apprentics tile. Drawing was done using several colors of Sakura’s Moonlight gel pens. Shading done with black colored pencil. Highlights created with a white chalk pencil.
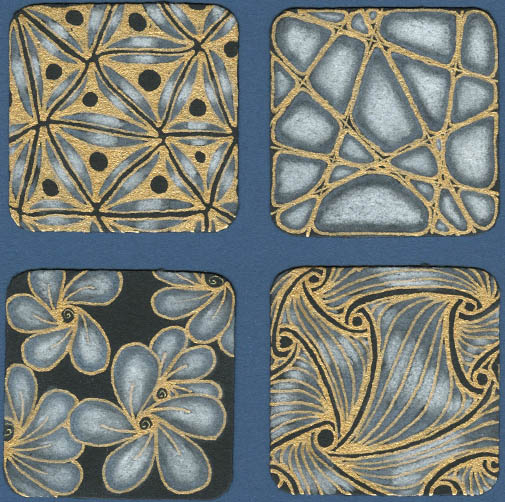
Project Pack 07 - Day 4
This video for this day’s project is located here .
Today’s project was to use black Bijou tiles with the blue pastel pencil to show how a blue-grey color can be used to advantage on a black tile.
All the tangling was done with a gold, Gelly Roll pen. The flow from this pen is lush, and you have to get used to what speed to use to achieve the line quality you want. If you hesitate or pause, the ink keeps right on flowing!

Project Pack 7 - Day 3
A beautiful star.
The video for this tile is here .
I am becoming more comfortable with Zendala tiles! I didn’t have many qualms about tackling this day’s drawing… other than it fell on a day of the week when I have the least amount of free time. But that’s ok. I just finished it the next morning.
I am also getting more comfortable working on grey tiles. Right now, here, it is well over 100 degrees every day. The grey and blue combination is very cool and refreshing in comparison!
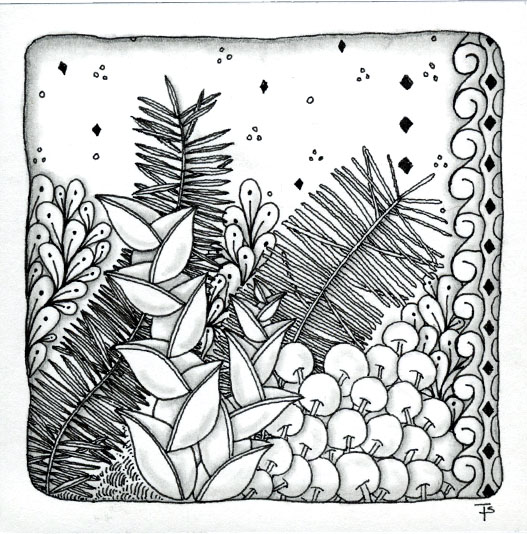
There are tangles that we love and draw over and over again. There are tangles that we don’t draw often because they are kind of like a pair of new shoes…kind of unfamiliar and uncomfortable. For me, this tile contains both.
My husband says that this tile reminds him of Christmas. I can see what he means: pine branches, berries and decorative leaves, oh my!
Zentangle drawn on Strathmore Vellum Bristol using a black, Micron pen. Shading done with graphite pencil.

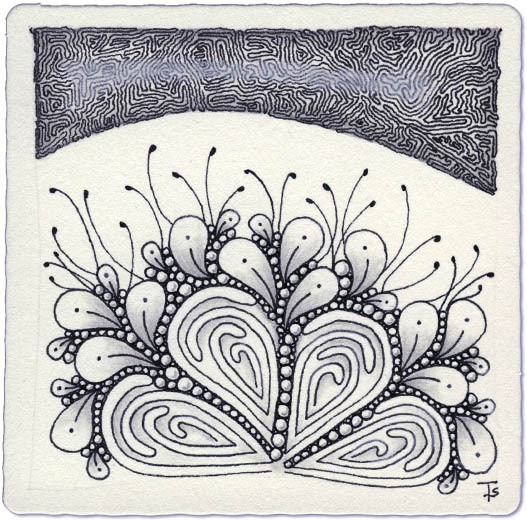
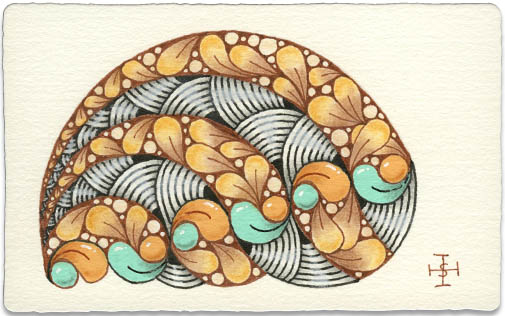
Today I was rearranging a row of drawers in my office studio when I came across an unfinished ATC (Artist Trading Card), probably from 2018. It had the border completed and the large Well leaf-like shapes had been drawn.
I decided to add some large MOOKA shapes all around and then just filled in between the upper ones with perfs.
I added the inner lines to the flower petals to make them look a bit like they were cupped.
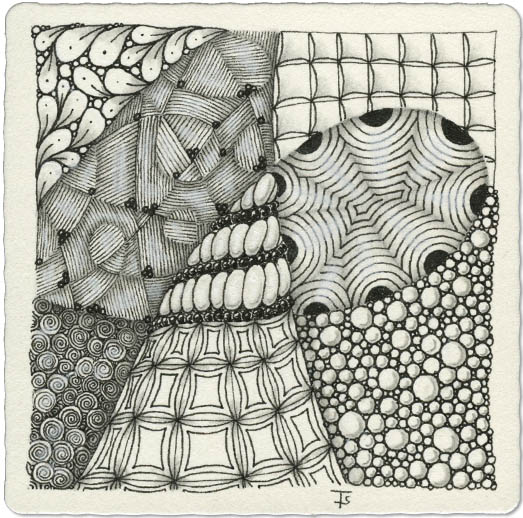
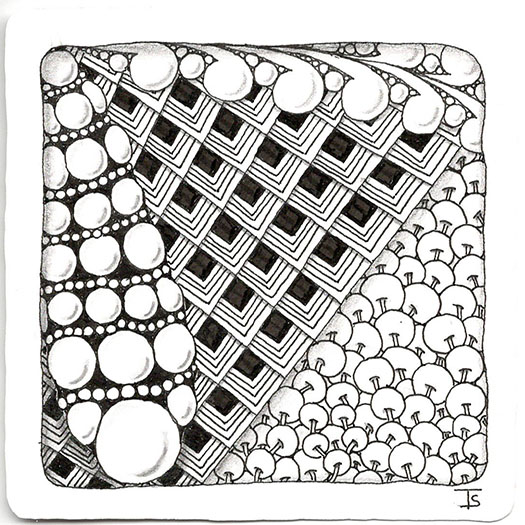
Day four of going back to basics with my Zentangle practice. For this tile, I chose a string at random from the instruction booklet, and random tangles from the Legend card and the back of the booklet.
While I enjoyed creating the tile, and it worked great for the reasons I tangle, I am not as excited with the end results. I loved the Cogwheels and the Flux ribbon, but when I added the background, it did nothing to enhance them. It isn’t enough contrast, and distracts from the other tangles.
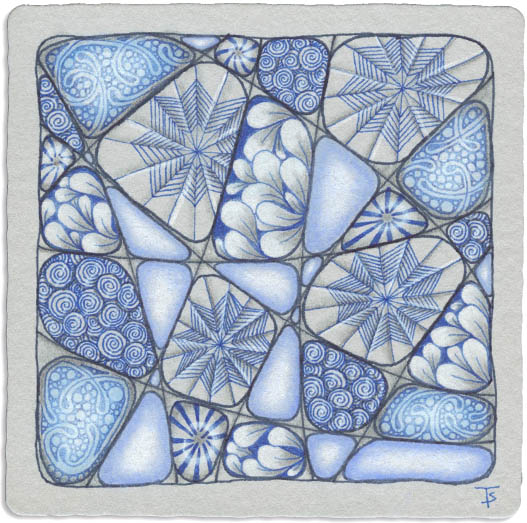
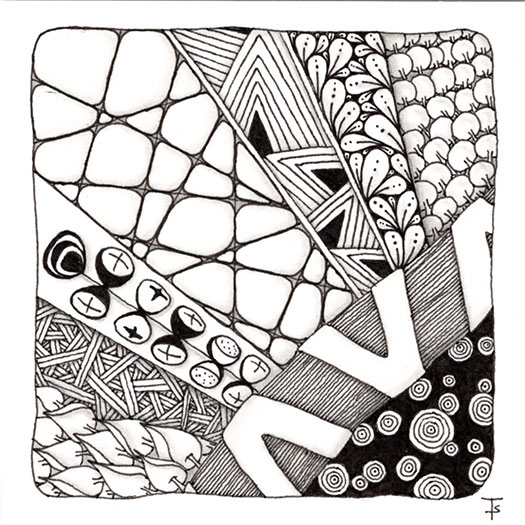
Day three of my back to basics journey along the Zentangle path! Today, I continued following the instructions in the little booklet in my kit. I randomly selected a string from those shown. It was a triangular shape in the middle of the tile, with three other triangles around it to make up the square.
I don’t have the die that belongs in the kit any more, so I just used a random number generator on my phone to select tangles from the Legend Card in the kit. Just by chance, I got three different tangles with rounded designs and a single, angular grid design! The combination worked out perfectly for this string!
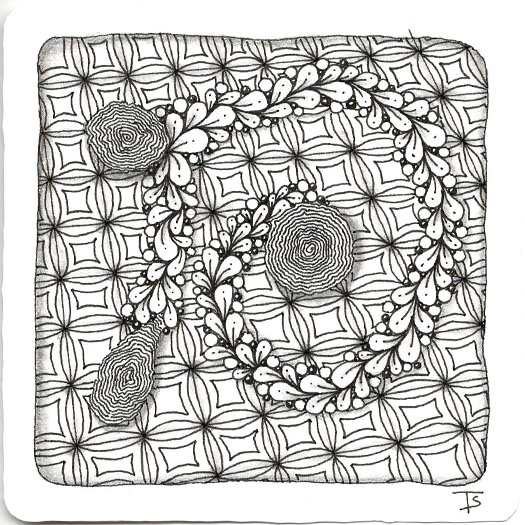
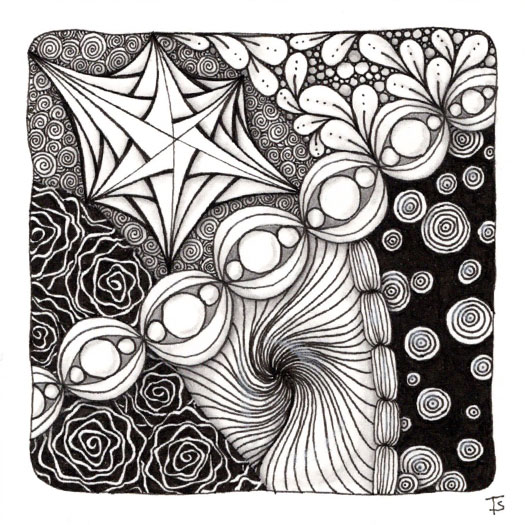
Back to classic style! Random string with random tangles!
Zentangle drawn on Strathmore Vellum Bristol using a black, Micron pen. Shading done with graphite pencil.
Tangles: Claws Crazy Nzeppel Flux Nexton Pods Pokeleaf Poke Root Sez Shard
It’s been a while since I’ve done a meditative Zentangle. I took the time for this one because I was having one of “those days”. The Zentangle method is a great technique for setting aside all of the outside world noise and just relaxing and drawing for a bit.
Give it a try!
Zentangle drawn on Strathmore Vellum Bristol using a black, Micron pen. Shading done with graphite pencil.