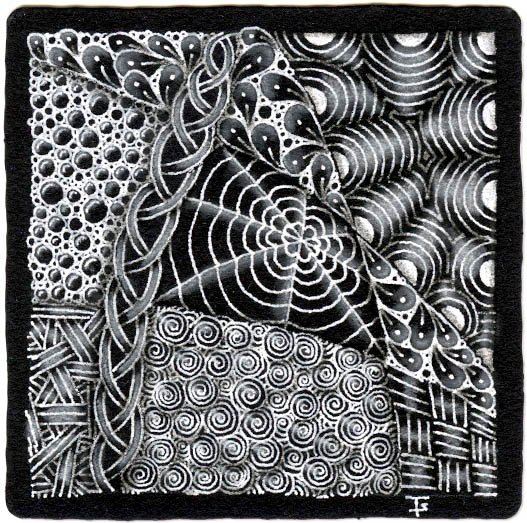
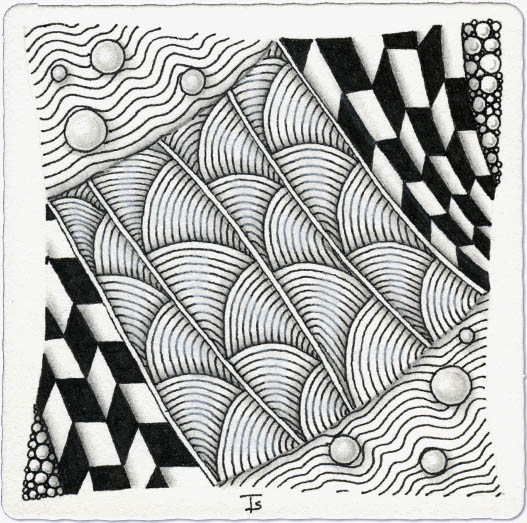
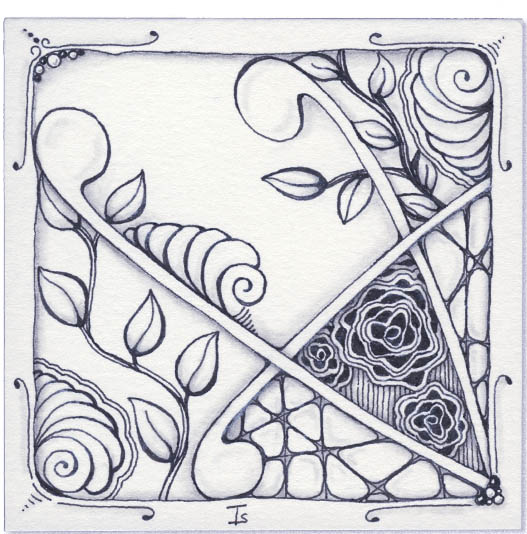
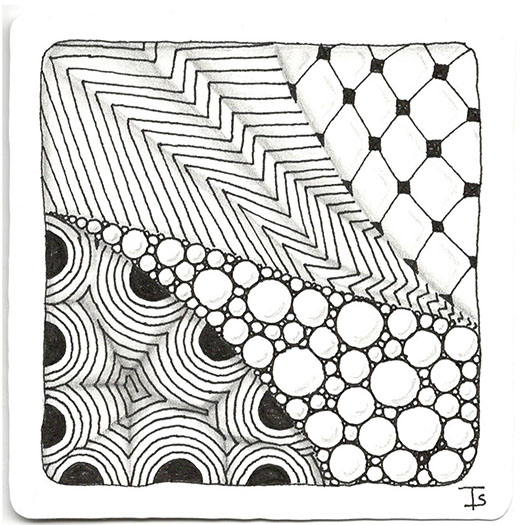
Random string, random and selected tangles.
Generating random tangles is kind of like opening a box of chocolates…
After drawing the string, which I liked, it was time to select random tangles. I knew where to put Claws right away. I also decided to split the V’s to add a little more texture and interest to them.
Next came Sproing. Again, not a problem. I thought it would look fine in that weird, narrow space.
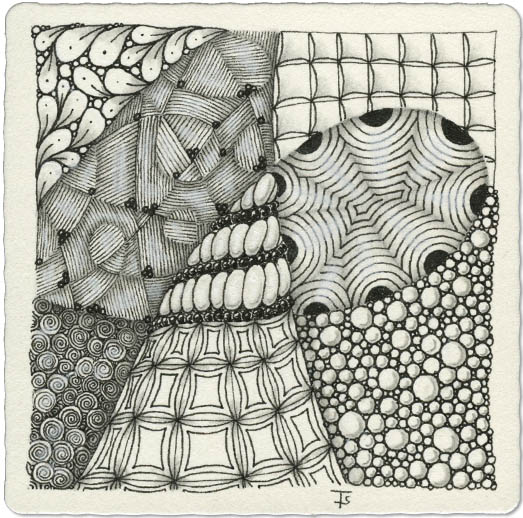
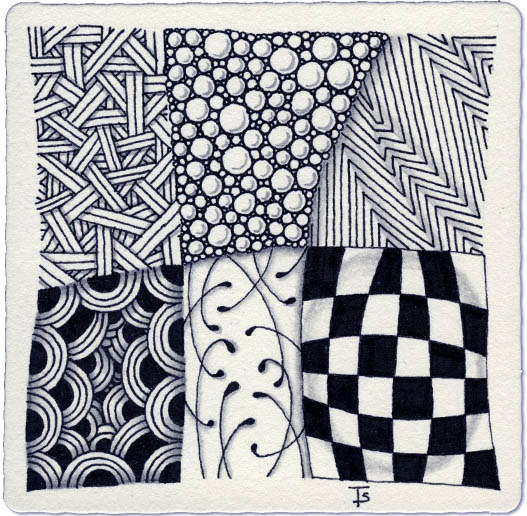
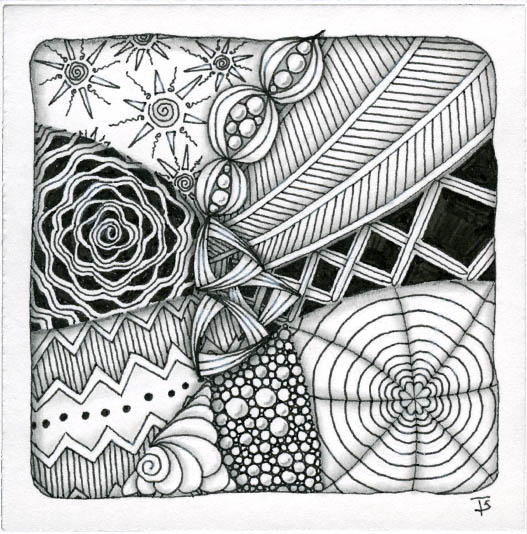
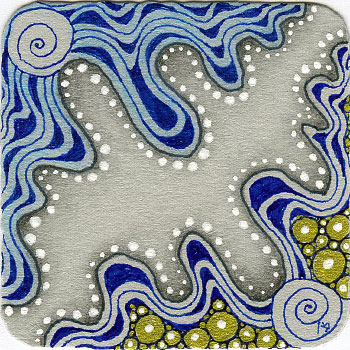
Random tangles, reclaimed tile.
This tile had curving line, including the spiral at the top already drawn on it when I pulled it out yesterday morning. I don’t ditch tiles that I don’t like. I put them into the stack of matching colored tiles to work on some other time.
I couldn’t think of what to do with it, so I started pulling tangles at random. Mythograph was about the third one. Perfect! I decided to run with it, adding the spiral to the ends of all the branches.
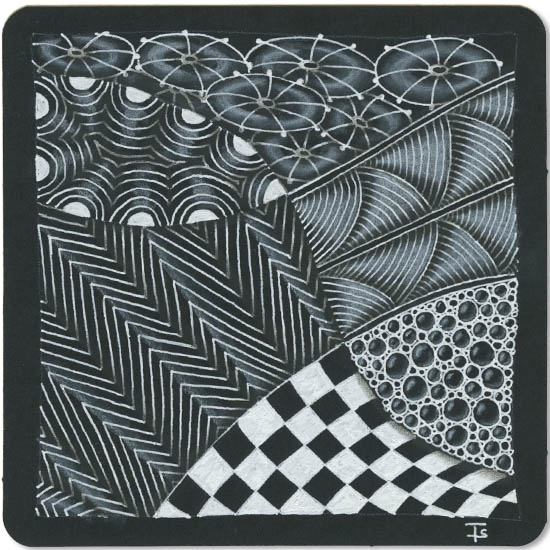
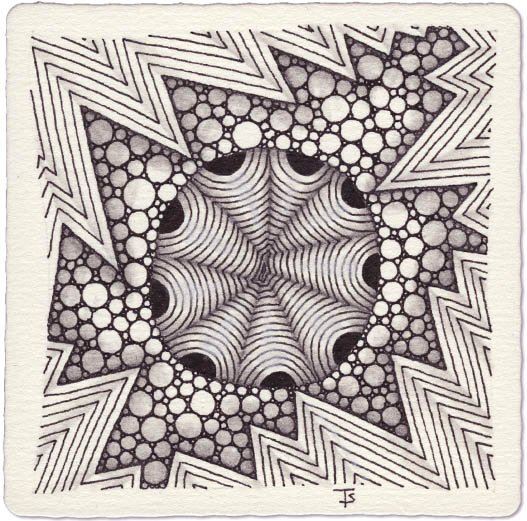
The inspiration for this tile came from Pere Cobo CZT . He is an amazing tangler and human being. He uses Zentangle to help homeless children at the Dar Chabab day center in Catalunya, Spain.
He has a very special style, part outer space, part interdimensional universes and part video game graphics. He has created many tangles that he uses when tangling and many interesting tangelations of common tangles.
He recently posted a tile he created that was really interesting and encouraged others on the Mosaic app to give it a try.
“One Zentangle A Day” by Beckah Krahula - Day 18 - Curvilinear Geometric Patterns
The new tangles introduced in this lesson are Cadent, Gneiss and Huggins.
Last night, when I was playing around with variations of Cadent, I had this idea that combined a geometric shape with both the triangular variation and the standard style of Cadent. I gave it a go on this tile. The result is a kind of layered effect in the center, where I placed the tangle Gneiss.
“One Zentangle A Day” by Beckah Krahula - Day 14 - Decorative Value
The tangles introduced in this chapter are Changing, Dyon and Keeko.
Decorative value involves contrasting shapes and planes of color rather than having an established light source to produce interest and move the eye through the piece.
Tangling on a black tile is usually a good example of decorative value because you’re already starting with the basic shadow of a dark background.
“One Zentangle A Day” by Beckah Krahula - Day 12 - Tangle Values
If you squint at your tile, you will notice that some tangles appear lighter and some darker. The levels from light to dark are referred to as the “value” of the tangle.
In the tile above, the lightest value section is the one with Chillon. The darkest value would be the one with Printemps. The other sections fall in between at various levels.
“One Zentangle A Day” by Beckah Krahula - Day 9 - Black Tiles
Today’s lesson was all about drawing on black tiles. There were no new tangles introduced.
Drawing on black isn’t any more difficult than drawing on white. However, you do have to think a bit differently. You are adding the lightest value to the tile with your lines. However, you are still adding shading and highlights to the same places as on a regular black on white Zentangle.
“One Zentangle A Day” by Beckah Krahula - Day 6
The new tangles introduced for this day are Amaze, Flux and Mooka.
I used Amaze at the top of the tile to fill the space above the focal point design. The random lines create texture and darkness without overwhelming the rest of the tile.
The traditional Mooka shapes work well as a fan-like foundation from which the Flux can emerge.
“One Zentangle A Day” by Beckah Krahula, Day 4.
For this day, the new tangles are Jonqual, Nipa and Shattuck. The focus is on angular vs circular patterns. As an interesting shading exercise, the circles in Nipa could be shaded as an orb…or a hole!
I kept the string very simple, drawing a square at and angle in the center of the tile.
I drew the lines within Shattuck and Tipple so that they weren’t perfectly straight or even to add more interest. Because both Shattuck and Nippa are mostly lots of lines, I placed them so that the directions were a contrast to each other.
This is the tile that I’ve created for Day Two from the book “One Zentangle A Day” by Beckah Krahula.
I had a choice of using the three new tangles, Fescu, Knightsbridge and Nekton and whatever tangles from the first day that I wished. Since my string had six spaces, I chose to use all of the tangles from both days.
I didn’t necessarily use the same style for the tangles, choosing, for example, to do a different tanglation of Crescent Moon.
I was looking through my library of Zentangle books, and I came across Beckah Krahula’s “One Zentangle A Day”. I haven’t looked at this book in a very long time, so I pulled it out and began reading. I like her writing style and appreciate how well she covers various topics.
The tile above is the “Day 1 Exercise”. This chapter is all about getting acquainted with your tools. She introduces three beginner tangles: Crescent Moon, Static and Tipple.
Project Pack 7 - Day 1
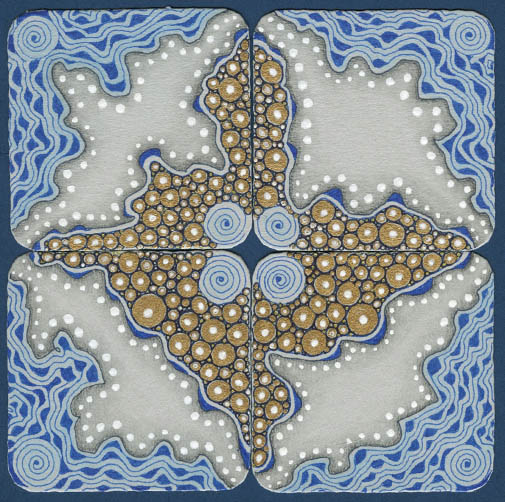
I had a bunch of gray tiles in my stash, but I’ve never really done much with them. So I decided to order Project Pack 7 from Zentangle . This PP was introduced for the 2019 Christmas season and is one of the 12 Days of Zentangle series. The theme for this pack is “that like in life, Zentangle, too, is not just black and white … there are many shades of gray in between.”
Dingbatz.
Dingbatz are the Zentangle version of printer’s ornaments called dingbats! They are small, ornamental areas of tangling that can be done on a tile, applied to an envelope, card or stationary. They could be used as stickers, or even used in your day planner to highlight an event or important appointment.
I am currently working through the “ Zentangle Dingbatz ” book by Brian Crimmins, CZT.
I decided to try a few ideas on a regular-sized, square tile for my first attempt.
Complex. There are days when our lives are full of complication. This tile reminds me that there is a way of organizing and taking things one step at a time that restores calm and confidence.
There are a lot of tangles here, with many not seeming to go together at all. But the Zentangle Method does an amazing job of making it all work, ending up with a tile that makes artistic sense.
I mentioned previously that I had a very old Zentangle kit. I also have a newer one that has the lighter green color on the outside. I pulled it out because I wanted to see what was in it and I found a standard Zentangle tile that already had a string drawn on it! Actually there are a few with strings already drawn on them.
I chose this one to work on. The string was fairly complex, so I thought it might be fun. The string had several small loops around the outside edge, so I started drawing orbs and basically filled them in with Tipple.
Day four of going back to basics with my Zentangle practice. For this tile, I chose a string at random from the instruction booklet, and random tangles from the Legend card and the back of the booklet.
While I enjoyed creating the tile, and it worked great for the reasons I tangle, I am not as excited with the end results. I loved the Cogwheels and the Flux ribbon, but when I added the background, it did nothing to enhance them. It isn’t enough contrast, and distracts from the other tangles.
I am home!
I know that sounds a bit odd, but if you had my life since the beginning of the Covid pandemic, you would understand. The last original tile I posted was May 26, 2020. Certainly a long time ago!
Since then, I’ve moved 4 times. My stuff has been in and out of storage in three different cities, and I now have a teenager and a pet!
For the first project in the new Zentangle Project pack for grey tiles, we are creating a small, rearrangeable puzzle of four Bijou tiles, all with the same tangles.
These can be assembled into your own mosaic and arranged in different designs depending on how you place each little tile.
This is my first tile. I got carried away with the Diva Dance, on the second side, so I will be redoing this.
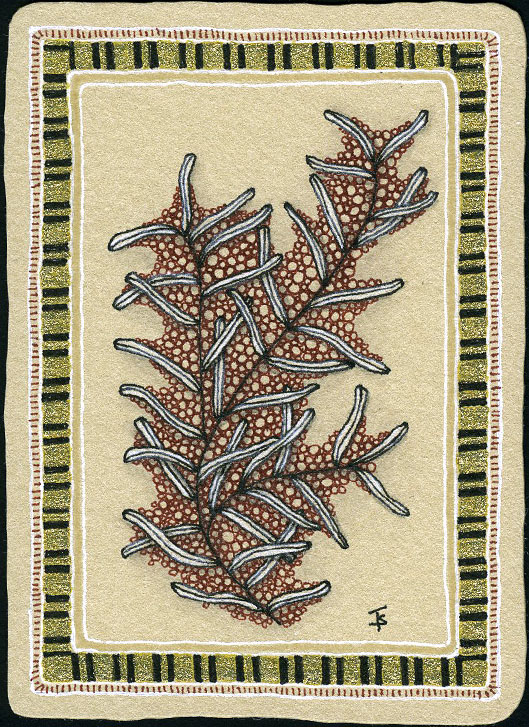
If you follow me, then you know I’ve done this tangle, which can look like a sprig of Rosemary, or a pine bough, or a feather, many times before. I enjoy drawing it and it’s one of my favorites.
ATC #7.
Zentangle drawn on sahara, Fabriano Tiziano using a black and tan, Micron pen and gold gel pen. Shading done with graphite pencil.
Tangles: Marasu Tipple Verdigogh
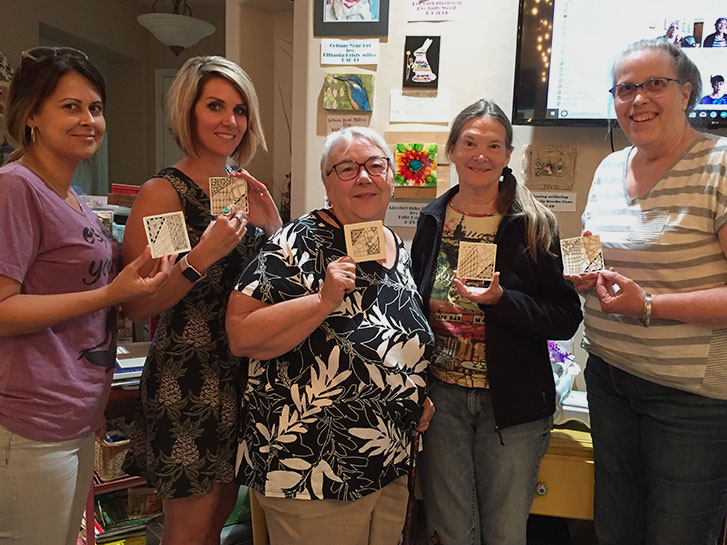
I had such a fun class on Saturday at the cARTel Studio, introducing these ladies to the wonderful world of Zentangle!
They all did such a great job on their first tiles, which you can see below.
This is the first of a series of three Zentangle classes on consecutive Saturdays.
Next week: working on black tiles!