Warning: Lots of images ahead!
If you are an active tangler, you probably know about ZenButtons. I’ve posted a few that I’ve done recently . But do you know about SpundalaZ? These are another type of Zentangle button, but they are created over a base design. This post is about how that base design can be created.
The basic premise is that you need to be able to rotate the tile around the center point, and while it is rotatating, create greyscale or color concentric areas on the tile.
I want to show you some options for creating the base for SpundalaZ, and let you know how well they work… or don’t.
Cool Maker Pottery Studio
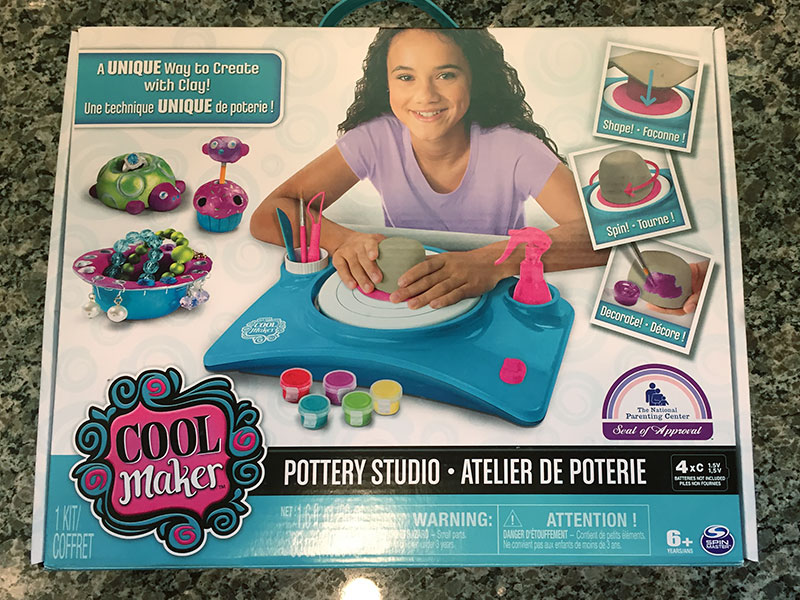
First, I tried this, which is a toy pottery wheel. I chose it, based on what appeared to be a large, flat rotation platform and the multiple speeds.

This is what it looked like out of the box.
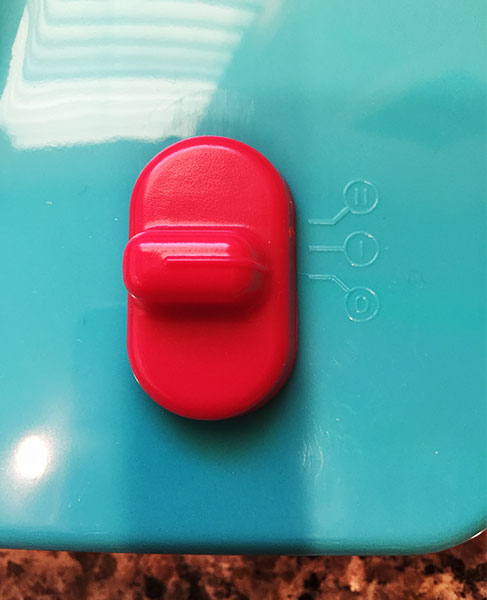
The control button has two speeds and off. It runs on 4 C-type batteries that go into a compartment on the bottom. You will need a phillips screwdriver to put them in or change them. When you turn it on, it’s quite noisy… which attracted my husband’s attention right away.
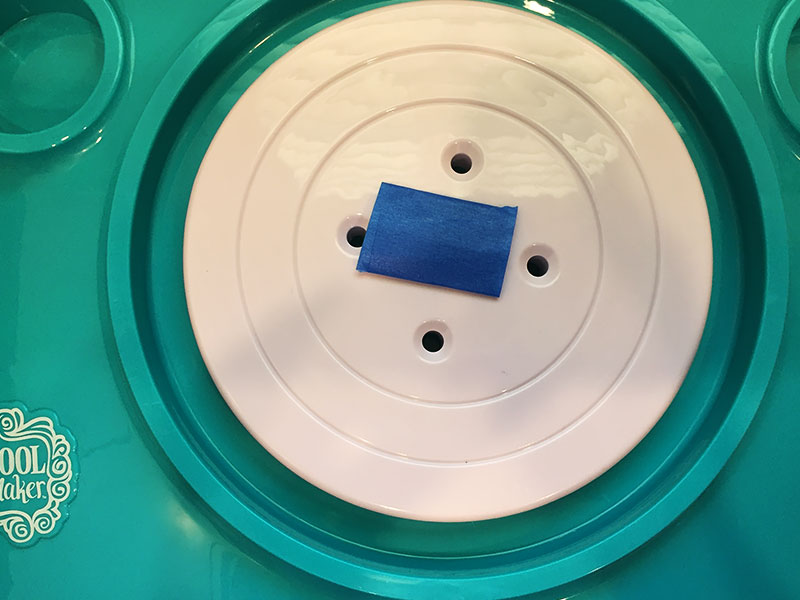
To attach the tile to the platform, I used a piece of folded masking tape. This worked well for the experiments and peeled off the back of the tiles cleanly.
It wasn’t too difficult to get the tile relatively centered because the concentric rings on the platform helped. It wasn’t perfect, but it wasn’t bad, either.
Here’s some of the things I tried.
This was done with Tombow markers. You can see that I had some difficulty getting a smooth transition. I ended up with more spirals than rings. I think this is because this toy doesn’t spin fast enough for what I’m trying to do. It’s on the highest speed, and it’s just too slow.
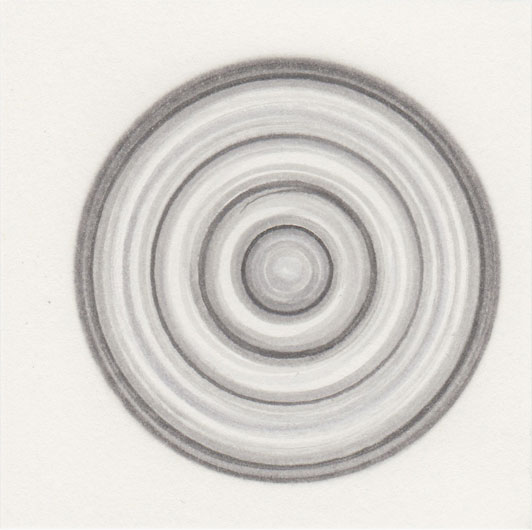
Black Pigma Micron and Tombow markers. I wanted to see, if I was very careful, I could just draw concentric lines. I still had some issues, though, when I switched to the brush end of the markers. I was trying to make sure that I was holding it straight up and down, with only the tip of the brush touching. It turns out that the platform wobbles a bit, so there where times when the tip wasn’t touching the paper at all!
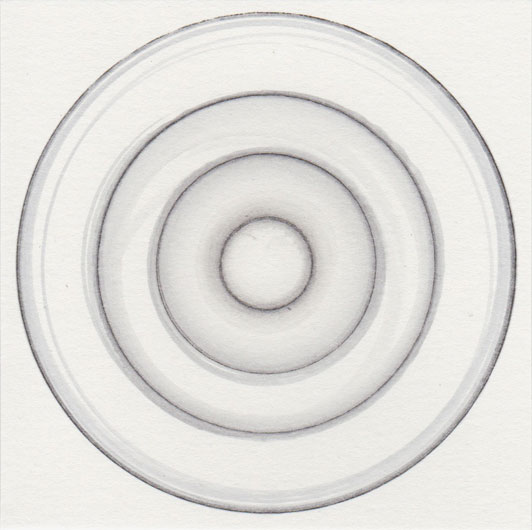
Copic markers and some Copic blending fluid. Ok, this is better, But again, not perfect. However, the blender, used while the tile was rotating, helped the rings transition from one color to another look more concentric. I used very pale colors here, so it’s kind of hard to tell.
Sharpie markers. My Sharpies are pretty juicy, and they bleed into the paper. So that’s why I decided to give them a shot, thinking they might transition better because of their nature. I also chose bolder colors so I could see what is happening. Although this has some irregular areas, I don’t mind them, and I think this works.
Student-grade watercolor pencils, then brushed with water. I really should have tried this with the professional, brighter pencils. I was able to create soft and strong areas, based on how much pressure I applied with the pencil. However, too much pressure caused the entire tile to move off the tape. I also applied pencil, water and then more pencil in some areas.
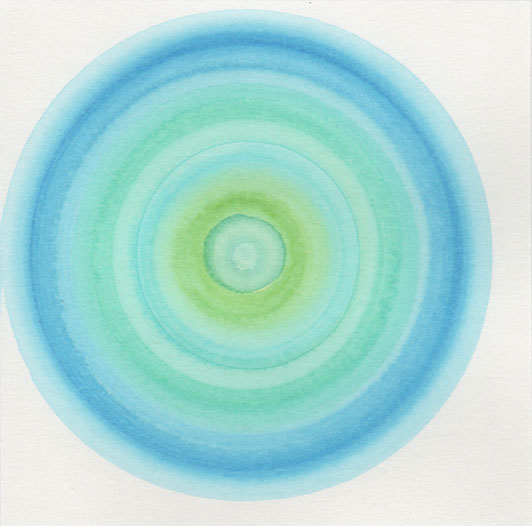
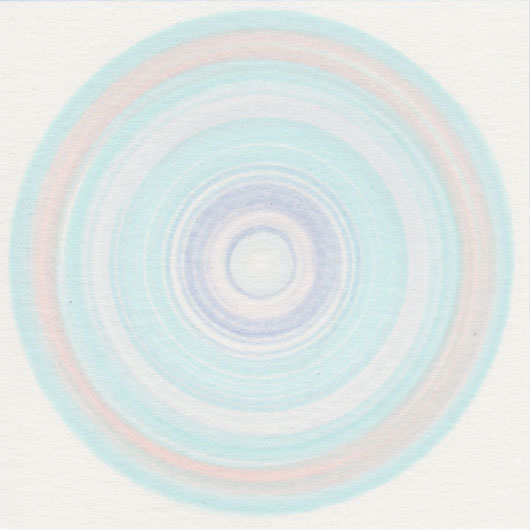
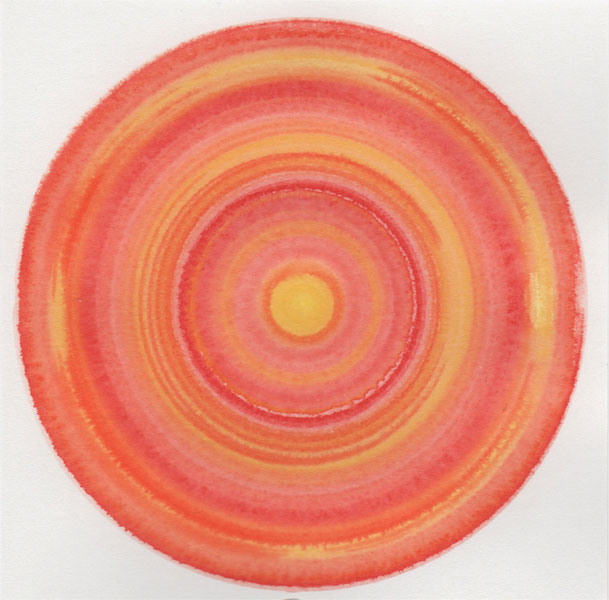
Crayola marker and water. Since the watercolor pencils didn’t work well, but I wanted to have a watercolor look, I went back to my favorite Crayola markers. In this case, I applied them directly to the paper, then I used a damp brush to go over them and blend them together while the tile was still rotating.
I think this worked best of all the methods I tried with this spinner.
Record Turn Table
My husband’s curiosity was peaked by watching my experimentation, and he felt the biggest problems were that the speed was too slow and the platform wobbled quite a bit. He thought I should try a record turn table. So, when we went out, we went to a recycle/trade store where I already had a bunch of credit, and we found this.
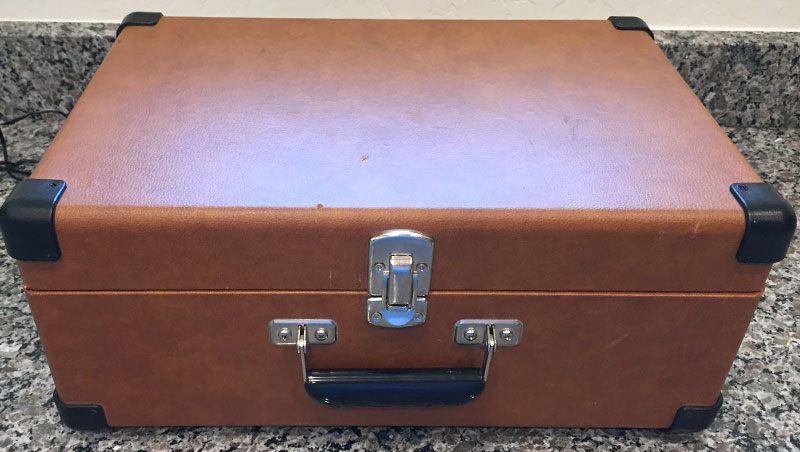
This is a portable turntable in a case.
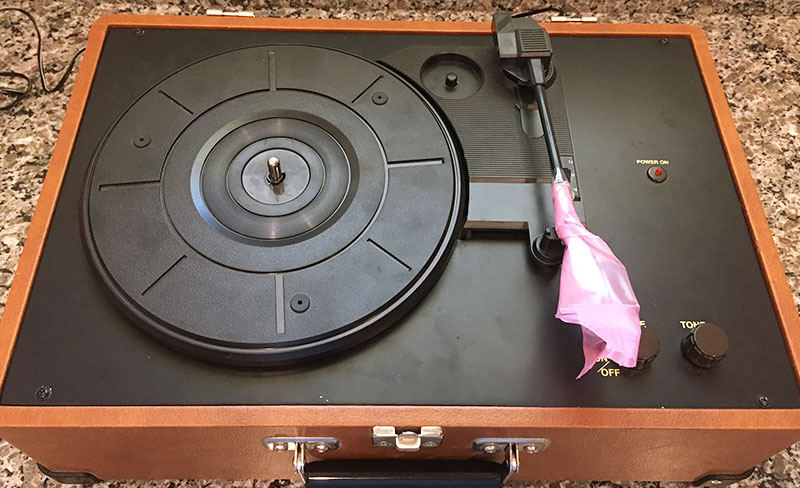
The cover comes completely off and it looks like this inside.

The turntable rotates at the 3 common record speeds.
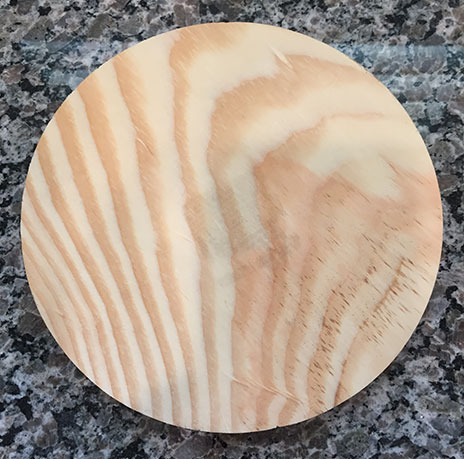
On the way home, we also stopped at Hobby Lobby and picked up a circular wooden plaque.
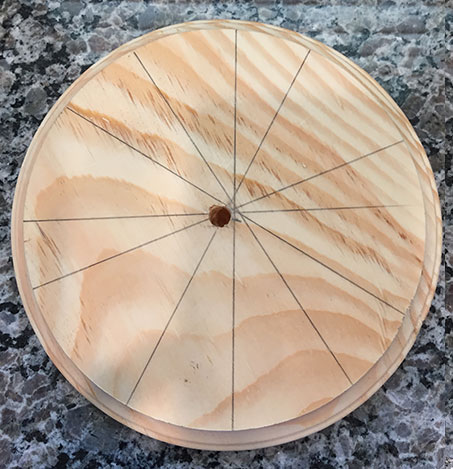
He drilled a hole in the center that was deep enough for the spindle in the center of the turn table. (Next time, I think he will let his wife mark the center first, LOL!)
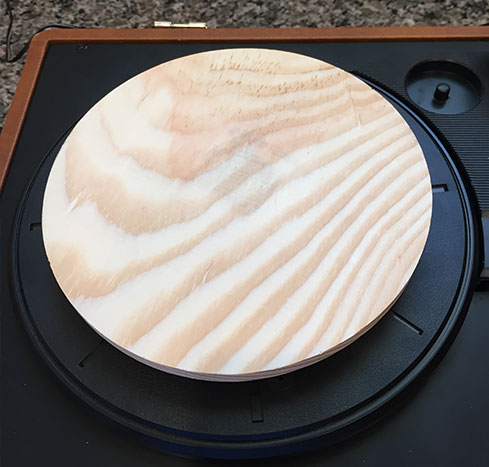
So now, there is a nice, flat platform to put a tile on. I used the same, masking tape method to attach the tiles to the wood disk.
The immediate problem with this is that there is no way to know if the tile is centered. However, I could use a larger piece of stock and then trim it back down, I suppose.
I only created two tiles with this.
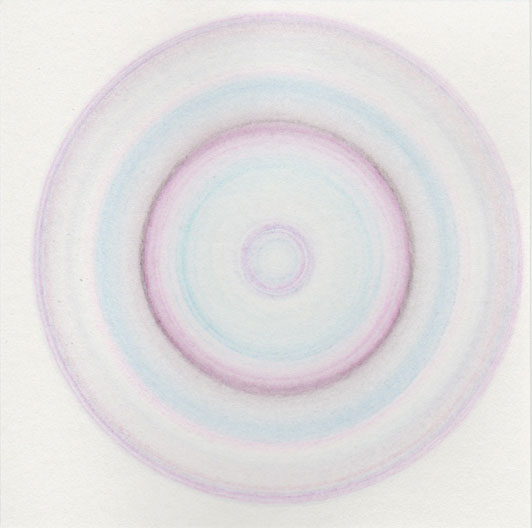
Crayola marker and water. This is better, but it really isn’t much faster than the previous pottery wheel, even at 78rpm. It was, however, much smoother, which was really nice. On the other hand, you can see that it is badly off-center.

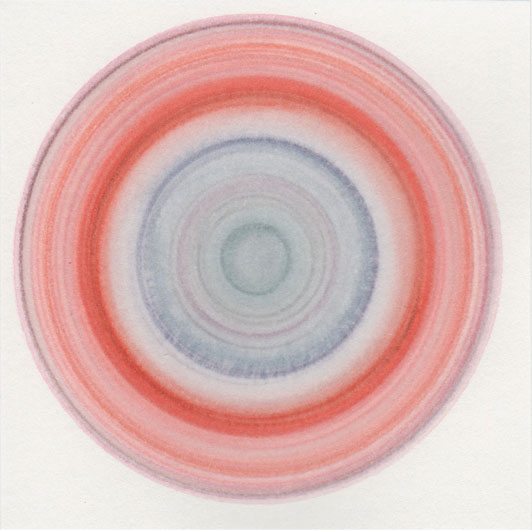
Watercolor. I thought I would try actual watercolor. This didn’t work well because of the slow revolution. The paint had too much time to puddle in blobs. I did like the effect where it was a bit drier, but over all, I wasn’t thrilled. This time, I did get the tile centered better.
ALEX Toys Artist Studio Fantastic Spinner
The last spinner I tried was a completely mechanical (no batteries) toy.
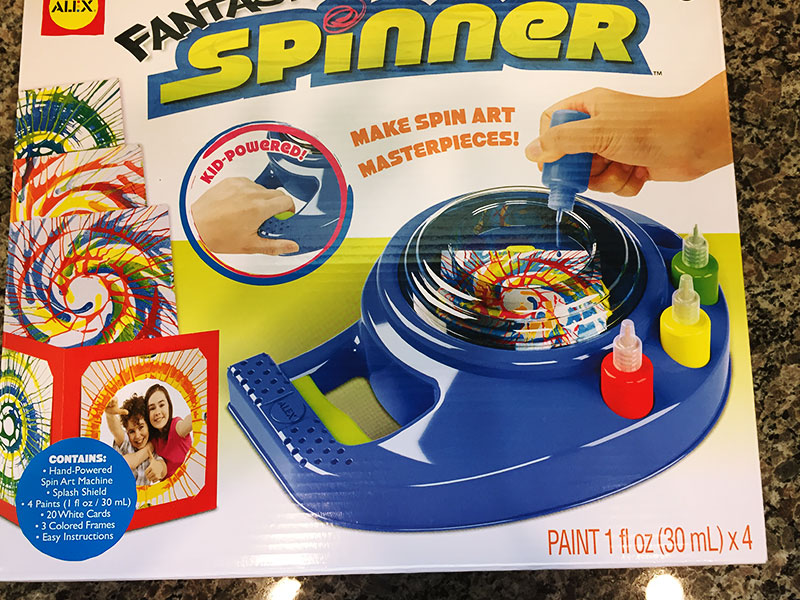
I figured that with no batteries, I could use it anywhere and not have to worry about them running out. I was also hoping that I could control the speed better.

This one is sturdy plastic, and the speed control is that big green button you see inside the handle on the left.
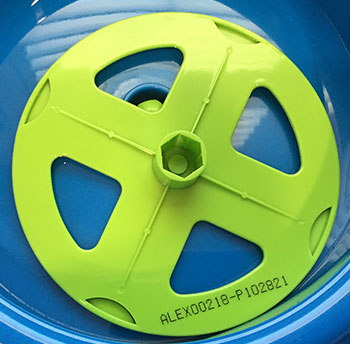
The center platform is completely removable, making it easier to clean and attach tiles.
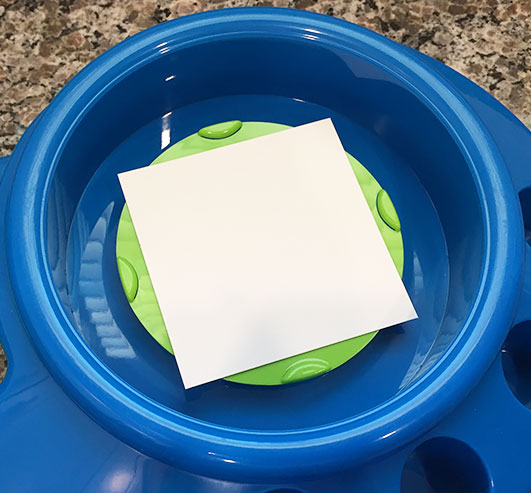
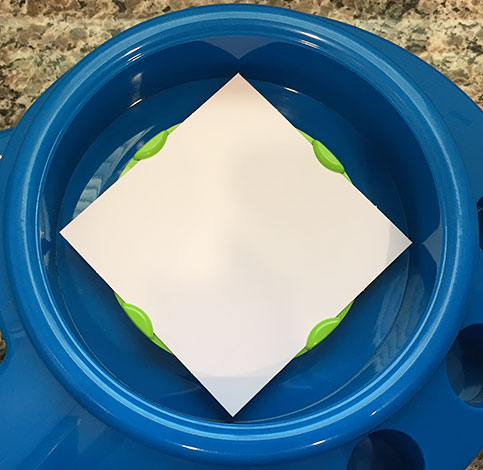
First, I used masking tape to attach a 3-1/2" tile.
As you can see, there’s still a problem getting it centered. However, I loved the way this one works. Because it will spin really fast, I got much more concentric rings and more interesting effects when I added the water. I will probably tangle this tile even though it’s a bit off, just because I like the way it turned out!
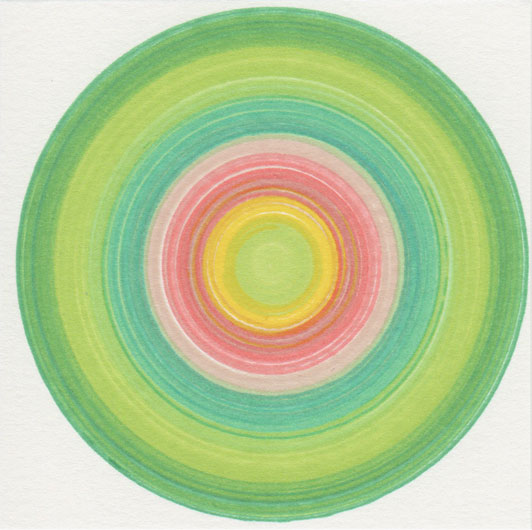
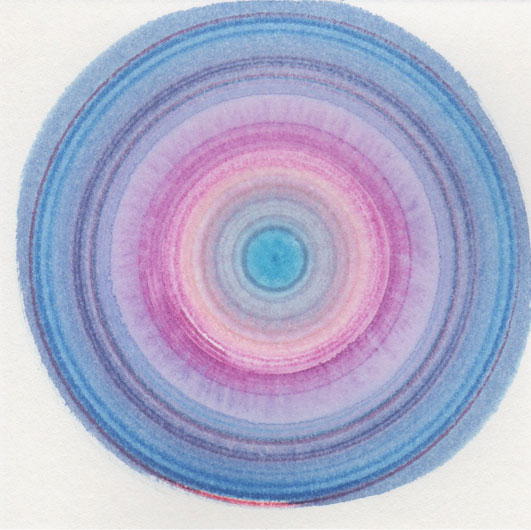
Lets try this again, using a 4" piece of Bristol. It fits nicely onto the platform with the built-in clips holding it in place.
Crayola marker and water. Oh my! This worked so much better! There are still some odd places, but they are my own fault, not the fault of the spinner. I don’t even need to try any more of this type of experiment. I can see that this is the way to go, for me.
Conclusions
I would have to say that the pottery wheel was mostly a bust. If someone gave you one, for free, go for it. But it’s too expensive to purchase just for this, and it doesn’t work well. Honestly, I wouldn’t buy this for a child to try pottery either. I think, because of the really slow speed, it would be disappointing.
The record player was slightly better because the platform was very stable. The off center issue could be resolved by marking the platform. However, again, it doesn’t do well enough to make it worth messing with, as far as I am concerned.
I would, finally, highly recommend the ALEX Toys Artist Studio Fantastic Spinner . It worked great, was really easy to use and isn’t very expensive, at $15. It is what I will be using to create my bases for SpundalaZ! I didn’t have any problems working the button while I was creating the tile. If you have arthritis or another condition that would make it difficult for you to squeeze the button, you may have to go for a different model, but other than that, this seems like a really good choice.
I hope you found this information useful and it helps you decide what tools you may and may not want to try for yourself.
Tandika*
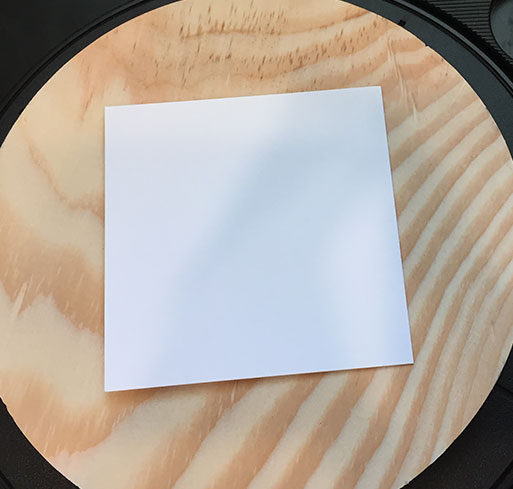
For all of these experiments, I used Strathmore Bristol Vellum, cut to size.