
In my last post , we set up a basic sketch in Nannou. This week, we’ll look at a Nannou app. A Nannou app is like a Nannou sketch, but with more capabilities and tighter control of what is happening. They are very similar; in fact a sketch is just a shortcut for an app when you don’t need the features an app provides. This can save you some typing.
So what does an app do that a sketch doesn’t? The main thing is that it allows for an application state, a set of variables which can be modified over time as the app progresses. This lets you, for example, do an animation instead of just having a static screen. An app will also give you access to the full range of features in Nannou, such as access to sound libraries and to lasers (if you’re into that kind of thing…)
So here is our sketch from last time, modified to be an app:
use nannou::prelude::*;
fn main() {
nannou::app(model).update(update).run();
}
struct Model {
_window: window::Id,
}
fn model(app: &App) -> Model {
let _window = app.new_window().view(view).build().unwrap();
Model { _window }
}
fn update(_app: &App, _model: &mut Model, _update: Update) {}
fn view(app: &App, _model: &Model, frame: Frame) {
let draw = app.draw();
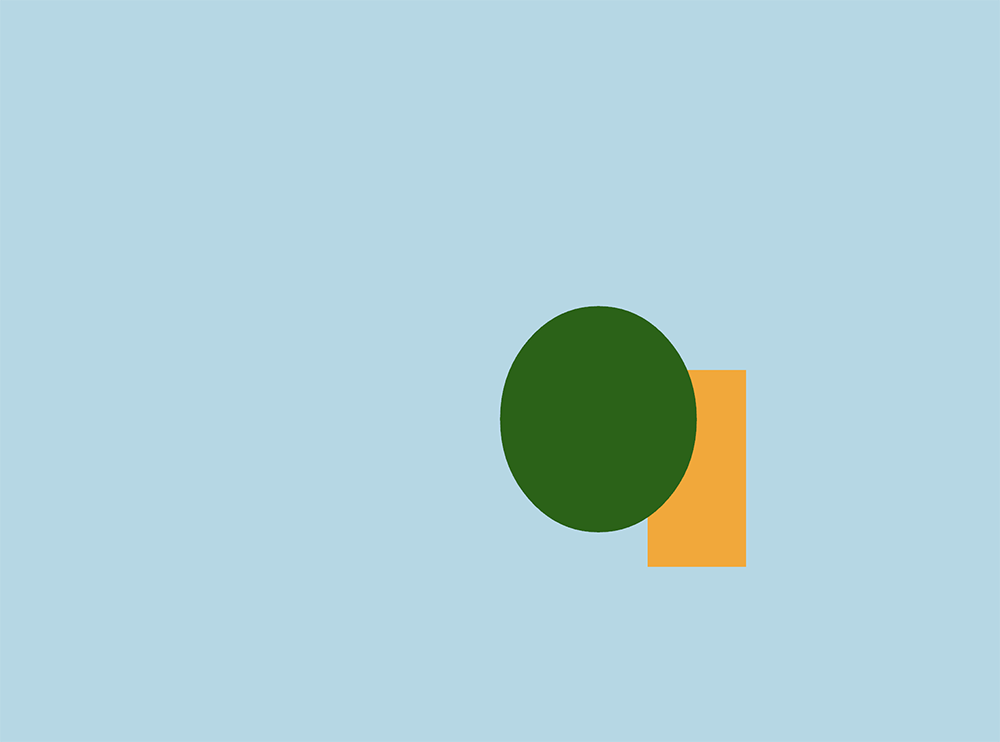
draw.background()
.color(LIGHTBLUE);
draw.rect()
.color(ORANGE)
.w(100.0)
.h(200.0)
.x_y(200.0, -100.0);
draw.ellipse()
.color(DARKGREEN)
.w(200.0)
.h(230.0)
.x_y(100.0, -50.0);
draw.to_frame(app, &frame).unwrap();
}
Instead of just a main() function and view(), we have two additional functions: model() and update(). Also, there is a Model structure definition. Model is the big new change here; let’s have a look.
Model defines a data structure which will hold any information we want to maintain throughout the life of the program. It can contain anything; in this case it just has a single variable, which holds the id of the window we’ll be displaying our artwork on. It’s important to understand that this doesn’t create the data structure; it is only a template for what one should look like. We’ll create a model structure based on this template later, which is where the model() function comes in.
The model() function always runs once, at the beginning of the program. It is used to create an instance of the Model structure. In some apps, this can be quite complex; in this one, all we are doing is creating a new window, and telling it the use the view() function to display information. Then we create an instance of Model that refers to that window.
Next, let’s look at the view() function. It is exactly the same as the view function from last week’s sketch, with one exception: a reference to the model that was created in model() is passed in. In this example, we aren’t doing anything with it (yet).
The other new function is update(). Update is called periodically, whenever a timed update happens. By default, this is 60 times per second. It can be used to make changes to the model (a reference to which is passed in to this function). In this case, we aren’t making any changes.
The last difference between the sketch and app versions of this program is in the main() function. In the sketch, we made a call like nannou::sketch(view).run(), meaning we are defining a sketch, and to use the view() to draw it. For the app, it’s a little more involved: nannou::app(model).update(update).run(). This says we are defining an app, to fun the model() function to get an instance of the model for this app, and to run the update() function periodically to make changes. Why don’t we mention the view() function in the app version? That is handled in model(); we’ve told it to use the view() function to display our masterpiece on the window we created.
That covers the differences! If you run this, you get exactly the same result as from last week’s sketch:
So let’s make some changes to provide some movement on the screen. We’ll have the green ellipse move slowly up and to the left, eventually leaving the screen altogether. To do that, we can no longer hardcode the position in the view() function; we have to move it to the model. So we’ll add an x and y position to the model:
struct Model {
    _window: window::Id,
    x: f32,
    y: f32,
}
Both x and y are f32 types, meaning a 32-bit floating point number, which is what the x_y() function in the ellipse is expecting to see.
In the model() function, we’ll set the x and y value to the 100.0 and -50.0, respectively. These are the same values we had originally used for the position of the ellipse in the example above.
Next, in the view() function, we need to use the x and y from the model instead of the hardcoded values when we set the position:
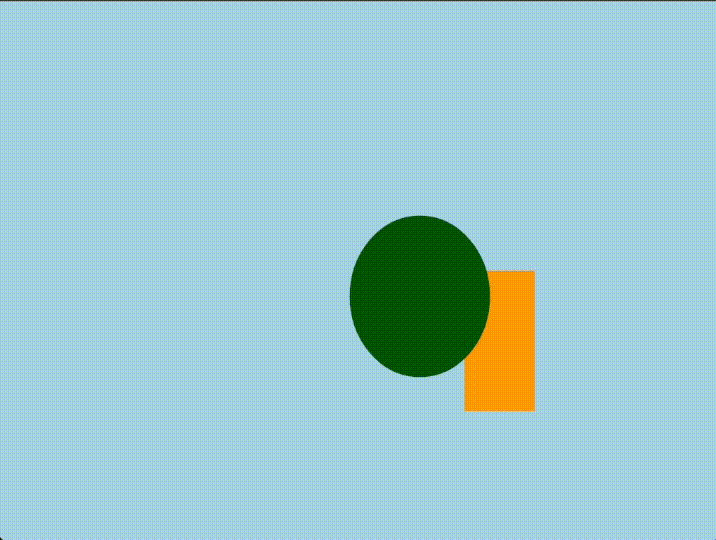
fn view(app: &App, model: &Model, frame: Frame) {
    let draw = app.draw();
    draw.background()
        .color(LIGHTBLUE);
    draw.rect()
        .color(ORANGE)
        .w(100.0)
        .h(200.0)
        .x_y(200.0, -100.0);
    draw.ellipse()
        .color(DARKGREEN)
        .w(200.0)
        .h(230.0)
        .x_y(model.x, model.y);
    draw.to_frame(app, &frame).unwrap();
}
Notice that we also changed the name of the model parameter to the view() function from _model to model. This is because the Rust compiler will complain if you declare a variable and don’t use it unless that variable’s name starts with an underscore. So if you declare a variable and aren’t using it yet, it should start with an underscore (so… _model), but since we are going to use it now, we change it to model.
All of these changes so far don’t have any effect on what is displayed on the screen; they set the stage to allow us to make a change to the ellipse position while the app is running. We will actually make that change in the update() function:
fn update(_app: &App, model: &mut Model, _update: Update) {
    model.x -= 0.5;
    model.y += 0.5;
}
This subtracts 0.5 from x, moving the ellipse to the left, and add 0.5 to y, moving the ellipse up. When you run this app, the picture starts out the same as the sketch, but the ellipse slowly moves up and to the left, eventually moving off the screen.
In this post we made a minimal change to a sketch to make it an app and to show the process for using a model. There are many improvements that could be made to this app. For example, put all of the description of each object on the screen into the model, including the size, color and position. Then they can all be affected by changes to the model. Another obvious improvement would be to have the objects stay in the screen instead of flying off into nothingness. They could change direction to avoid hitting the edges, or they could bounce off the edges like billiard balls. There’s a particularly nasty bug here as well: we just keep modifying the x and y values forever, and eventually they will overflow what an f32 will hold. Not any time soon, in this case, but it’s the kind of thing you should watch out for. We won’t be making those changes here, but now that you understand how this works, you can experiment to your heart’s content!