Last week we talked about noise, specifically Perlin noise, which lets you vary a value randomly but incrementally, leading to a slowly changing value. We used it to draw the outline of a mountain range, but it can be used anywhere you need a value that changes a tiny amount at a time.
Conveniently, this also works in two dimensions. In 2-dimensional noise, the x and y axes each have their own noise, and (and this is important) they are not the same. So instead of asking the noise generator for a value at a position along a line, you have to pass it two values; you are asking for a value at a position on a plane.
Here is a Nannou app which plots points in both dimensions:
use nannou::noise::{BasicMulti, Seedable};
use nannou::noise::NoiseFn;
use nannou::prelude::*;
use rand::random;

fn main() {
    nannou::app(model)
        .update(update)
        .run();
}

struct Model {
    noise: BasicMulti,
    points: Vec<Vec<f32>>,
}

fn model(app: &App) -> Model {
    app
        .new_window()
        .size(600, 600)
        .view(view)
        .build()
        .unwrap();

    Model {
        noise: BasicMulti::new().set_seed(random()),
        points: Vec::new(),
    }
}

fn update(app: &App, model: &mut Model, _update: Update) {
    let rect = app.window_rect();
    if model.points.len() < rect.w() as usize {
        let step = (model.points.len() + 1) as f32;
        let mut column = Vec::new();
        for y in rect.bottom() as i32..=rect.top() as i32 {
            let amplitude = model.noise.get([step as f64 / 400., y as f64 / 400.]) as f32;
            column.push(amplitude)
        }
        model.points.push(column);
    }
}

fn view(app: &App, model: &Model, frame: Frame) {
    let rect = app.window_rect();
    let draw = app.draw();

    let x = model.points.len() as f32 + rect.left();
    let mut y = rect.bottom();
    let column = &model.points[model.points.len() - 1];
    for amplitude in column {
        let level = map_range(*amplitude, -1., 1., 0., 1.);
        draw.ellipse().x(x).y(y).w_h(1.0, 1.0).gray(level);
        y += 1.0;
    }

    draw.to_frame(app, &frame).unwrap();
}
Source code: https://gitlab.com/theartistshusband/noise/-/blob/main/two_dim/src/main.rs
In the update() function of the
one-dimensional version
, we added a single new y value to the next x value each time it is called, indicating what value y will take for that value x. This time, for the next x value, we are adding a value for every y position. So we are slowly going through the image and calculating the noise value for each pixel.
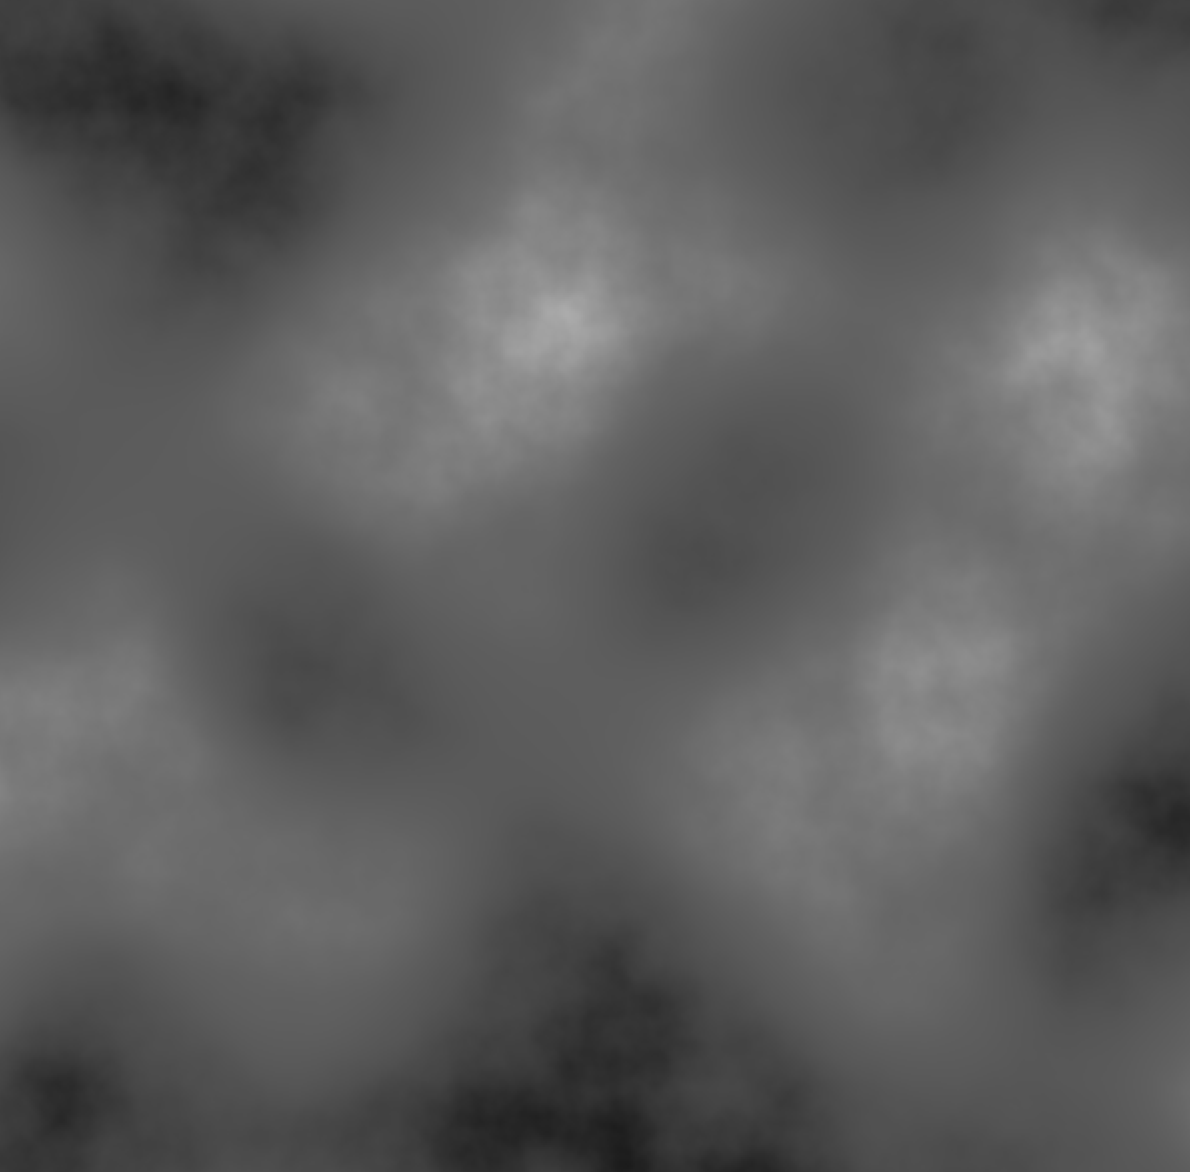
In the view() function, we just display the last column of y values we generated, add them to the columns we already displayed in previous calls to view(). Eventually, for each pixel in the image, we map the noise value at that x and y position to a gray level, from back to white. The result is an image like the one at the top of this post. It turns out, this works very well for generating an image that looks like smoke or clouds. Alternatively, you could interpret the noise value as a third dimension, and use it add texture to a flat plane.
Let’s look at the actual call to the noise function in update():
let amplitude = model.noise.get([step as f64 / 400., y as f64 / 400.]) as f32;
We are calling the get() method of the noise generator with two values, one for x and one for y. In this case, step is the value of x we are looking at; it goes up by one each time through the update() function. y is the partcular y value we want. In both cases, we are converting them to 64-bit floating points, and dividing by 400. Why are we dividing by 400? It’s because a peculiarity of the noise generator is that, whatever else the function returns, it always returns 0 when the position we are asking for is a whole integer. Since pixel counts are integers, if we just passed those in, we’d get back 0 every time. Not much interesting variation there! All of the interesting random activity happens between the integers. So we divide by some number to get a fractional value as the input, we’ll see some of that variation.
So why 400? Would any other number work? Do the divisors for x and y need to be the same? Excellent questions! We can use any number that gives interesting or useful results for our use case. The larger the number, the smoother the output. If we rerun our app using 1000 instead of 400, the transition is much more gradual:

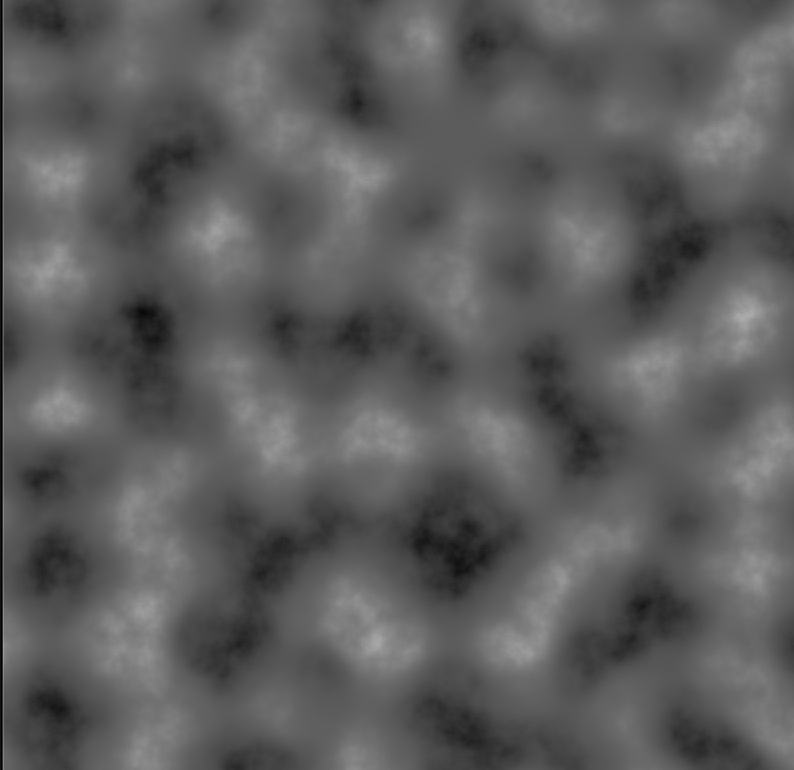
As that number gets smaller, the more detail you are skipping, and the faster the transitions. Here is our app using a divisor of 100:
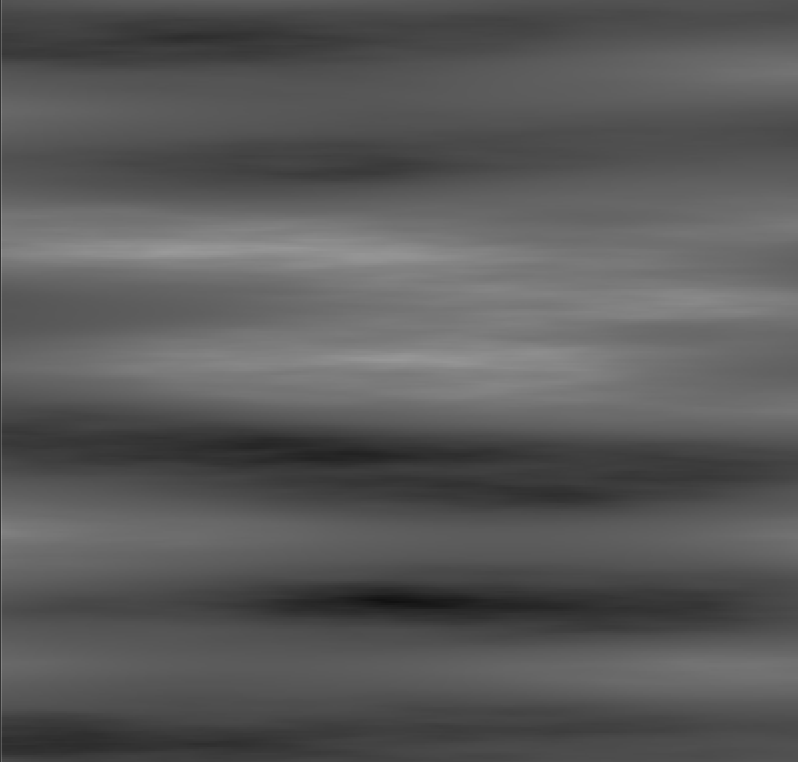
There is no reason the divisors for x and y need to be the same. Here is our app with the x divisor set to 1000, but the y divisor set to 100:
Choose the values the give the effect you want to see!
The noise generators in Nannou let you give inputs in 2, 3 or 4 dimensions. How you interpret and make use of the output of any of these is entirely up to you! You may be curious how we did one dimension
last week
if Nannou only does 2, 3 and 4 dimensions. Simple! We used 2-dimensional and held the y value constant giving us a 1-dimensional cross-section of a 2-dimensional space.
Next week, we’ll try to do some actual art using these noise ideas!