Recently, I had an idea about adding a color wash to a line. Suppose, in real life (not digitally,) I made a line of watercolor paint on some paper. Then suppose I took a very fine brush and smeared the paint at right angles to the line. I could go down the line and smear each part of it a different amount. This being watercolor, the darkness of the color in the smear would be greatest if I smeared it just a little, but if I smeared it a lot, the color would become quite light. I decided to try and do this digitally (so I don’t have to clean any paint brushes afterwords.)
This turned out to involve a bit of math, especially since I wanted to be able to use this on any line no matter what its angle on the canvas.
There are a number of attributes a watercolor stroke needs. First, a base color. It’s important that the color have an alpha (transparency) component, and that it be set to a very transparent value. This is because we’ll be varying this color’s transparency depending on how much we “smear” it in order to make it lighter or darker. The fully opaque value (1.0) will be used when there is no smearing at all. The transparency value you specify in the base color will be used when the smearing is at a maximum. The more transparent a color you start with, the more pronounced the color change as you smear over different distances.
The next important attribute is the load. Think of the load as the amount of paint in the initial line on the canvas. A thick line of paint will smear further than a thin line. We’ll use the load to define the max number of pixels we will smear from the original line.
That is enough to implement the basics of what I have in mind, but I’ve defined two more attributes: count and stroke type. The count is the number of times to add a line of paint and do the smearing, possibly smearing a different amount at each location on the line each time. Since this is watercolor, you can see the previous smears under the new smears; they are additive, and it makes for an interesting effect. The stroke type can be Left, Right or Full. It defines to which side of the line you are smearing. The default is Full, which smears to both sides.
Here is the WatercolorStroke class:
use nannou::color::{Alpha, Hsl, hsla, Hsla};
use nannou::Draw;
use nannou::geom::{Vec2, vec2};
use nannou::math::map_range;
use nannou::rand::random_f32;

pub struct WatercolorStroke {
    /// Base color of stroke
    color: Alpha<Hsl, f32>,
    /// Brush load
    load: f32,
    /// Number of time to stoke
    count: u32,
    /// Stroke Type
    stroke_type: StrokeType,
}

impl WatercolorStroke {
    pub fn new() -> Self {
        Self {
            color: hsla(0.3, 1., 0.5, 0.005),
            load: 100.,
            count: 1,
            stroke_type: StrokeType::Full,
        }
    }

    pub fn color(mut self, color: Alpha<Hsl, f32>) -> Self {
        self.color = color;

        self
    }

    pub fn load(mut self, amount: f32) -> Self {
        self.load = amount;

        self
    }

    pub fn count(mut self, count: u32) -> Self {
        self.count = count;

        self
    }

    pub fn stroke_type(mut self, stroke_type: StrokeType) -> Self {
        self.stroke_type = stroke_type;

        self
    }

    pub fn draw(&self, draw: &Draw, start: Vec2, end: Vec2) {
        let base_color = self.color.into_components();
        let dist = start.distance(end);
        let dy = (end.y - start.y) / dist;
        let dx = (end.x - start.x) / dist;
        let theta = ((end.y - start.y) / (end.x - start.x)).atan();
        let rt = theta + std::f32::consts::PI / 2.; // 90 degrees to the right
        let lt = theta - std::f32::consts::PI / 2.; // 90 degrees to the left
        let mut load = self.load;
        for _ in 0..self.count {
            let mut d: f32 = map_range(random_f32(), 0., 1., -std::f32::consts::PI, std::f32::consts::PI);
            for step in 0..dist.round() as u32 {
                // Point on the base line to draw from
                let p = vec2(start.x + (dx * step as f32), start.y + (dy * step as f32));
                // Choose an amplitude
                d += map_range(random_f32(), 0., 1., -0.1, 0.1);
                if d < -std::f32::consts::PI { d = -std::f32::consts::PI }
                if d > std::f32::consts::PI { d = std::f32::consts::PI }
                let amplitude = d.cos().abs() * self.load;
                let mut color = base_color;
                // Set the color transparency based on amplitude
                color.3 = 1. - ((1. - base_color.3) * (amplitude / self.load));
                // Draw the color wash
                let mut begin = p;
                let mut end = p;
                match self.stroke_type {
                    StrokeType::Left => {
                        end = vec2(p.x + amplitude * lt.cos(), p.y + amplitude * lt.sin());
                    }
                    StrokeType::Right => {
                        end = vec2(p.x + amplitude * rt.cos(), p.y + amplitude * rt.sin());
                    }
                    StrokeType::Full => {
                        begin = vec2(p.x + amplitude * lt.cos(), p.y + amplitude * lt.sin());
                        end = vec2(p.x + amplitude * rt.cos(), p.y + amplitude * rt.sin());
                    }
                }
                draw.line()
                    .start(begin)
                    .end(end)
                    .color(Hsla::from_components(color));
                load *= 0.7;
            }
        }
    }
}

pub enum StrokeType {
    Left,
    Right,
    Full,
}
All the fun stuff is in the draw() method, which takes a Draw object and some start and stop coordinates, then draws the entire watercolor stroke. The basic idea here is that it figures out the length of the line you want to draw, and roughly every pixel along that path it draws perpendicular line with a length somewhere between 0 and load (if you are smearing to both sides of the path, the maximum length of the perpendicular line it will draw is actually 2 * load.) How does it know how long a line to draw? That length is called the amplitude, and it varies randomly by a small amount at each step along the path. Then the color is set to the same as the base color, with the transparency set to some value such that longer lines are more transparent.
Here is our model().
fn model(app: &App) -> Model {
    app.set_loop_mode(LoopMode::loop_once());
    app
        .new_window()
        .size(WIDTH, HEIGHT)
        .view(view)
        .key_pressed(key_pressed)
        .key_released(key_released)
        .build()
        .unwrap();

    Model {
        stroke: WatercolorStroke::new()
            .color(hsla(0.1, 1., 0.5, 0.005))
            .load(200.),

        paused: false,
        ctrl_key_pressed: false,
    }
}
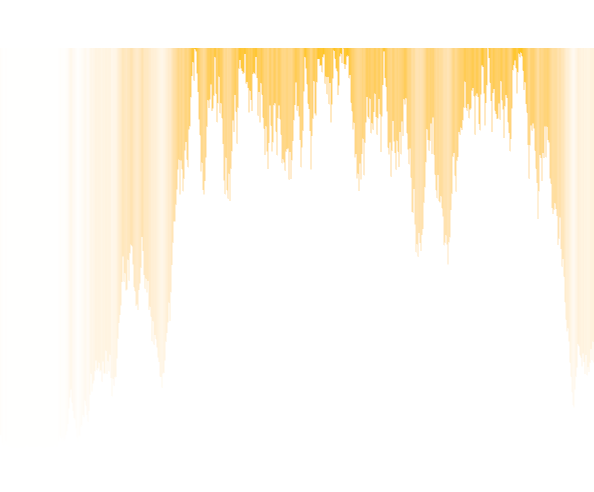
Note that we are storing the stroke in the model, selecting a color with the transparency set to 0.005 (so transparent it’s almost invisible), and a load of 200, meaning the smearing could extend out a far as that many pixels on either side of the line.
In our example, we want to draw a single stroke, horizontally, across the center of the canvas. So our view() function contains this line:
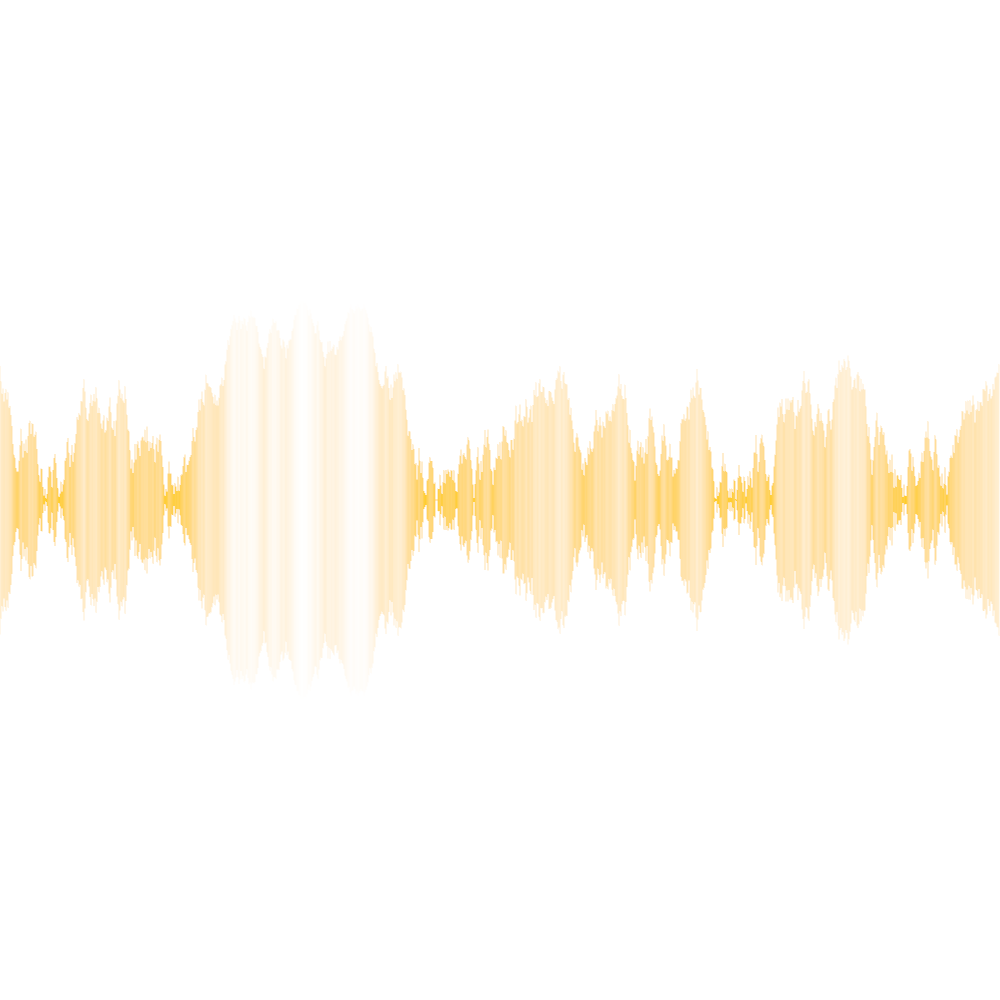
model.stroke.draw(&draw, vec2(rect.left(), 0.), vec2(rect.right(), 0.));
This draws an image much like the one at the top of this post.
There is another thing to be aware of here. Look at the first line in the model() function:
app.set_loop_mode(LoopMode::loop_once());
This tells Nannou to run the view() function only once. So whatever we want to display, we have to generate it in one call to view(). This is important in this example because view() calls draw(), and every time draw() is called, the entire stroke is recreated with different random values. If you draw it over and over in successive frames, it’s going to look like very colorful noise!
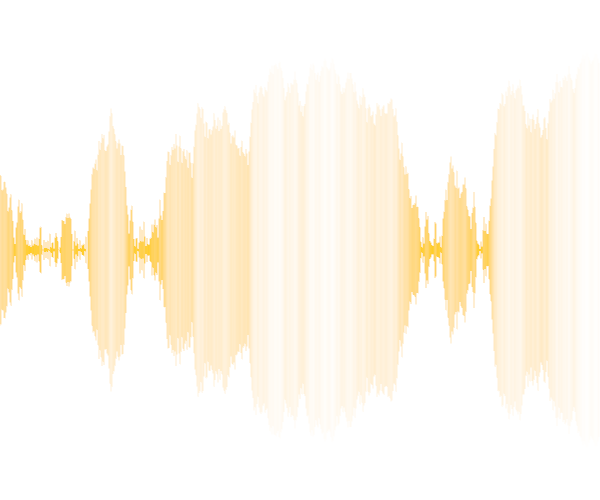
As I mentioned earlier, there is an option to have the stroke run more than once. This can be done in model(). Let’s have ir run three times.
        stroke: WatercolorStroke::new()
            .color(hsla(0.1, 1., 0.5, 0.005))
            .load(200.)
            .count(3),
Well that’s a bit more complex and interesting, isn’t it?
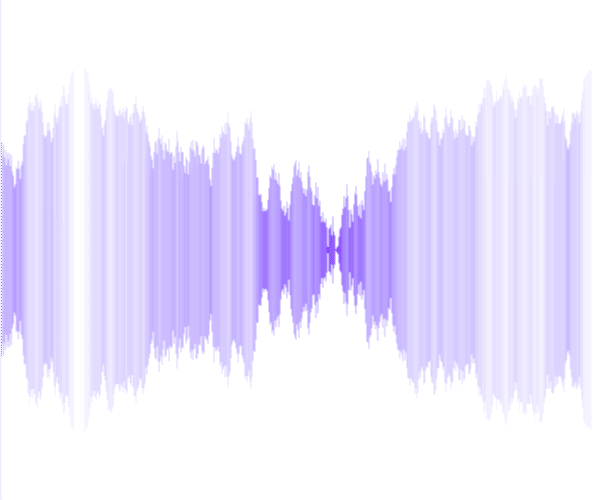
You can also just smear to one side of the path:
        stroke: WatercolorStroke::new()
            .color(hsla(0.1, 1., 0.5, 0.005))
            .load(400.)
            .stroke_type(watercolor_stroke::StrokeType::Left),
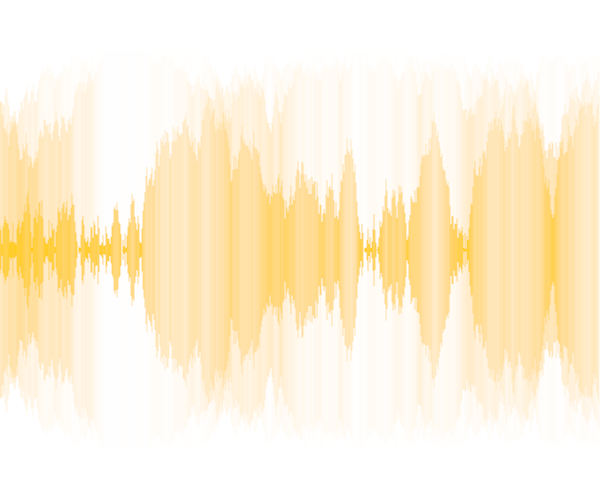
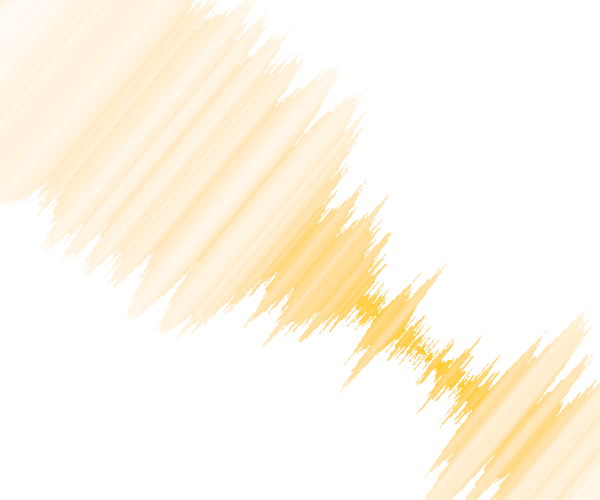
And, of course, the Watercolor Stroke works at any angle:
What am I going to do with this? I’m not 100% sure yet. I probably won’t be using too often as the main feature in an image, like I did in the images in this post. I want to use it for adding a little color next to lines.
I have some more ideas to improve it. As it stands now, it’s quite clunky to use, and not particularly efficient, which could adversely affect rendering times in complex pieces. Also, it might be nice to have a set of related colors in a stroke instead of just one. Perhaps I can pull those colors randomly from an image. We’ll just have to see where this goes…
The source code for this, now and as it evolves, can be found on Gitlab .