Note: This is the first in a series of tutorials that will guide you through the steps of making your first micro art journal. For more information you can join the Micro Art Journal group on Facebook.
I realize that many of you are experienced book makers and art journalers. However, this tutorial will make no assumptions about where you are at in your path. It is written for anyone, even those with little or no experience. You are welcome to follow exactly, or adapt it to your own skill level and needs.
For this tutorial you are making two tiny art journals. One will be larger than the other. This way, you will have a choice of sizes to work in. It’s a good idea to read through these instructions before starting to make sure you have all the needed parts and understand the instructions.
The materials you will need are:
- An index card or piece of cardboard
- 2 sheets of mixed media paper, 8" x 10" or larger
- Sheet of scrap paper or printer paper
- Staples
- A piece of masking tape
The tools you will need are:
- Pencil
- Ruler with cm/mm markings
- Scissors
- Stapler
- Stainless steel spoon or bone folder
Optional things you may want:
- Paper cutter with cm/mm markings
- Corner rounder
- Different paper (colored, scrapbook, etc.) for the cover
Here are the steps for creating the simplest book:
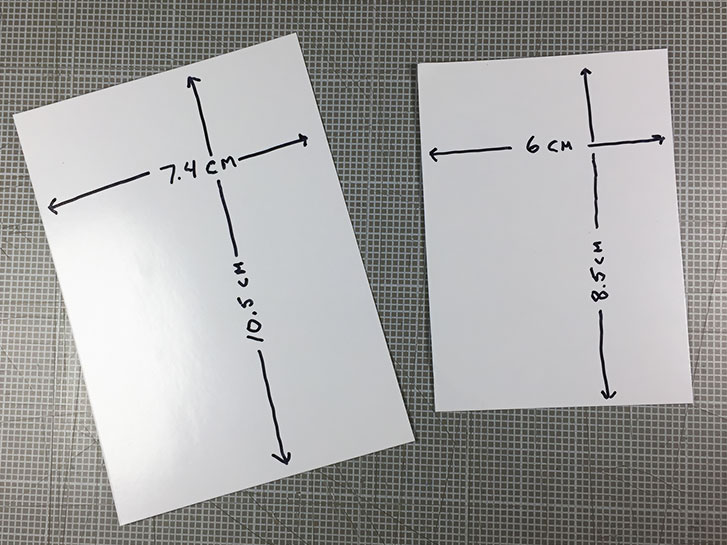
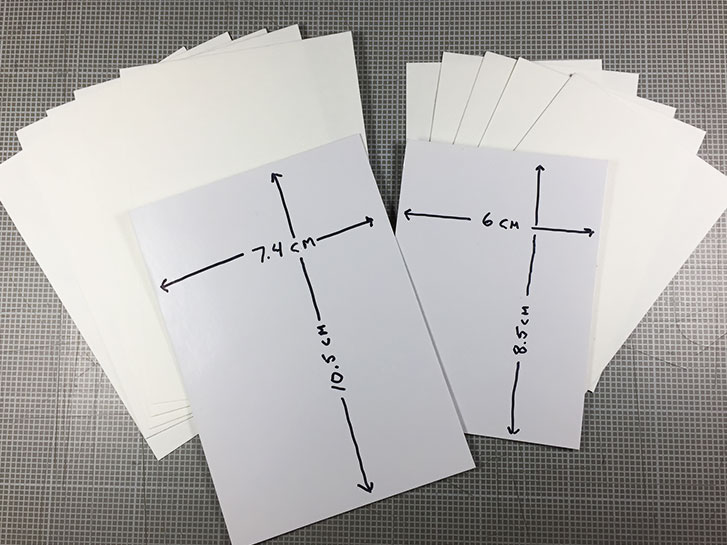
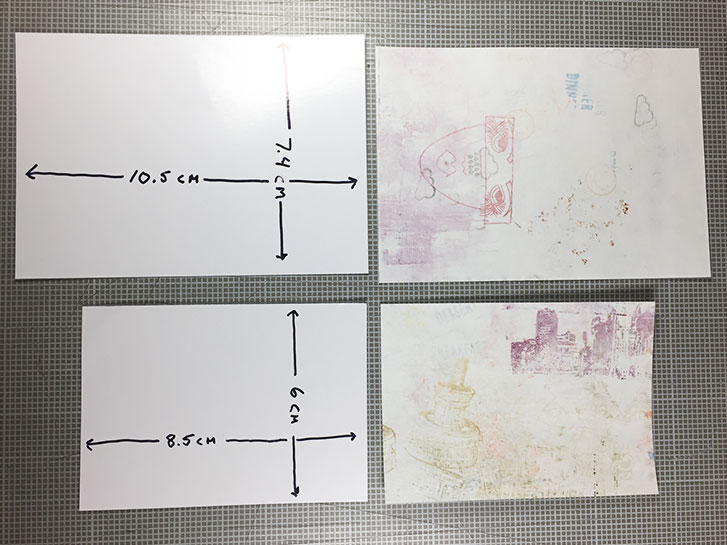
Using your ruler and pencil, you’re going to draw two rectangles on your index card. Make the first rectangle 7.4 cm x 10.5 cm. The second rectangle is 6 cm x 8.5 cm. These are templates that you will be using to cut pages and the cover for your tiny art journals. Cut out your templates carefully. Write the applicable sizes on each template! This way you don’t have to remember them later.
You are going to cut 4 sheets and one cover sheet for each journal. The cover can be made from the same paper and you can decorate it any way you wish. Optionally, you can use other paper for the cover. It’s totally up to you. This will give you enough pages to have a double-page spread for each day for a week. It’s a good number of pages to experiment with and finish in reasonable amount of time.
Using your template, pencil and scissors (or paper cutter) cut out your pages and cover out of the multimedia paper for each size.
Cut one sheet from each template out of your scrap paper.
Fold both of the sheets of scrap paper in half where the spine of the book will be. Unfold.
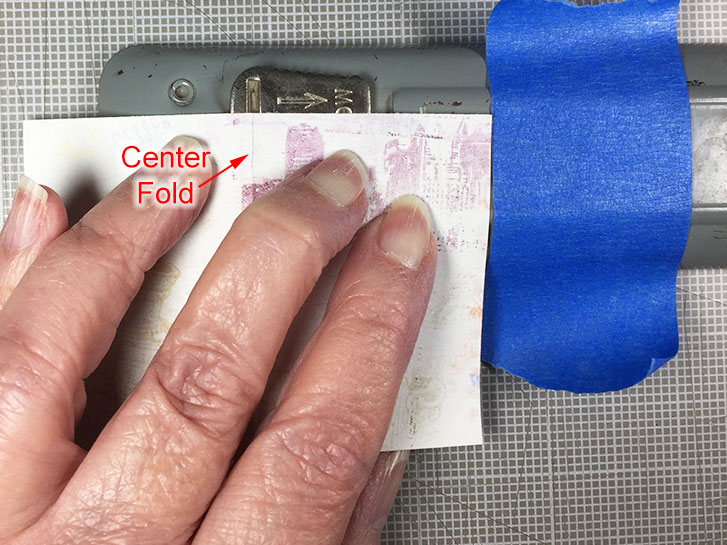
Line up the fold line of first scrap sheet with the center staple impression on the base of your stapler. This is where the staple is going to end up when you use the stapler.
Place the masking tape on the base of the stapler to mark where the edge of the pages line up. You’re using the masking tape as a positioning marker to consistently staple your booklet in the center!
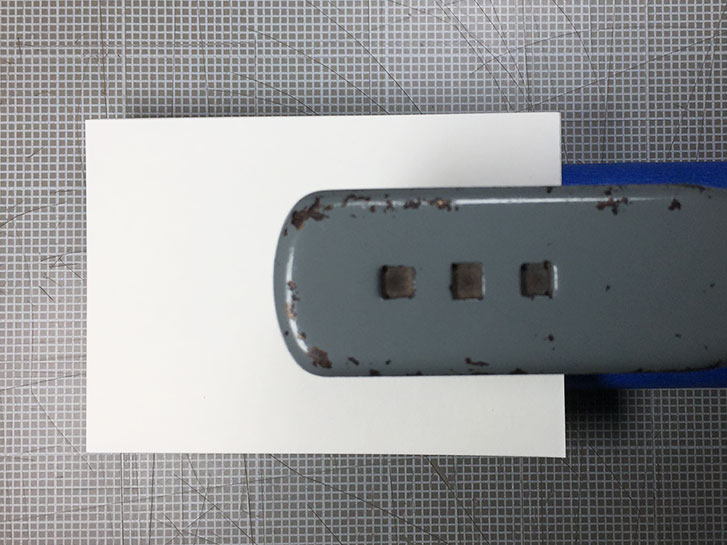
Stack up the appropriate set of papers with the cover on top. Make sure your stapler is on a firm surface. Place the stack of papers under the head of the stapler, lining up the page edges with the edge of the masking tape. Center the staple placement from top to bottom. Staple in the center.
Repeat the previous two steps, but for the other size using the other stack of pages.
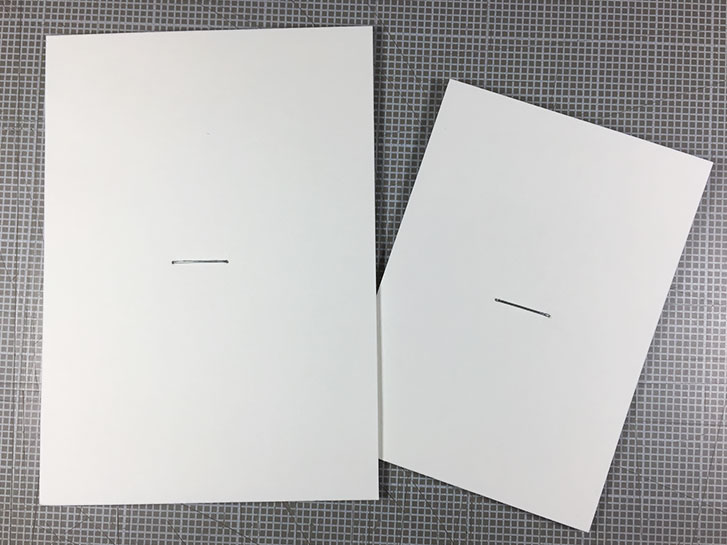
You should now have two, center stapled stacks of paper. Each stack is one journal.
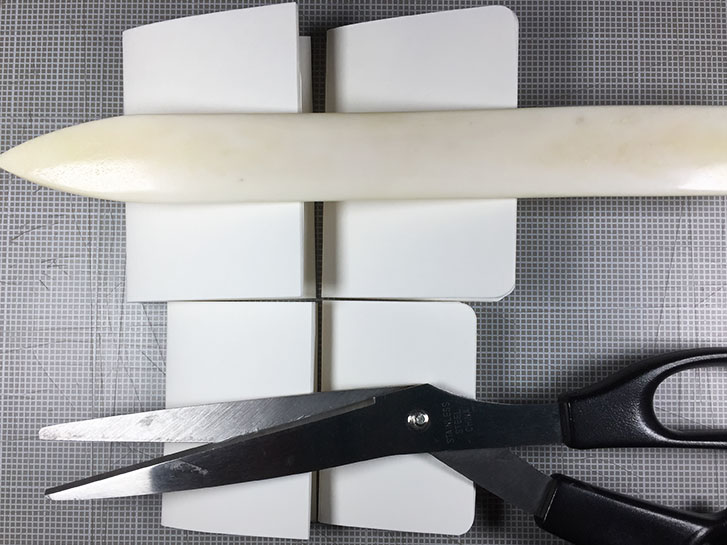
It’s time to fold your journals in half. The best way to do this is by standing them up straight and matching the top corner of the cover. When you do this, the pages will fan out a bit and extend beyond the cover. Press the spine edge to fold, but don’t fold all the way down.

Flip the book over and match up the bottom corners of the cover. Again, the inside pages will extend beyond the cover. Press the spine edge to mark the fold.
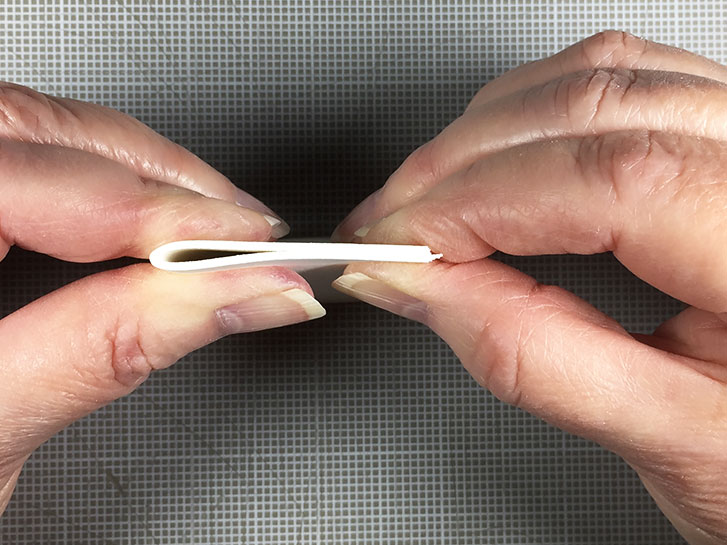
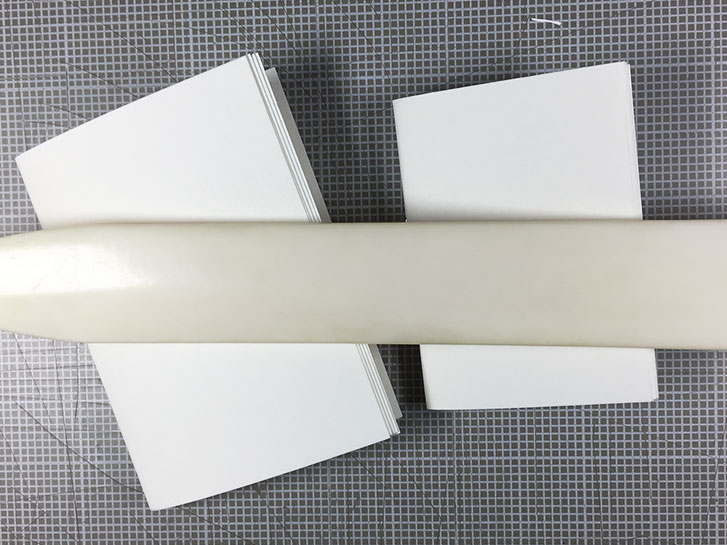
Place the book flat on your worktable and press the fold into the spine firmly with the spoon or bone folder.
Now, you can use your scissors to trim the inner pages back to match the covers.
If you want rounded corners on your journals, use the corner rounding punch on the corners of your pages.
Repeat with the second book.
Congratulations!
You now have two books that you can use for your first micro art journals. The larger book is right at the edge of what is allowed in the Micro Art Journal Facebook group. The smaller one is well within the size restrictions, but still big enough for some stamps, drawing and word art.
If you would like to join a group of fellow art journalists, follow along with these and other tutorials, and show off your work, you can find this and more in the Micro Art Journal group on Facebook!
#microart #microartjournal #miniatureartjournal #miniartjournal #miniatureart #tinyjournalnation #allthingstiny #allthingsminiature #microartjournaling #tinyartjournal #travelersnotebook