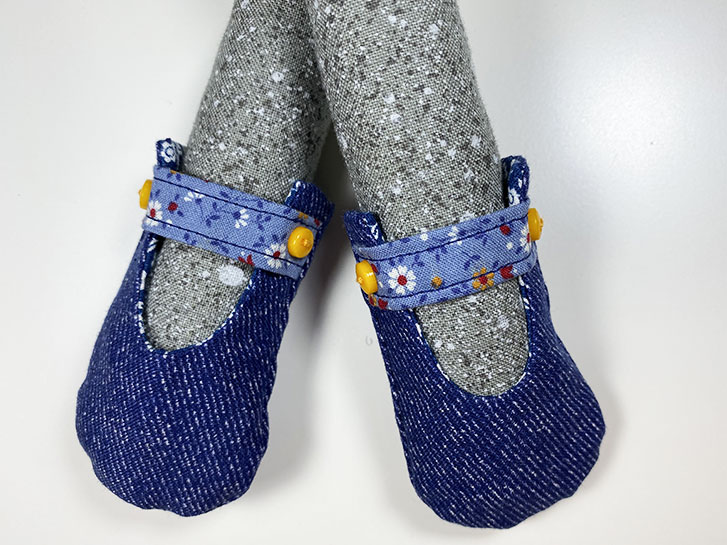
I wanted to create a pair of Mary Jane shoes to go with Tuna’s new outfit. The Tuna patterns do not include this style of shoe. However, the Scout & Ria pattern does. Actually, there are several different cute shoes in this pattern!
This style of shoe presents some particular complications for construction. It’s more than just a tube, sewn shut at one end. Between the size, the U-shape of the front piece and the limitations presented by your sewing machine, it can get very tricky.
After looking through the instructions, and trying a few tests, I realized that either, I didn’t understand the printed instructions or that there was probably another way to put these shoes together.
Here is what I did.
Note: LOTS of pictures ahead!
It’s a good idea to look at all these pictures and read the instructions before you start!
You could also print out these instructions and check them off as you go along.

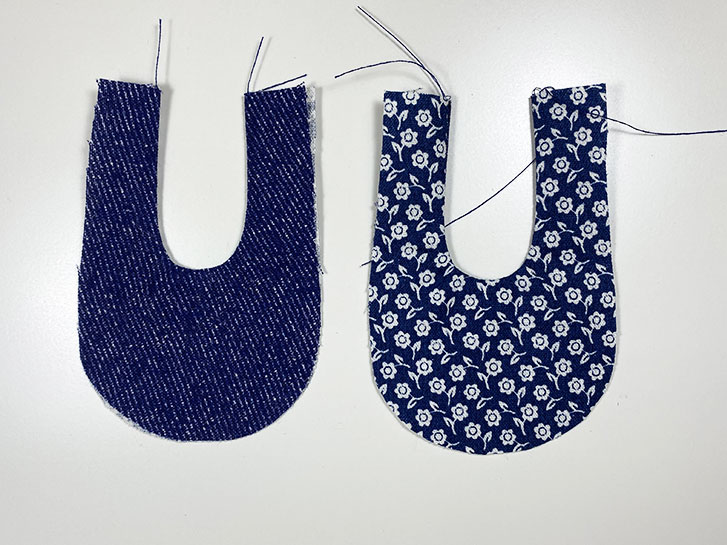
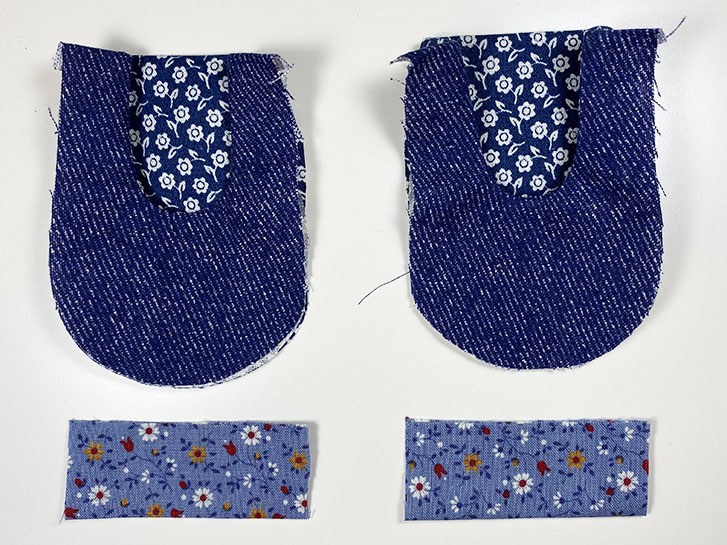
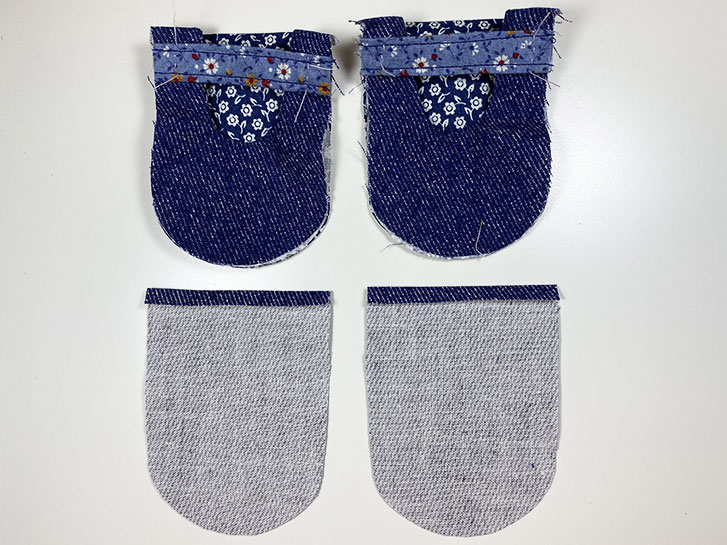
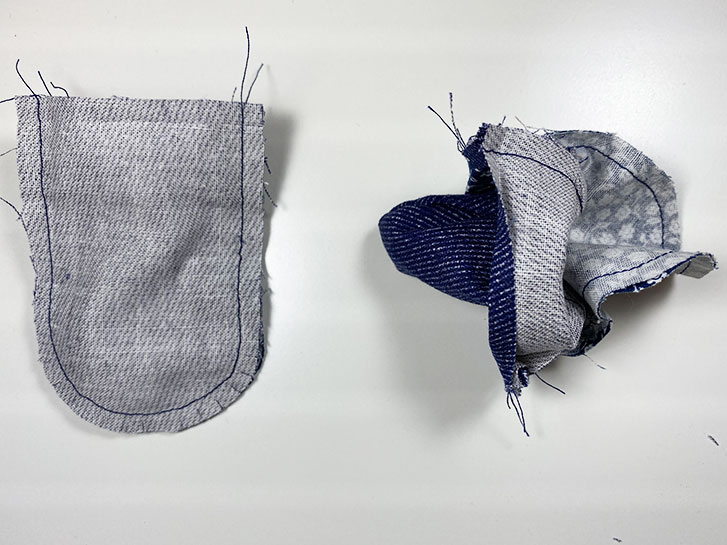
Cut out the pattern pieces as per the instructions: 2 Shoe Lining Backs, 2 Shoe Lining Fronts, 2 Shoe Backs, 2 Shoe Fronts, and 2 Straps.
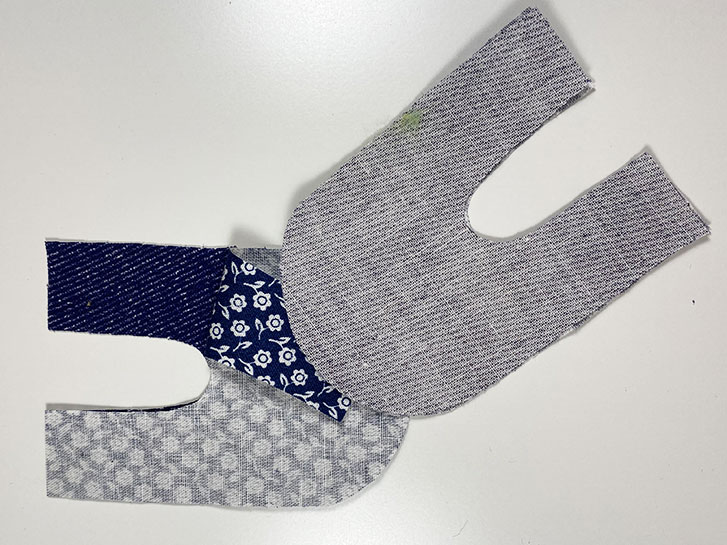
For each shoe, place the shoe top and the shoe top lining, right sides together. Pin them to keep them in place if necessary.
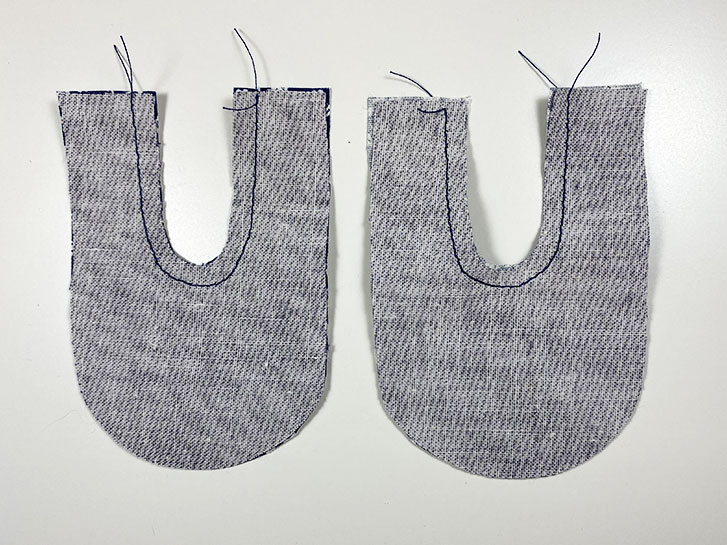
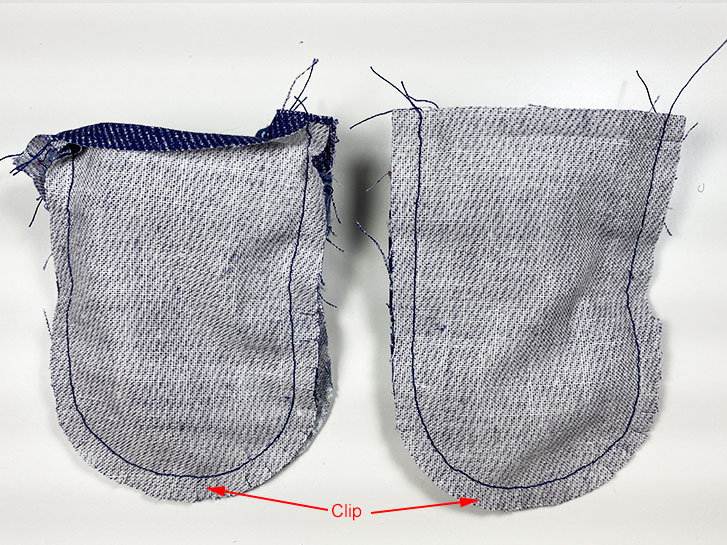
Stitch around the “U” shaped opening.
Clip the curved portions of the seam.
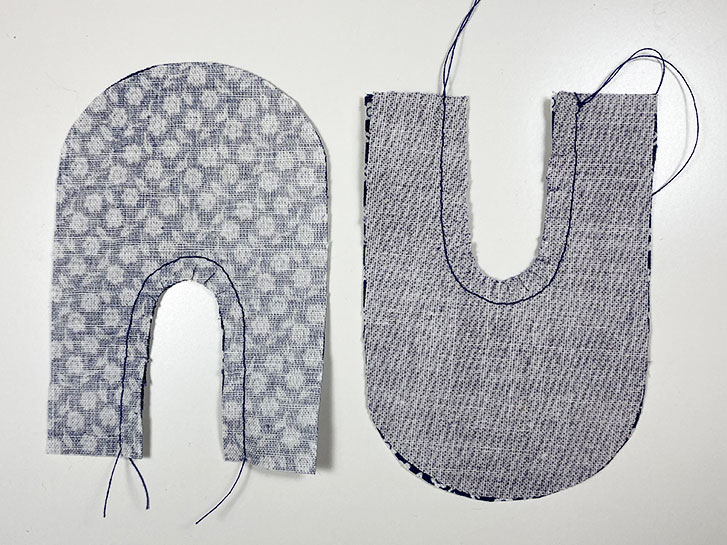
Turn to the right side and press.
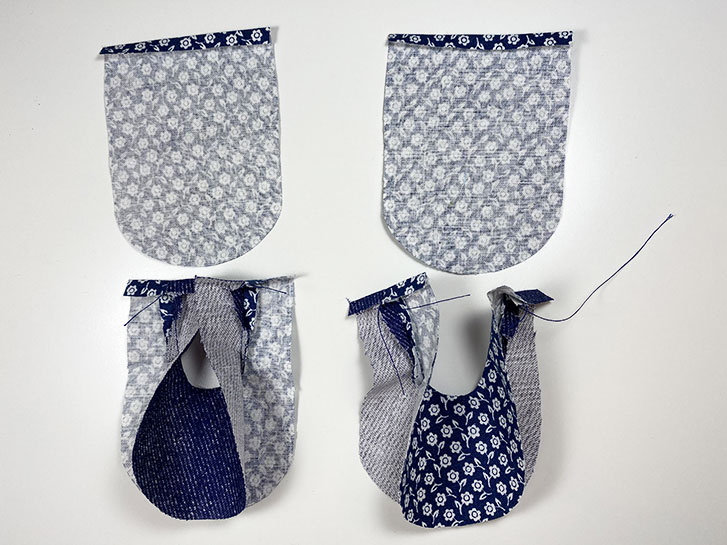
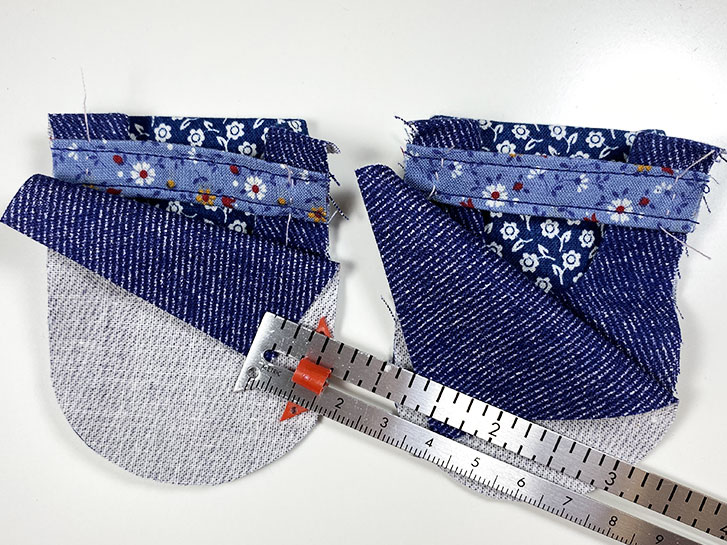
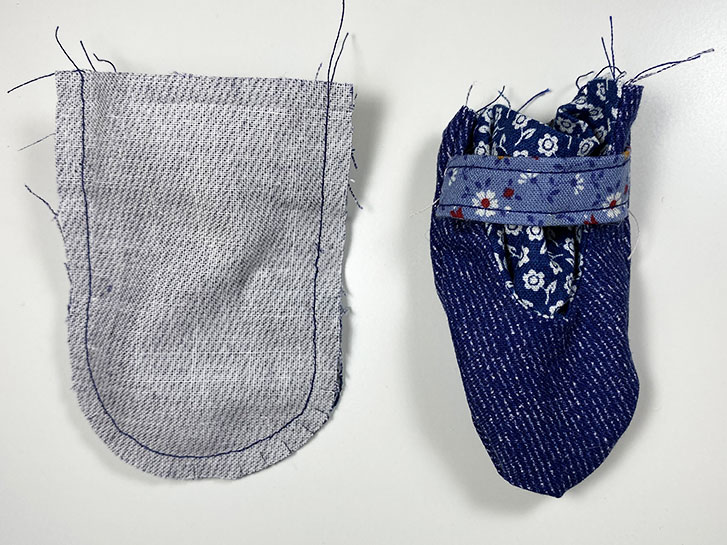
Next, turn under 5 mm along the top edge of the pieces you’ve just sewn and the shoe back lining pieces and iron the fold so it is creased. By doing this now, it will be easier to stitch this top edge later.
Set the shoe lining back on the table with the right side of the fabric facing up. Set the top of the shoe on the lining so that the two lining pieces are together. Fold up the shoe top and pin or clip it to hold it out of the way.
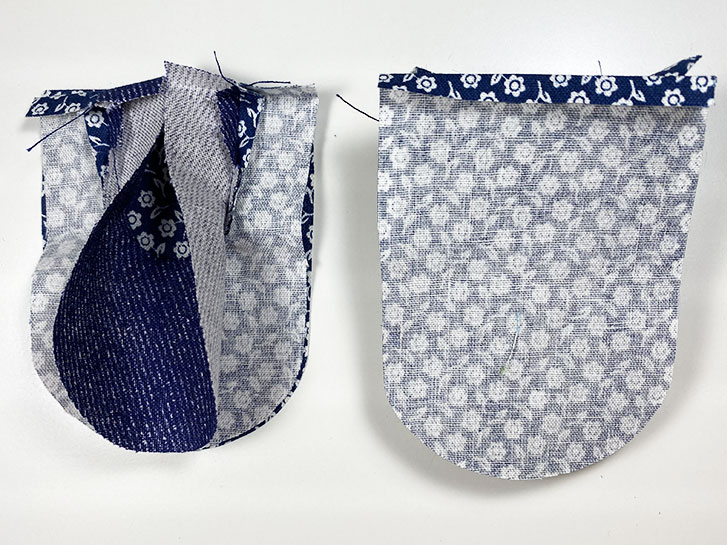
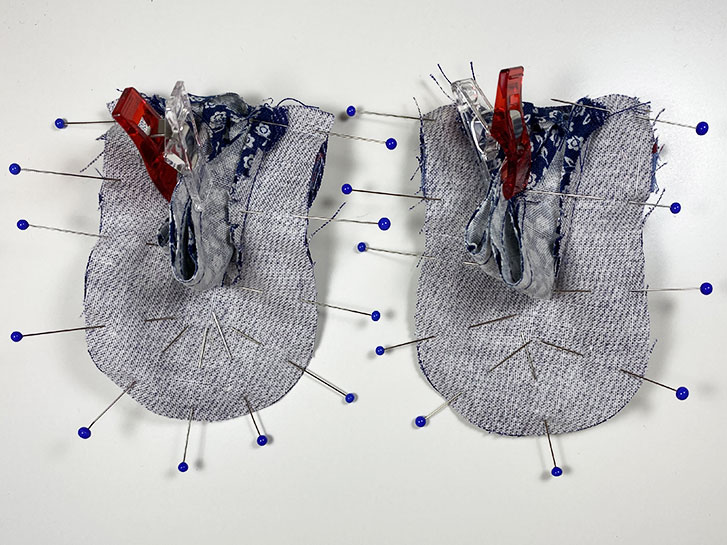
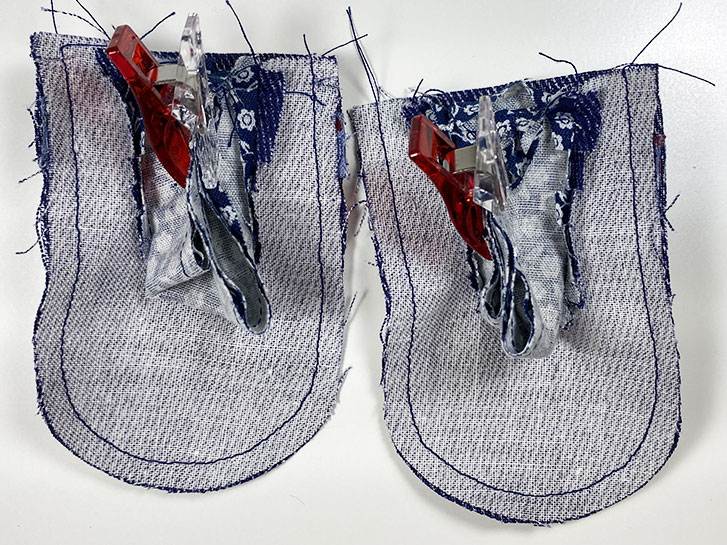
Unfold the top edges by the seams. Pin the shoe lining top to the shoe lining back. Double check to make sure you are putting the right sides together!

Stitch around the pinned pieces including the unfolded top edges. Turn the shoes over so the front side is on top.
Now is the time to decide how you want to handle the straps for your shoes. Traditionally, for Mary Jane style shoes, the strap is anchored at the inside side of the shoe and goes across the instep and then is fastened in some manner on the outside of the shoe.
I chose a different, easy to do, method for this particular pair.
You will want to read through the following, and decide if you want to try this, or perhaps only anchor one side. Your choice will affect how you, personally, will handle the next steps.
Fold the strap pieces in half along the long direction. Press to set.
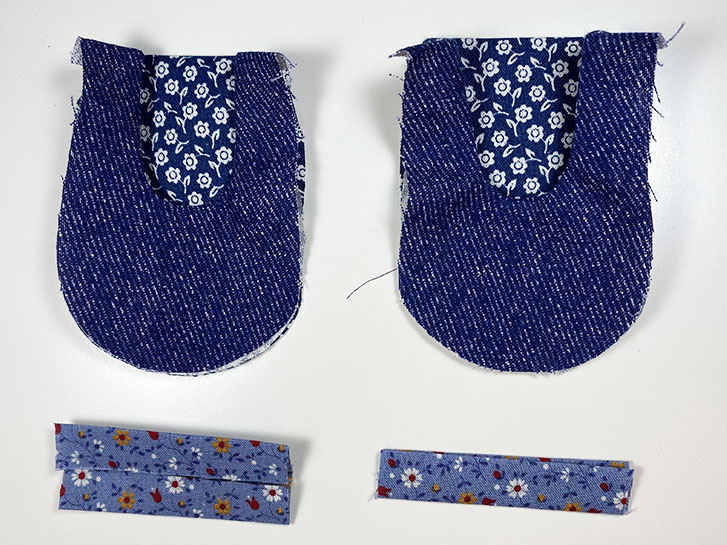
Fold each side in towards the center fold and press in place.
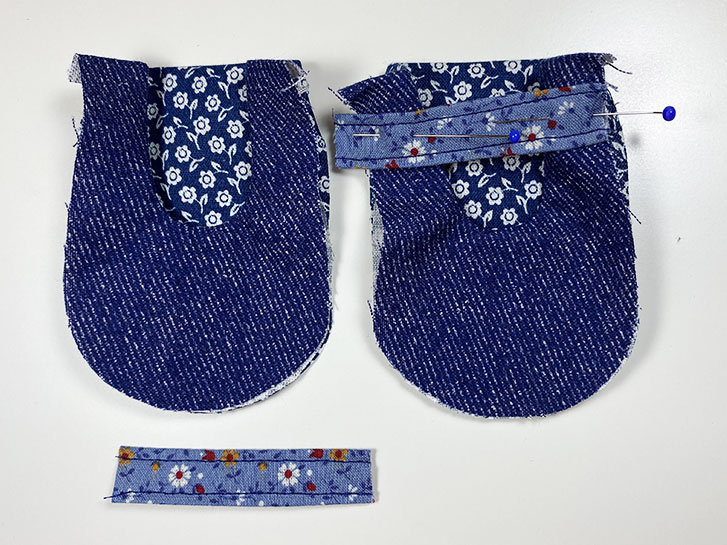
Stitch, close to both long edges for decoration and to anchor the folds. Pin the strap in place. For the method I used, I pinned the ends of the straps even with the edge of the fabric on both sides.
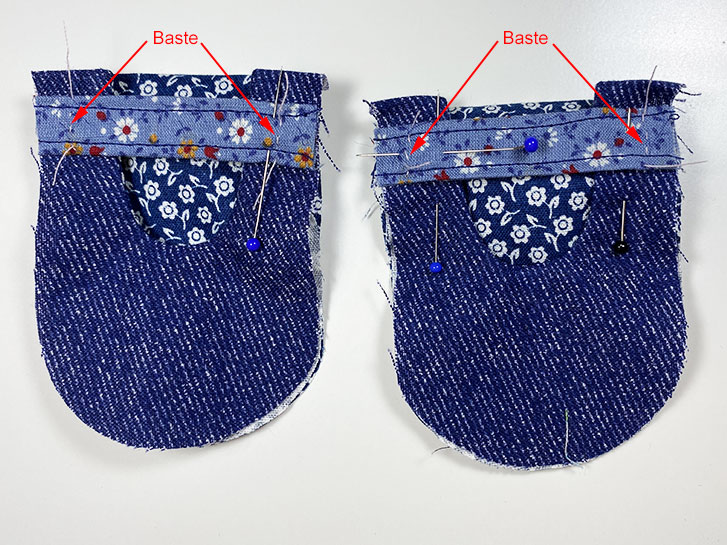
Baste the strap in place so there will be no pins between layers while stitching. Make sure your basting stitches are away from the edge so they do not get caught in the seams or top, folded over edge.
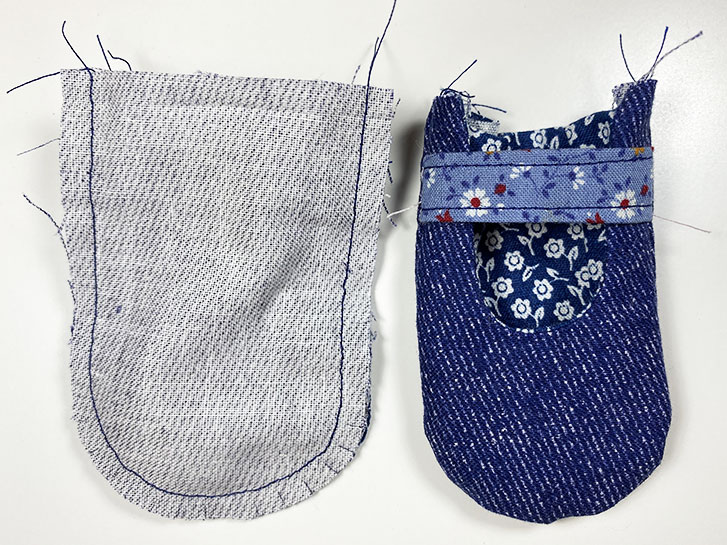
Fold down 5 mm along the top edge of the shoe backs. Iron along the fold. This will make it easier to finish the top edge later.
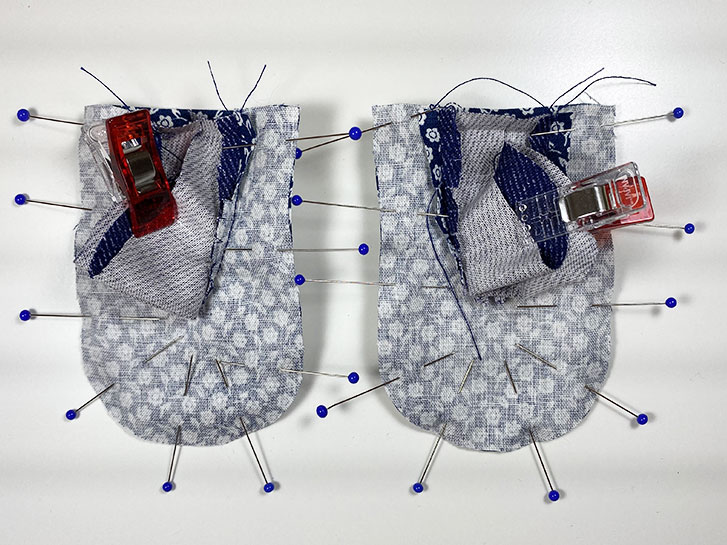
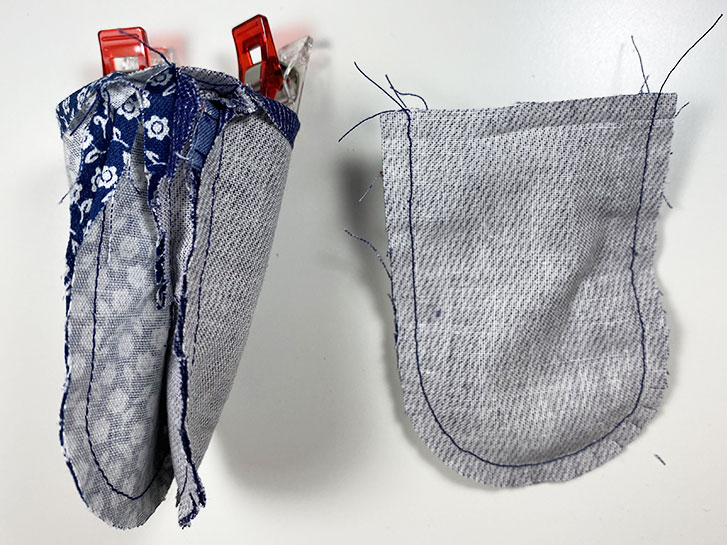
Place the shoe backs, face down on top of the shoe fronts. Flip the “shoe sandwich” over so the lining side is now up, facing you.
Gather up the lining, and hold it out of the way with a clip or pins. Pin the shoe front to the shoe back around the outside edge, including the unfolded top edges, to hold the two layers in place.
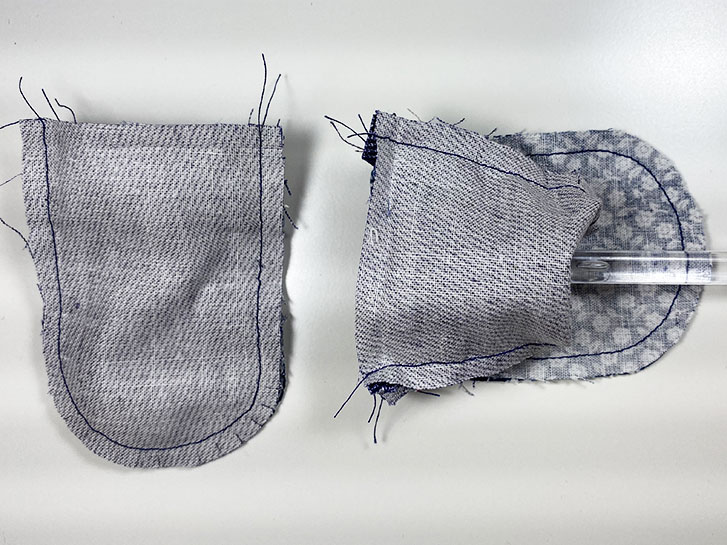
Stitch around the outside edge, including the unfolded top edge of the shoe.
Clip the curved portion of the shoe. Then you can remove the clip/pins that were holding the lining out of the way.
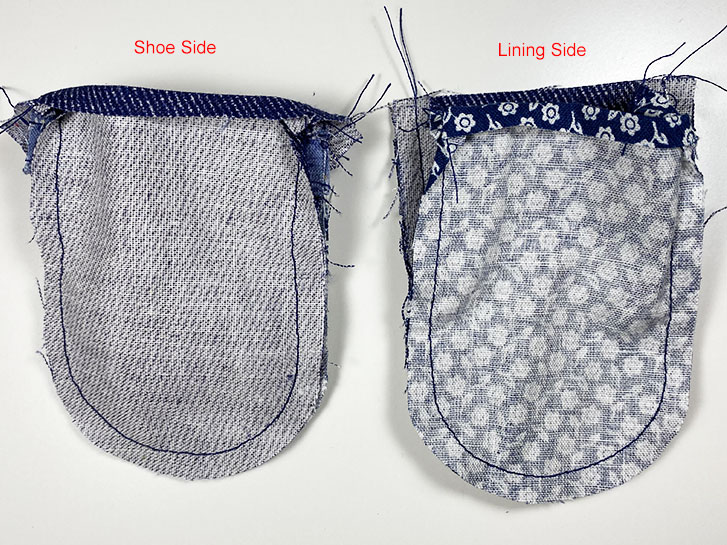
Now, when you look at the shoe, you will see a “shoe” side and a “lining” side.
The two sides are attached together around the “U” shape in the center of the top of the shoe.
You will need a pencil with an eraser, chop stick or other tool for this step. You’re going to turn the shoe inside out. Turn the shoe so that the shoe part is the top and the toe is facing your dominant hand. Use the tool to push in the toe of the shoe side towards the opposite side.
As you push gently, the toe will appear out the other side.

Now you can use your hands to turn the shoe completely to the right side.
When you have it turned all the way, you may have to flip the strap to the correct side.
Continue manipulating the shoe until it is completely turned out, with the lining in position inside the shoe.
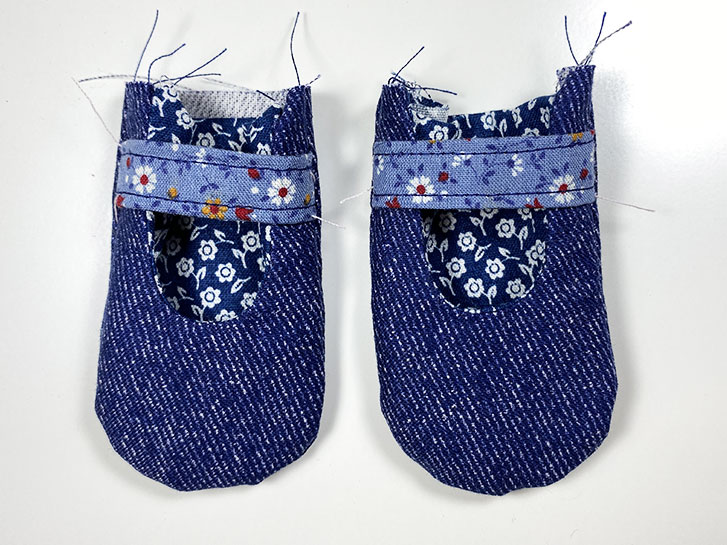
Repeat this process with the other shoe.
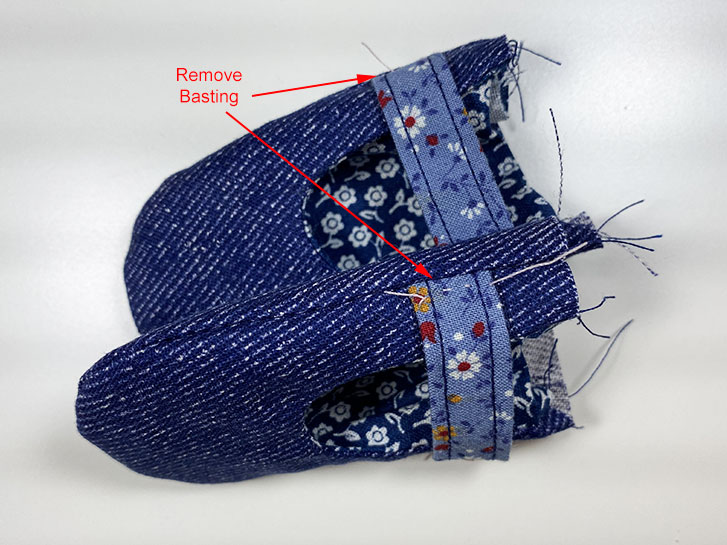
Now you can remove the basting stitches on the strap.
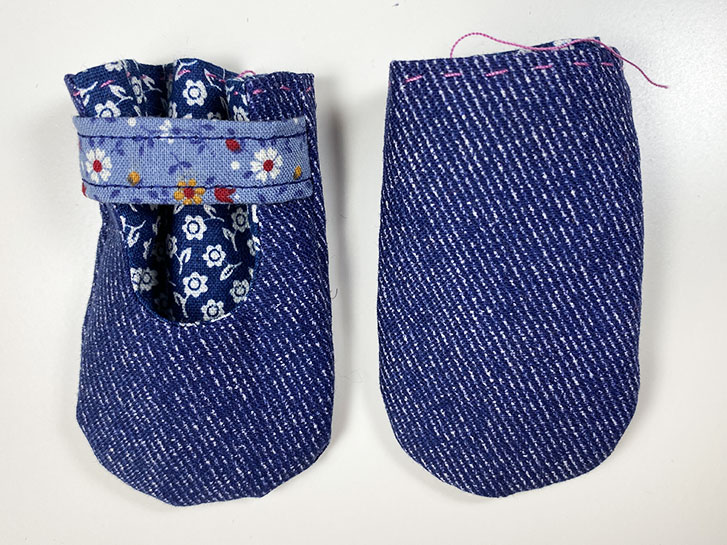
Turn under the top edge of the shoe and lining along the previous pressing line. Baste in place.
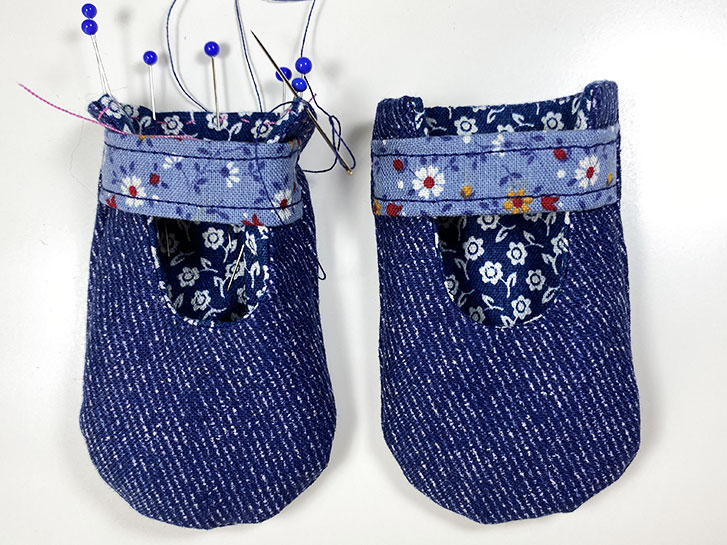
Pin the lining to the shoe, matching up seams and the top edge. Use a needle and matching thread to stitch the lining to the shoe along the top edge.
Remove the basting stitches.
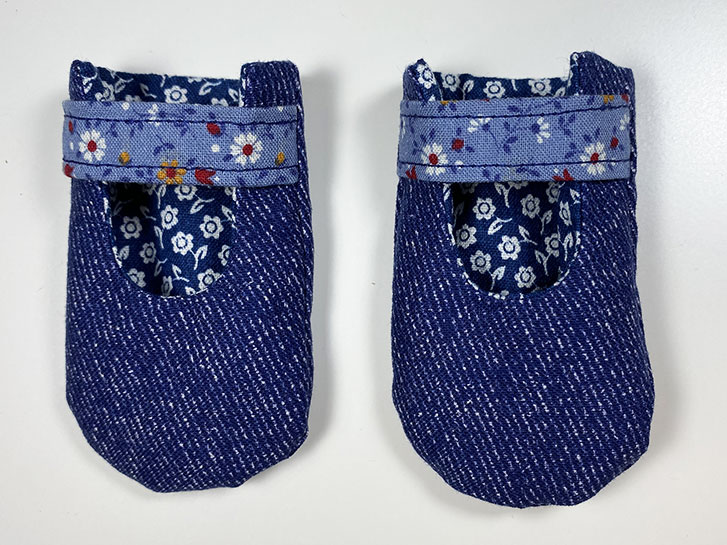
To finish the shoes, sew a button in place along each side of the strap. Or, if you’ve chosen another strap concept, finish your straps in the chosen manner.
Conclusion
This seems like a lot of steps, or that it might be hard or time consuming. It’s not. These actually go very quickly. The explanation is much longer than the execution. Now that you know how, you can make bunches of these very quickly so your doll can have new shoes with every outfit!
#artdoll #catdoll #dressupdoll #sewing #koalaandmilapatterns