Random tangles, no string.
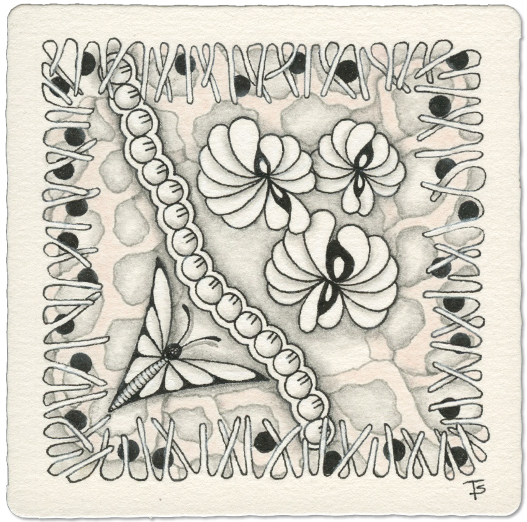
The first tangle selected was Bumper, and I immediately used it as a frame.
The next three tangles were Butria, Centepede and Kiss. I liked that combination. I added the Centepede first to break up the center of the tile. Next, the three Kisses were grouped together, slightly overlapping to fill the larger, right-hand space. A single Butria was added in the lower left to anchor the center elements.
The final tangle was Vertibraid. How would I incorporate it? For a while, I didn’t see how it was going to fit into this overall design! I finally decided to use it as a background. I also grabbed a light gray Micron, in case I hated it. I thought I might be able to cover it up somehow if I didn’t like it.
For the shading, I started with the Centepede. I already knew that shading heavily around the outside really makes it pop up off the tile.
I still really didn’t like the Vertibraid. I had to make a critical decision at this point. I had to do something radical, and used a light tan pastel pencil to color all of the solid parts of this tangle. That slight bit of contrast made a huge, totally unexpected difference. It doesn’t jump off the tile and yell, but it also seperates it from the background enough that it adds a bit of interest!
After shading everything carefully and adding white chalk highlights, I’m now happy with this!
I hope my process helps you if you run into a situation where you don’t like something on your tile… take a leap and embrace it! You never know what will happen!
Zentangle drawn on a Standard, white Zentangle tile using a black and a light grey, Micron pen. Shading done with graphite pencil. Highlights created with a white chalk pencil.
#drawing #tile #zentangle #tangling