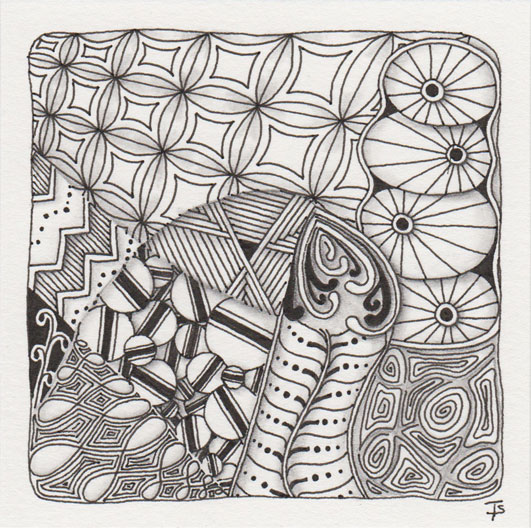
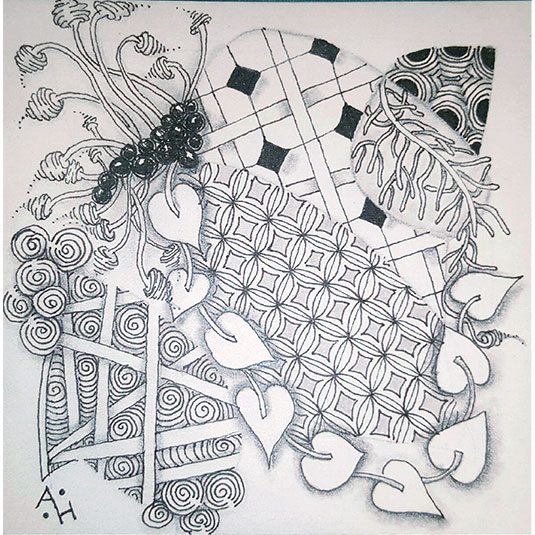
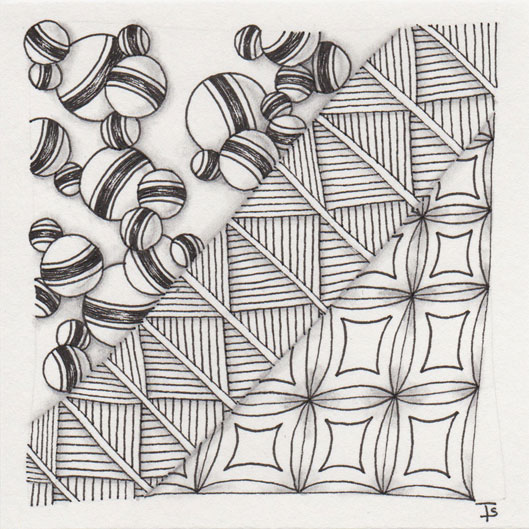
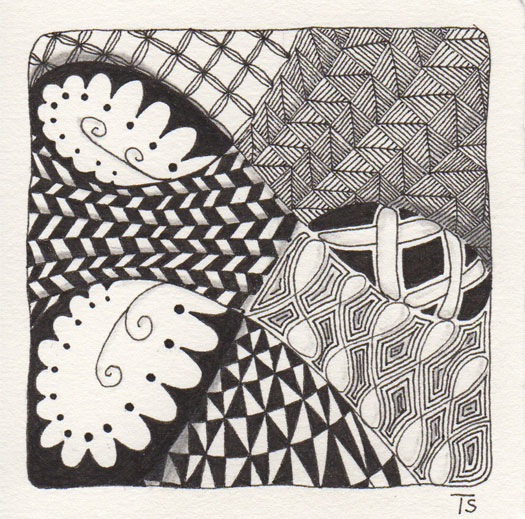
Jumble.
Others always wondered at how so much cargo could come out of such a tiny ship. They just didn’t understand. She’d captured so many universes in her travels. And now she could store infinite amounts in each one. All she had to do is make sure they traveled together!
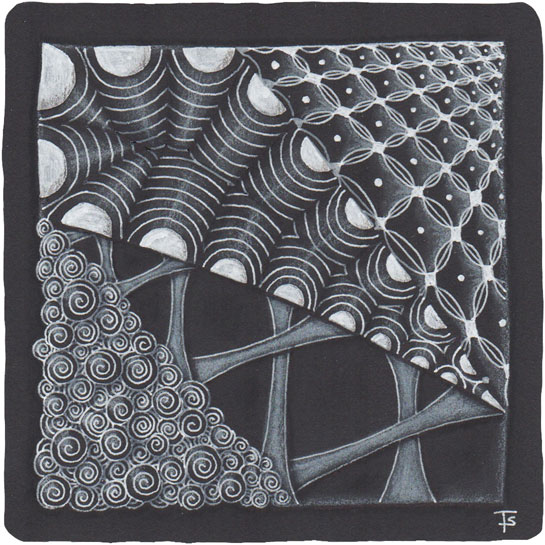
It has always fascinated me how shading opens up, raises, or pushes back sections of tangles on a tile. Here, this crazy combination took on all kinds of dimension just from shading various edges. Don’t skip shading your tiles. It’s as interesting and meditative as the drawing!
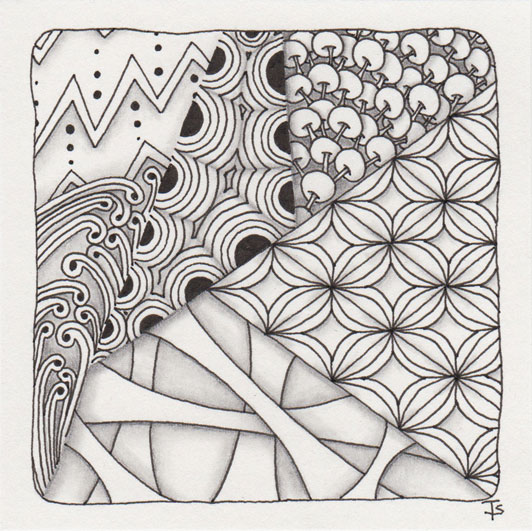
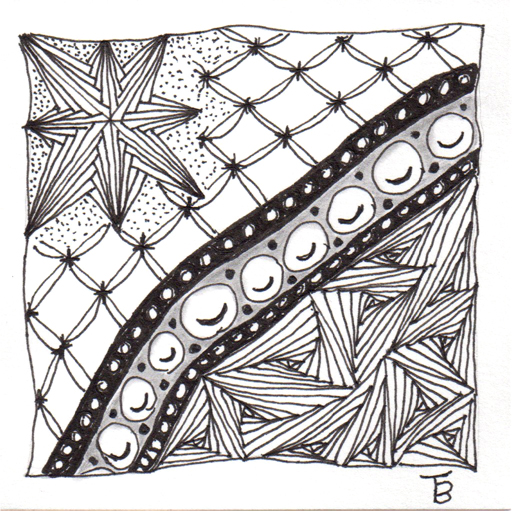
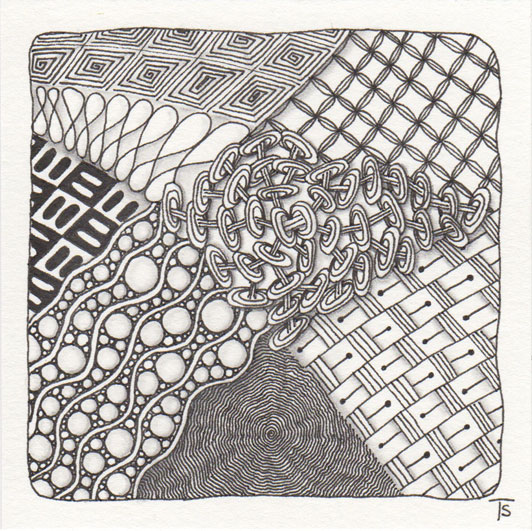
Tradition.
We all enjoy learning new things, pushing boundaries and growing in our art. But we shouldn’t forget where we came from in the process.
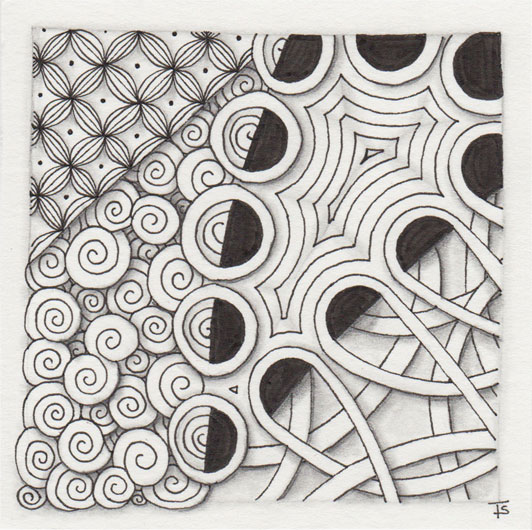
To keep with the original tradition of Zentangle, I have used the die and legend that came with my new Zentangle Kit to select the tangles that I used for this tile. I chose them one at a time, filling in a section before rolling for the next. I went around clockwise, starting with Bales. I think it’s fascinating how everything fits together and looks good without having to think much or labor over what to use where. That is what makes this type of tangling a very meditative experience.
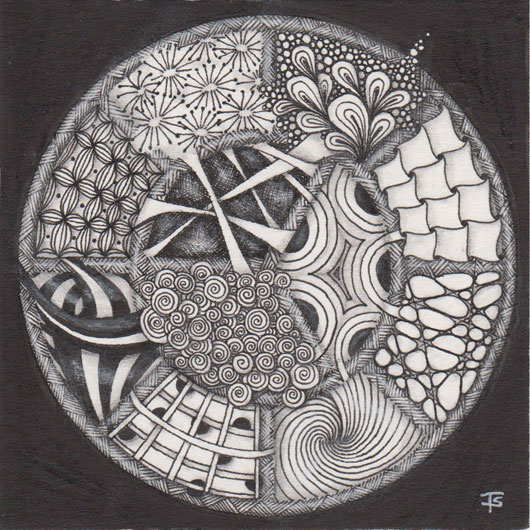
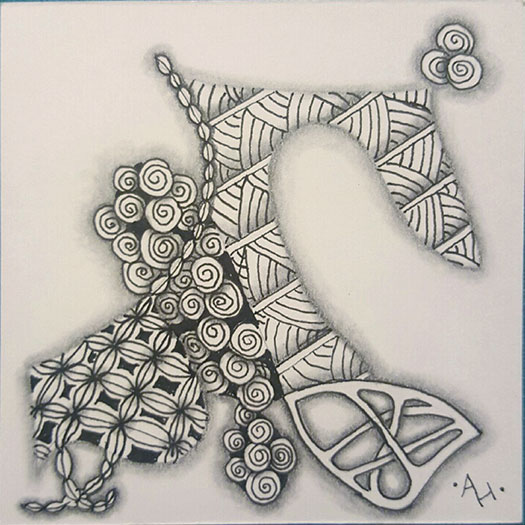
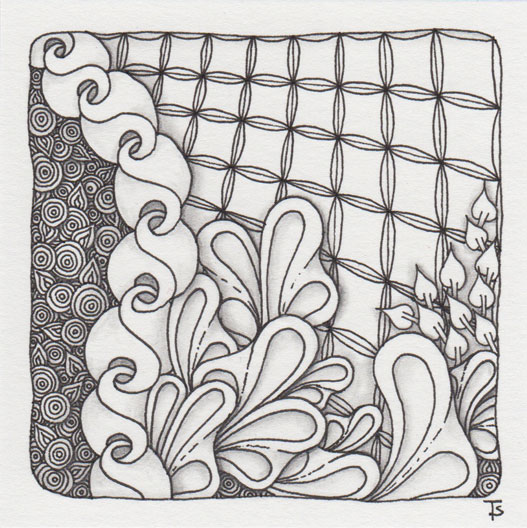
Palette.
Her basket was full of magical designs just waiting to be added to a frock or a cushion. Some plain, some fancy, some simple, some complex, woven together they created a magical mixture for the customers to choose from.
The basic string for this Zentangle came from the Tangler's Palette" stencils from Acadia Laser Creations on Etsy. I wanted this set of stencils as soon as I saw them. They offer so many different possibilites for creative play!
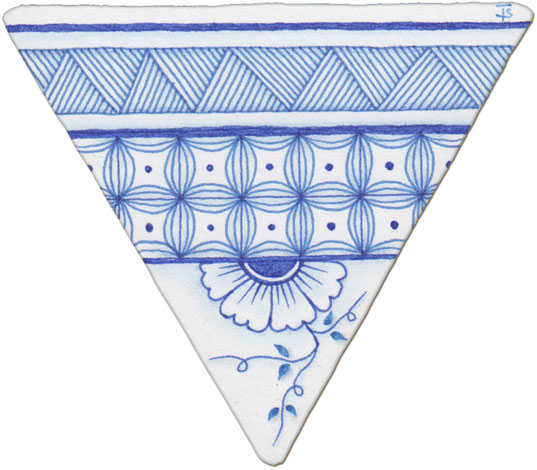
I decided to try the Delft Delights techniques on a 3Z-sized tile, thinking it would look a bit like a pottery shard. I also did a bit of research into patterns used on Delftware, so that I could find tangles that corresponded. The ones shown here I actually found on examples on the internet!
Zentangle drawn on 3Z-sized Strathmore Vellum Bristol using blue Zig and Staedtler markers. Shading done with colored pencils.
If you saw my New Year's post , then you know that I have challenged myself to work on black tiles more frequently this year. I want to develop techniques and find the materials that work for me. For that reason, for every challenge or lesson from Eni or any other artist, I am making a black tile for the theme as well as a normal one.
To that end, this is my black tile from Eni’s Zentangle Basics lesson. for this one, instead of charcoal, I tried using a white, colored pencil to do the highlighting. I found that it would actually move and blend, somewhat, with a clean stump. I do wish it was a brighter white where it was applied the heaviest, though. I will need to keep experimenting!
The newest Art Club video from Eni Oken's Art Club is a lesson on Zentangle Basics . Almost everyone, when they take their first Zentangle lesson from a CZT, creates a basic tile, using certain tangles that illustrate what Zentangle is all about. Eni’s video is no different, (after all, she IS a Certified Zentangle Teacher!) This is the tile I created while watching the video.
I’ve been tangling now for many years. My first actual tiles are dated 2010, but I was tangling before that in my sketchbook. If you go to the Zentangle Gallery page, by clicking on the link here or at the top, right of this page, I bet you will recognize more tiles that are based on the beginner’s instructions. This is the sixth tile to be added to the collection. Can you find them all?
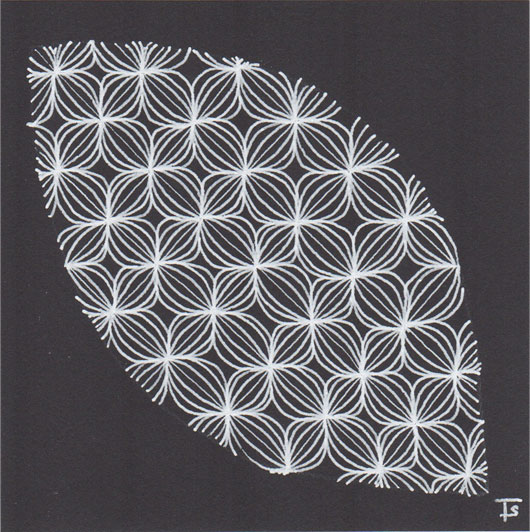
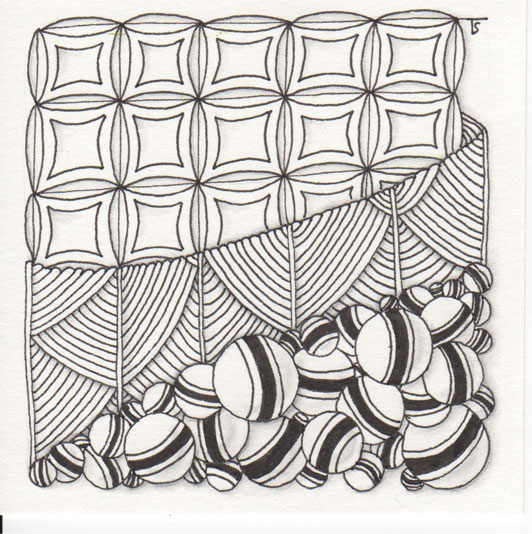
This is the fourth exercise from Project Pack 1. It is a second version of Bales. This tile is very, very simple. It’s all about the added lines transforming the regular seed shape found in the tangle into something beyond itself by repeating the strokes to fill in the centers.
It was fun and very calming to draw this Zentangle. But I feel it is just so plain, compared to what I normally draw!
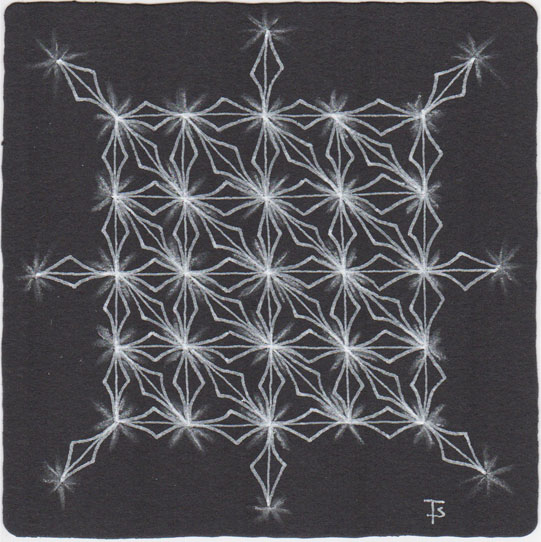
This is another exercise from Project Pack 1. This time, we’re drawing a variation of Bales on a black tile. You can watch Martha create this version here .
The differences between mine and the video are that I used the narrowest Gelly Roll to draw the grid lines, and then the 08 to draw the diamonds. I also chose to use the white pastel a bit differently. I drew small lines radiating between the lines at the intersections. Then I use my tortillon to lightly draw across the lines. This gave more of a “starlight” or “twinkling” effect which I liked much better.
From the Zentangle Primer: Lesson 3, page 55, Exercise #8. For this string exercise we were to go “beyond the string,” and push past boundaries.
I think Amanda did a fantastic job, compared to her original string, which you can see below! I love the way her Pokeleaf meandered around part of the string and then went up and joined into the Verdigogh at the upper right!
Amanda’s talent and distinctive style is slowly emerging with each exercise that she does!
Dementia is a terrible thing. It steals a person’s mind a little bit at a time… for a long time.
This Zentangle was created by my Mother-in-Law for my birthday in 2010. I was tangling with her very often, teaching her various tangles and techniques. I thought it would be good for her. She had had a heart attack and quadruple bypass surgery. She was on a lot of medication. I thought that tangling would help her by lowering her blood pressure and taking her mind off of her problems.

Christmas market.
She loved this time of year. Even the cold weather didn’t bother her. There were so many things to choose from: exotic fabrics and trims, fancy jewelry and decorations, beautiful baskets and ceramics. Even the colorful awnings and tents brought her joy!
Zentangle drawn on Strathmore Vellum Bristol using a black, Micron pen. Shading done with graphite pencil.
Tangles: Bales Criss & Cross Dyon Huggins Mooka Quipple Sez Shard Striping Tidings
From the Zentangle Primer: Lesson 3, page 55, Exercise #7.
In this lesson, we are learning about strings. For the first exercise, we are supposed to combine two (or more) sections of our string together to form a new section that is better suited for the tangle we want to use.
Here is what Amanda’s original string looked like, so you can compare it with her finished Zentangle above.
From the Zentangle Primer: Lesson 2, page 45, Exercise 4.
For this exercise, we were to use all the same tangles: Shattuck, Jetties and Bales, but use different shading.
I think Amanda (above) did a fantastic job with this tile! I love that she used several tanglations: Bales, Hollibaugh, Florz, and Jetties! My favorite is her version of Bales. It has so much depth to it now!
My artwork is above. I mixed Bales and Florz togther for my background, and pillow-shaded each floret in the design. I had a lot of fun with Jetties. I decided to treat them more like beads, and made each one different, although a few original Jetties snuck in on their own. I’ve drawn Shattuck many times, this is the first time I’ve added perfs to them.
From the Zentangle Primer: Lesson 2, page 36.
In this chapter, we are learning three new tangles: Bales, Jetties and Shattuck.
For the first tile in this chapter, there are step-by-step instructions that tell you where to put each tangle and how to draw and shade it.
I did make a few choices like drawing straight instead of curved lines for the Shattuck, and I chose to overlap my Jetties, rather than make them all touching. However, I did try to follow the shading instructions as exactly as I could.
New.
This Zentangle incorporates two new tangles that I haven’t done before: Pixioze and Kwazeela. The first one is on the far left, Pixioze, and was created by Margaret Bremner. You can find out all about it here . The second one, Kwazeela, is from Eni Oken. You can read about it here . In addition, Eni has created a Zentangle incorporating both of these that you can see here .
Zentangle drawn on Strathmore Vellum Bristol using a black, Micron pen. Shading done with graphite pencil.
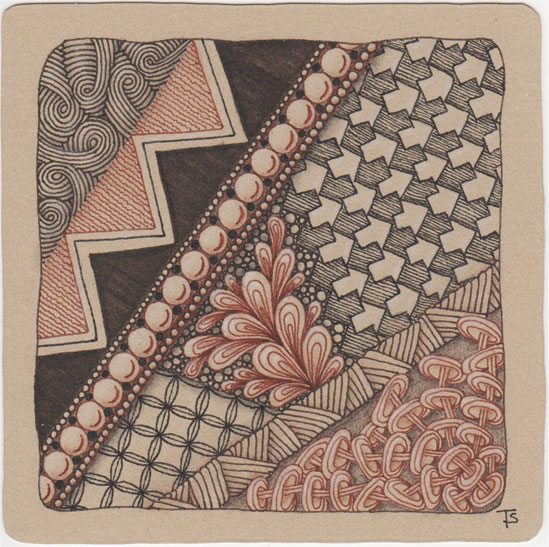
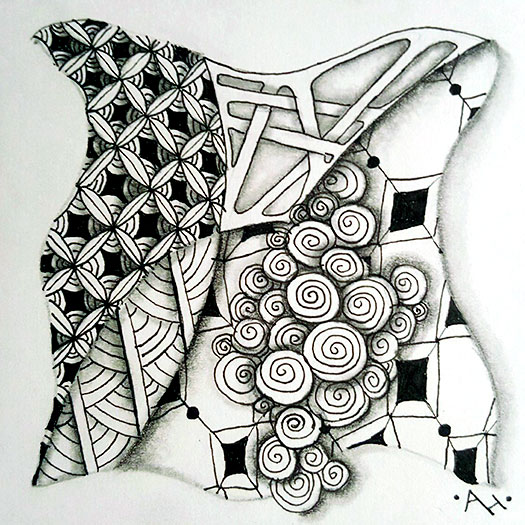
Graphic.
I love this paper! Using a tan paper allows me to add both high and low lights to the various designs. In addition, this combination produces a very graphic effect.
I bought a large sheet of this paper for a few dollars and cut out my own “tiles. This makes using the paper very affordable.
Zentangle drawn on BFK Rives tan print making paper using brown, sepia and black Micron pens. Shading done with Polychromos and Crayola colored pencils.
Land of two suns.
Whenever I look at this tile, I see plants growing on an alien earth; a planet with two suns.
Zentangle drawn on Strathmore Bristol Vellum using a black Micron pen.
Tangles: Bales Betweed Eke Evoke Pepper Warble XYP
Flutter.
To me, the two sections with the Queen‘s Crown in them remind me of butterfly wings. I think of them every time I see it.
Zentangle drawn on Official Zentangle tile using a black, Micron pen.
Tangles: Bales Chard Echoism Jonqal Pinwheels Queen‘s Crown Vega
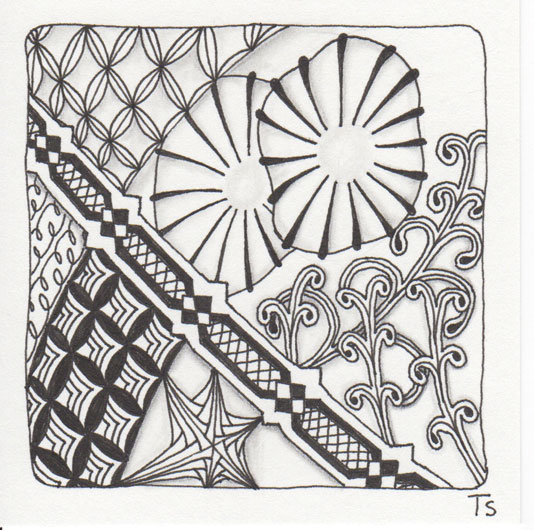
Drive by.
I think the Wheelz are out for a spin in the countryside. They‘ve driven by apartments, farms, a mountain and a river!
Zentangle drawn on Strathmore Vellum Bristol using a black, Micron pen.
Tangles: Apollonian Waves Bales Emingle Flutter Footprints Jalousie Kitl Wheelz
Lesson 2.
This is the tile I drew from the instructions in the second chapter in the Zentangle Primer. I‘m not sure that I like Bales, but I tried a different way of shading it on this tile. I‘m also trying to draw my tangles larger, so it felt different to draw the grid this large.
Zentangle drawn on Strathmore Vellum Bristol using a black, Micron pen.
Tangles: Bales Jetties Shattuck