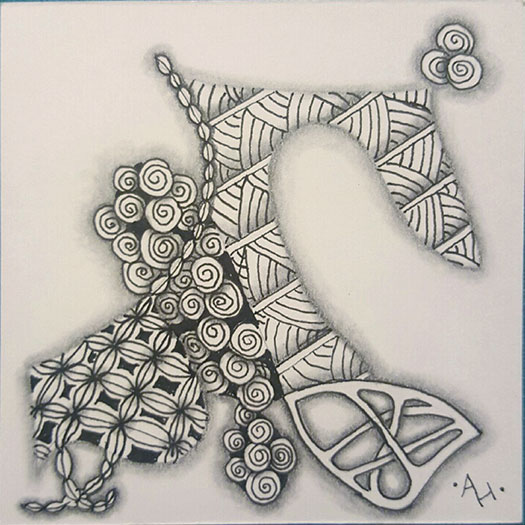
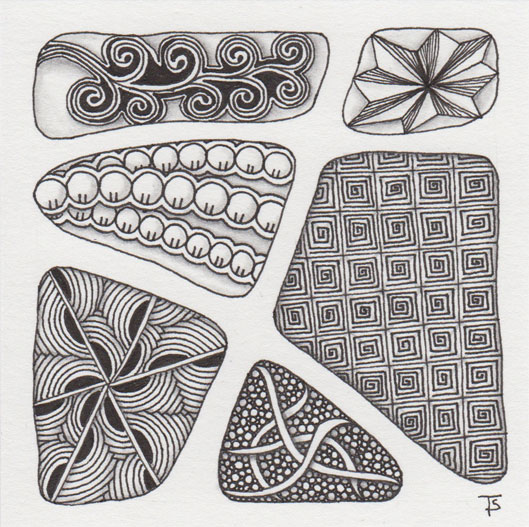
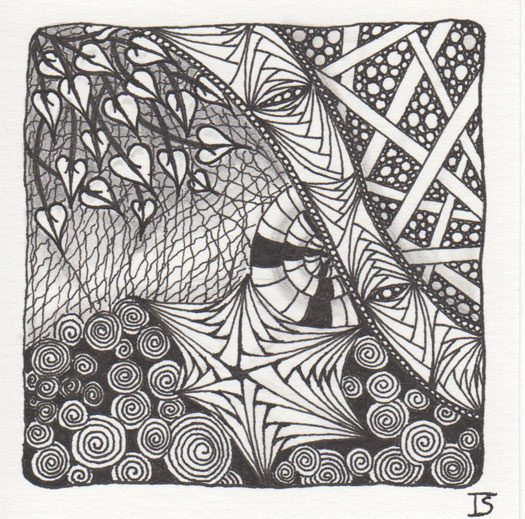
From the Zentangle Primer: Lesson 3, page 55, Exercise #7.
In this lesson, we are learning about strings. For the first exercise, we are supposed to combine two (or more) sections of our string together to form a new section that is better suited for the tangle we want to use.
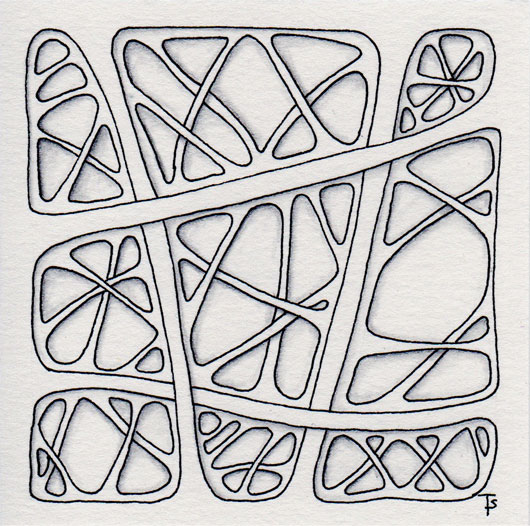
Here is what Amanda’s original string looked like, so you can compare it with her finished Zentangle above.
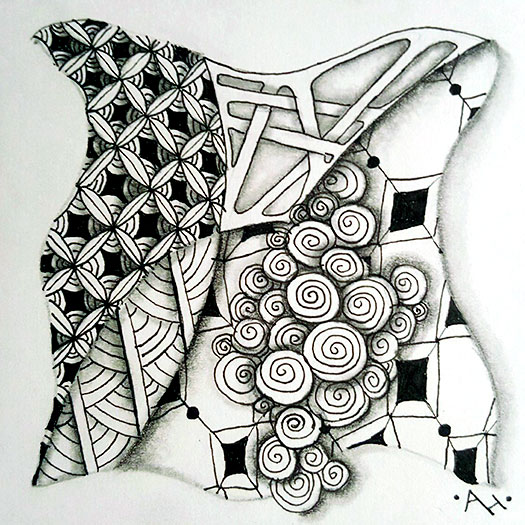
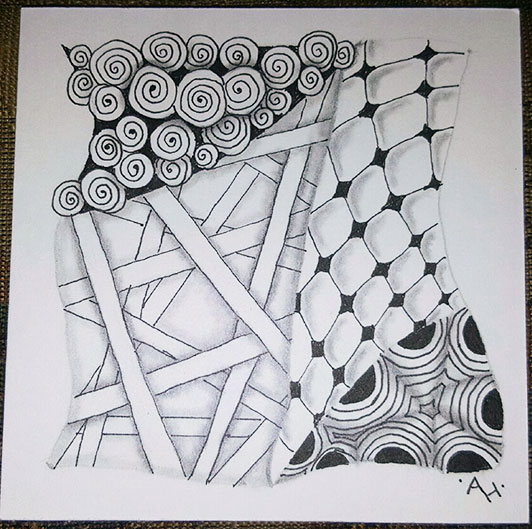
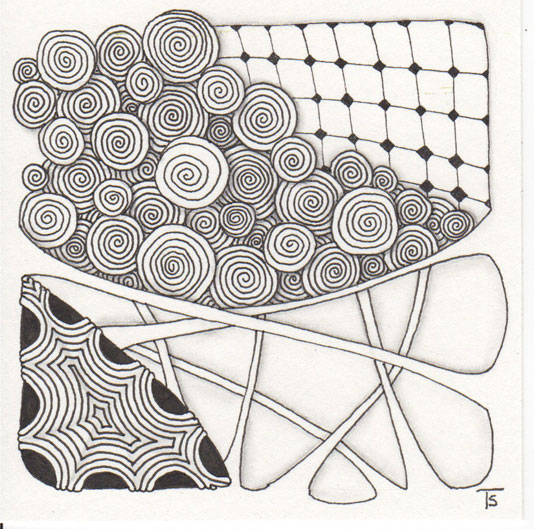
From the Zentangle Primer: Lesson 2, page 45, Exercise 4.
For this exercise, we were to use all the same tangles: Shattuck, Jetties and Bales, but use different shading.
I think Amanda (above) did a fantastic job with this tile! I love that she used several tanglations: Bales, Hollibaugh, Florz, and Jetties! My favorite is her version of Bales. It has so much depth to it now!
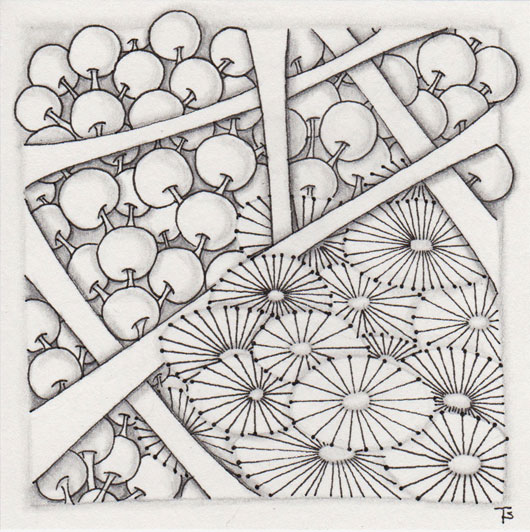
My artwork is above. I mixed Bales and Florz togther for my background, and pillow-shaded each floret in the design. I had a lot of fun with Jetties. I decided to treat them more like beads, and made each one different, although a few original Jetties snuck in on their own. I’ve drawn Shattuck many times, this is the first time I’ve added perfs to them.
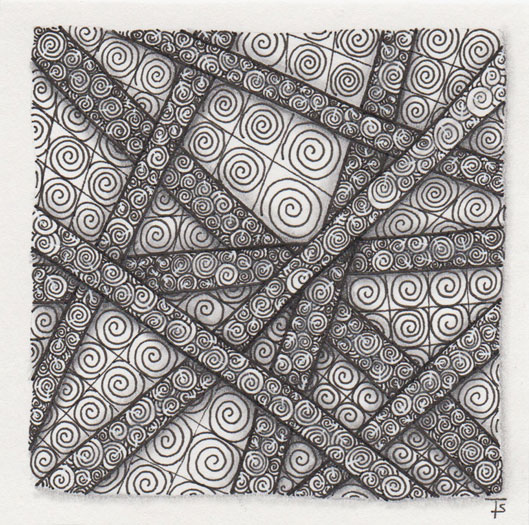
From the Zentangle Primer: Exercise 2, page 33.
For this tile, we were told to select two tangles and to alter or combine them to create a new tanglation.
I chose to use Printemps and used it to create the strips for Hollibaugh. This ended up presenting a challenge, because it was difficult to distinguish edges where the strips crossed over each other. I ended up outlining each strip with a wider-nibbed pen to create stronger edges.

From the Zentangle Primer: Exercise 1, page 33.
For this exercise, we each had to create a Zentangle using the same tangles as the first. However, we were to shade them differently.
Amanda’s artwork is above. You can see how she shaded around the outside of the central bobble which makes it appear more like it is floating above the tile. She also altered Printemps from her original style. This version gives it a lot more drama and depth.
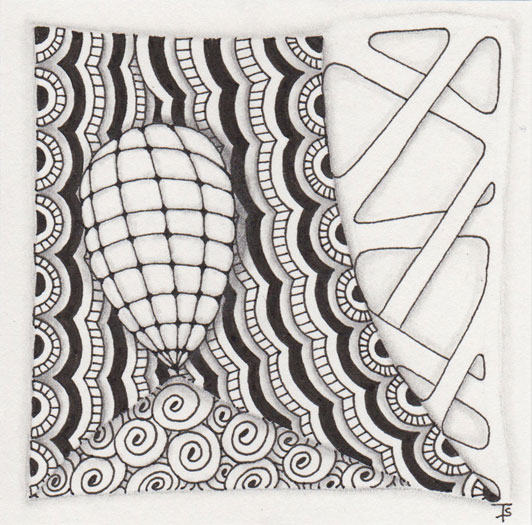
From the Zentangle Primer: Exercise 1, page 33.
For this exercise, we were to create another Zentangle, using the same four tangles as the first tile. However, this time, we were instructed to shade each tangle differently.
In addition to changing the shading, I also changed the style of each of the tangles. I chose to wrap Florz around a bobble and give it more of a 3D, or dimensional feel. I took a lot of creative license with Cresent Moon, adding more details and treating it more like ruffles. I normally draw Printemps fairly small, but here, I tried to make it much larger than I normally do. And for Hollibaugh, I rounded out the areas where the strips ran into the border.
Halloween.
All the goodies were ready, filling the bowl, nestled into the spider’s web. She waited on a bench by the door with the bowl in her lap. Would they come, dressed in outlandish garb? Or would they dance in the light of the fire and simply ignore her?
This is a very simple tile, with only three tangles. But by overlapping and allowing various parts to grow outside of boundaries, the tangles take on a life of their own.
The Zentangle Primer.
Our group has changed books. We originally wanted to use the Zentangle Primer , but we had to wait because Amanda did not have a copy. So, while we were waiting for hers to arrive, we have been using the One Zentangle a Day book. Amanda received her Primer on Saturday, so we have both been reading/rereading the Primer. Today’s post is from the Primer, Lesson 1, Your First Tile.
Portals.
The window was made of many openings. As she looked through each portal, she wondered why it was different from the others. What were those strange patterns. What kind of life forms were there. So many questions in need of answers.
I love this form of Hollibaugh, using rounding to create graceful openings between the crossed bars.
Zentangle drawn on Strathmore Vellum Bristol using a black, Micron pen. Shading done with graphite pencil.
Portals.
So many choices. Where will they all lead. Some appear to be places with natural growth and others more rigid, enclosed. So many choices.
Zentangle drawn on Strathmore Vellum Bristol using a black, Micron pen. Shading done with graphite pencil.
Tangles: Bucky Drupe Evoke Fescu Frondous Hollibaugh Sedgling Stoic Ticings Tortuca Vega
Sticks.
Do you know what a Talking Stick is? It comes to us from the Native American Traditions. It was a decorated stick that was used during group council meetings. Whomever was holding the stick had the floor, and was the speaker. They were the only person allowed to talk and could continue until they relinquished control of the stick. As I was drawing these bars decorated with Scute, they kept reminding me of talking sticks!
Inside.
It was interesting and fun to draw more Hollibaugh inside the original version. I like the way it ended up looking a bit like stained glass or wood carvings.
Zentangle drawn on Strathmore Vellum Bristol using a black, Micron pen. Shading done with graphite pencil.
Tangles: Hollibaugh
Ca-Ray-Zee!
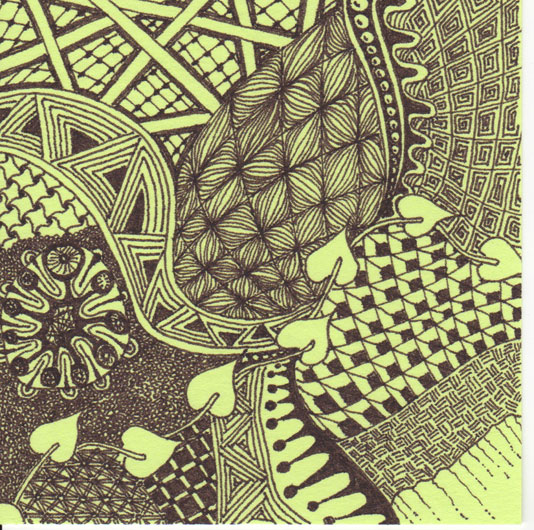
Ok, this is old, and I don‘t remember what I was trying here, other than to try tangling on a colored background with a different colored pen. This tile has no shading, and frankly, I don‘t think adding it would help at all. It looks like the string had lots of curves, but who knows how it all began!
Zentangle drawn on colored card stock using a sepia Micron pen.
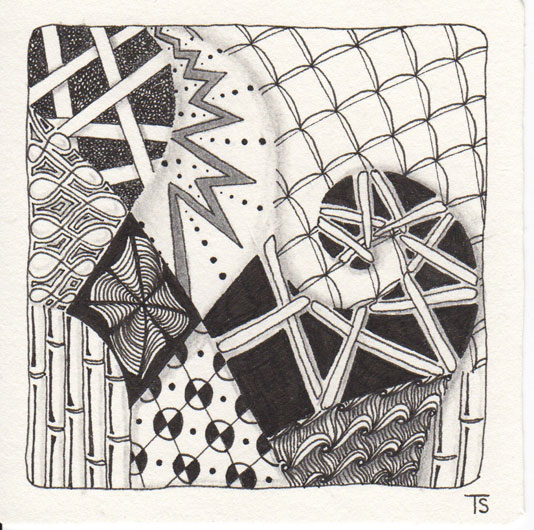
Bamboo!
This tile includes the first tangle I designed: Bamboo. While it‘s not an “official” tangle, it‘s still one of my favorites. It works as a filler or a border. You could even use it as a tangelation with Hollibaugh!
Zentangle drawn on Strathmore Bristol Vellum using a black Micron pen.
Tangles: Bamboo Chartz Chillon Echoism Flutter Pie Hollibaugh Nebel Spinners Vega
Back to the future.
Last Friday, a book I ordered recently arrived. It is the Zentangle Primer. Vol 1, by Rick Roberts and Maria Thomas. This book represents the beginning instructions for the Zentangle method.
I have never taken a class from a CZT, (Certified Zentangle Teacher,) so I was really looking forward to reading this book. I‘ve wanted it for some time, but the price is pretty steep. I have to say, so far, I am not disappointed. Even though it covers things that I already know, the book is still quite useful and informative.
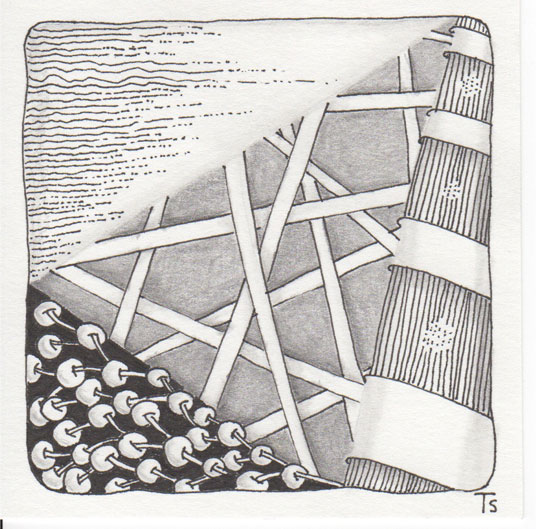
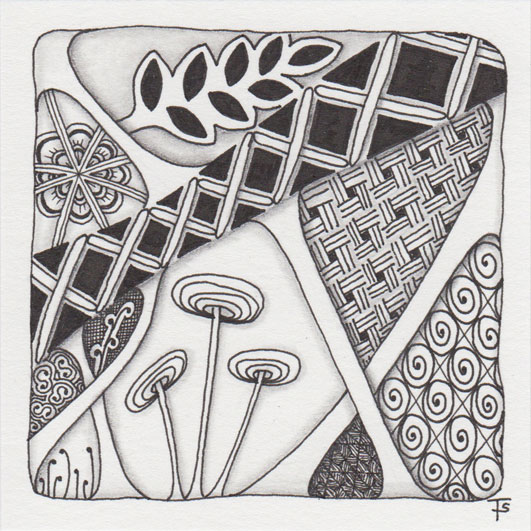
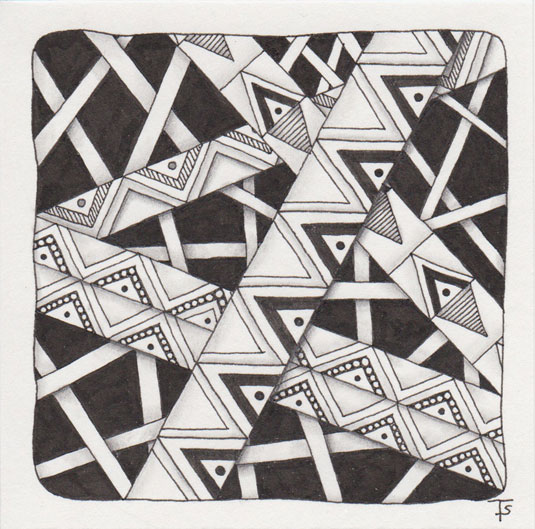
Triangular.
I usually don‘t use straight lines to draw the string on my tile. Here, I decided to use straight lines to make triangular areas on my tile as the basic divisions.
I also had a hard time making up my mind, which was the visual “top” of the tile when I was finished, which is why Msst is moving in an uncommon direction.
Zentangle drawn on Strathmore Vellum Bristol using a black, Micron pen.
Zentangle drawn on Strathmore Vellum Bristol with a black, Micron pen.
Tangles: Printemps Cheesecloth Hollibaugh Pokeleaf Marasu Betweed