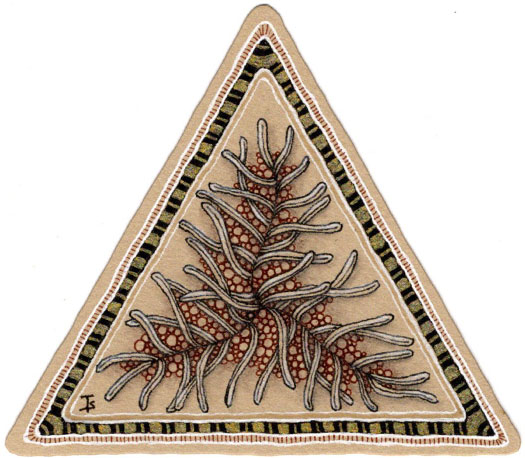
I love tangling on tan! It opens the door to so many different and interesting possiblities. And I never know how it will actually turn out.
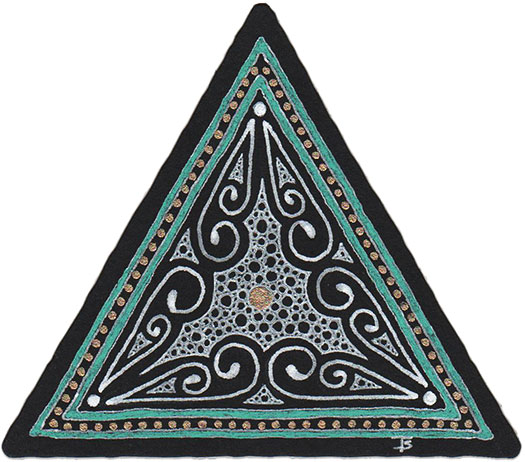
This was inspired by another Zentangle that I did last year. But I wanted to change it up some, and recreate it on a triangular tile.
Although it didn’t show up well on the scan, I used gold ink on top of the black band on the border to create a Marasu pattern. And I used a brown pen to draw the Tipple bubbles around the central Verdigogh fronds.
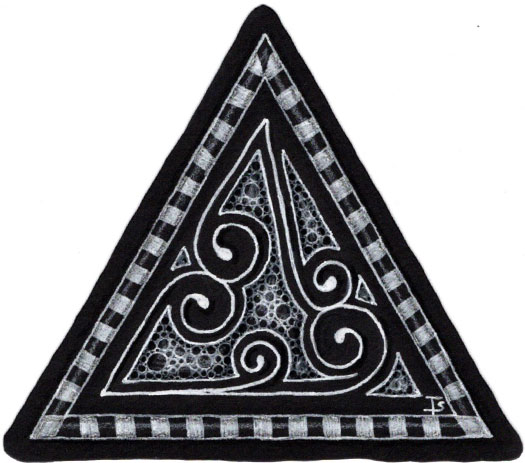
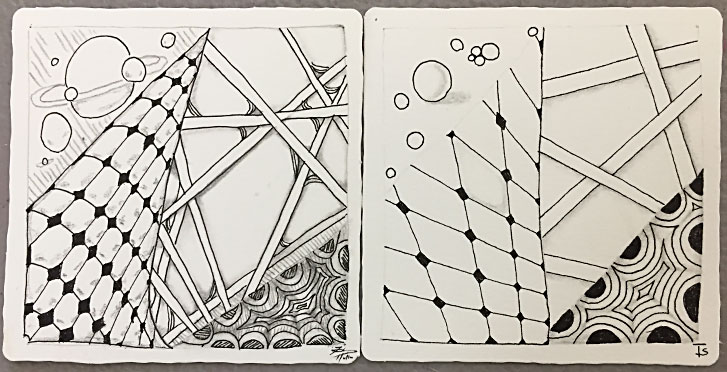
I’ve posted Zentangles with a design similar to this tile before, here and here .
In addition, the other two examples have no shading or highlights. So I needed and example that included these additions.
I’m doing it again because I’m using it on a class project and I wanted it on a 3Z for my students to observe and discuss.
Zentangle drawn on black, Strathmore, Artagain paper using a white, Sakura, gel pen. Shading done with Copic Markers and black colored pencil. Highlighting done with General’s Charcoal White.
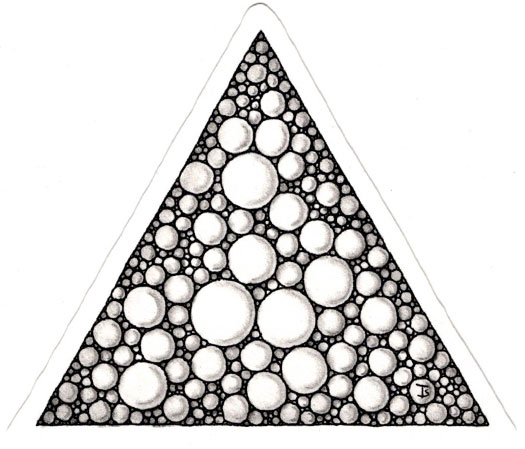
How do you practice drawing orbs? By drawing orbs!
I actually found it very relaxing to draw lots and lots of circles. I tried various methods, both drawing all the way around in one fluid motion and drawing a “C” shape for one side and then the other.
I learned that some sizes I can do very nicely, and some are harder to do. It’s important to turn the tile so that you can see what your doing. It made a big difference!
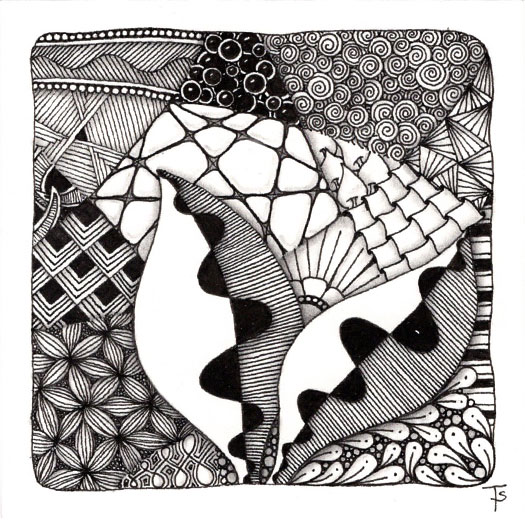
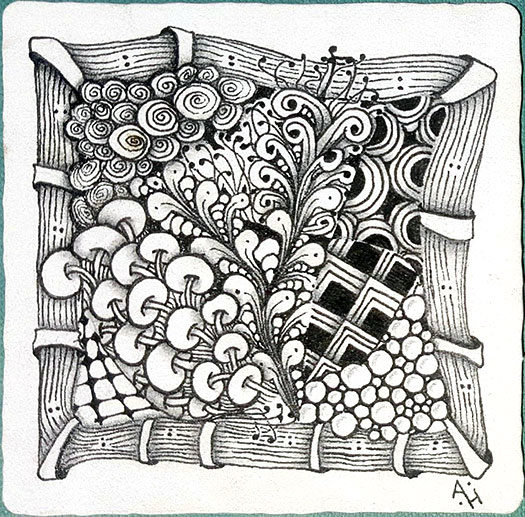
Generally, now days, I use fewer tangles on a tile that I did when I began 10 years ago. But not always.
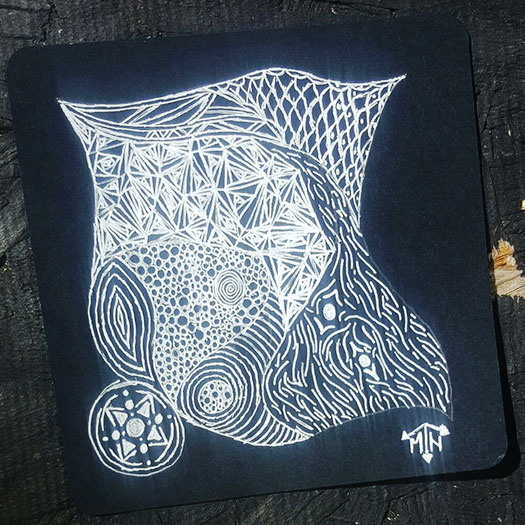
Yesterday, I decided to create a complex string and use a lot of different tangles. I had been looking through tiles from years ago and I wanted to see if I could still tangle in that style.
It took longer to choose the tangles than it did to draw them! 17 tangles is a LOT!
This tile was created following the instructions from Eni Oken ’s Art Club ’s latest lesson, Glazed Whitework .
It all started with a watercolor tile. It was an interesting challenge to draw the string and all of the tangles using a white colored pencil. Then more color was added creating the depth and shading you see here.
One of the most challenging things was to select appropriate tangles. It’s much more difficult to create detail with colored pencils than if you were using an inking pen.
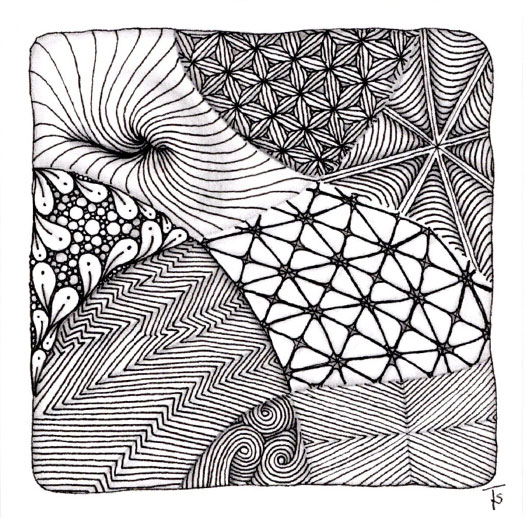
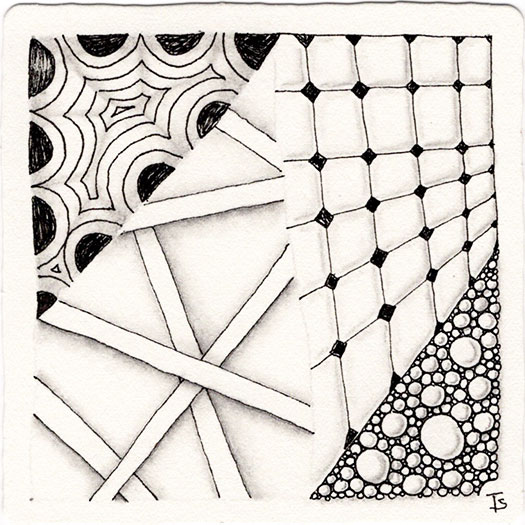
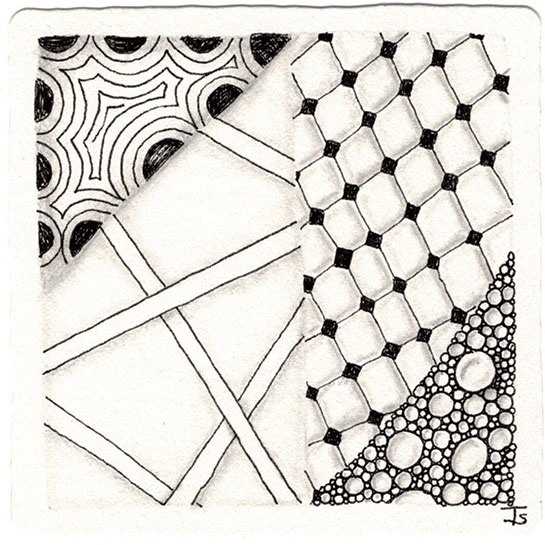
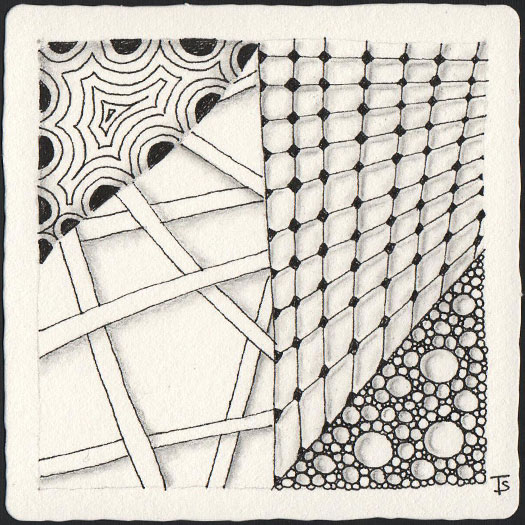
My random tanglizer spit out a lot of tangles for practicing line work yesterday. At first, I was a bit worried that these wouldn’t produce enough contrast. But after using my magic wand (actually, a pencil), I like the way they became distinct and unique!
Zentangle drawn on Strathmore Vellum Bristol using a black, Micron pen. Shading done with graphite pencil.
Tangles: Fassett Flux Fracas Nzepple Sand Swirl Static Tipple Xircus
I had a private class with a very artistic, imaginative young lady on Saturday. She wanted to know what the Zentangle method was, so we sat together and I taught the Basic Beginner’s Class.
She was so much fun to work with because she is already a gifted artist and has an inherent understanding of things like drawing behind, line weight, shading, and auras!
As I was showing her the way we do things in Zentangle, she was showing me how she does similar things. I learned a lot from her, and about her, and I’m looking forward to working with her again in the future!
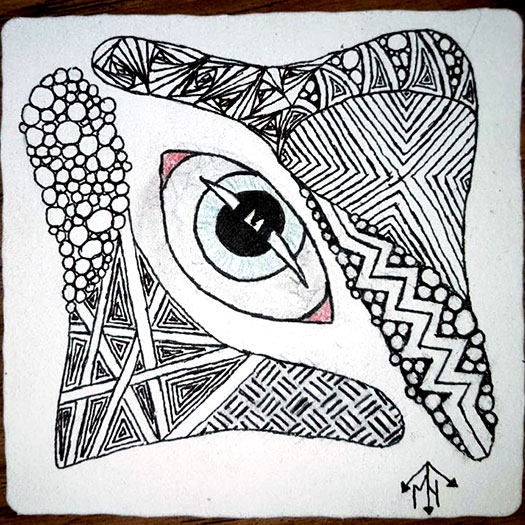
How do you challenge yourself? As an artist I’m always looking for different things to try as ways to grow and expand my skills.
Here, this tile was drawn entirely with my left hand. I even signed and dated the back with my left hand.
Why?
Well, first of all, I wanted to see if I could. In addition, drawing with your non-dominant hand builds new neural pathways in your brain. It also challenges you to look at things in a different way, and helps you to understand how your students, those that use a differnt hand to draw, are challenged to follow your instructions!
This is my finished tile from the Tuesday Beginner’s Class. I rarely finish my tile during the sessions because I’m busy helping the students. However, I do always finish them eventually. I don’t mind having many tiles with the same design.
I can always create my own, personal mosaic!
Zentangle drawn on a white, Official Zentangle tile using a black, Micron pen. Shading done with graphite pencil.
Tangles: Bales Florz Hollibaugh Tipple
Another Beginner’s class last Tuesday!
I love introducing the Zentangle Method to new students. Their excitement and enthusiasm is so contagious!
Tangles: Crescent Moon Florz Hollibaugh Tipple
Another tile from a Beginner’s Class this week. I may have enough of these to create my own Mosaic!
I never get tired of drawing these. Each time, while they always have the same plan, they come out somewhat different. It depends on the day, the artist, and what they feel like doing.
It’s one of the wonderful things about the Zentangle Method!
Zentangle drawn on an Official Zentangle Tile using a black, Micron pen. Shading done with graphite pencil.
I taught another Beginner’s Zentangle class yesterday. What a wonderful time we had sharing our drawing and life experiences with each other!
Zentangles drawn on Original Zentangle tiles using a black, Micron pen. Shading done with graphite pencil.
Tangles: Crescent Moon Hollibaugh Florz Tipple
I had an introductory class with a private student yesterday. We had a wonderful time together. This is the tile I created while teaching.
Every so often, I think it is very important to go back to the very beginning and do that “first tile” again. Every single person who has taken a class from a CZT creates this tile, or one very similar with the classic “Z” string. Sometimes the tangles used vary slightly. But there is so much to learn and remember from that Beginner’s class!
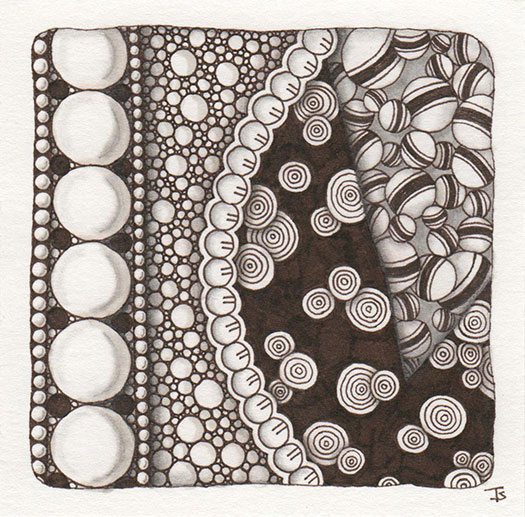
This week’s I Am The Diva Challenge is “Orbs”. These simple spherical shapes are a fundamental of the Zentangle Method.
For this tile, I chose tangles that are created completely from orbs, with some minor ornamentation. It was really good practice, and got me back into the swing of drawing these shapes with total concentration.
The sepia color was a bit of a happy accident… I picked up what I thought was a black pen and started drawing… So I just kept on going!
Another tile from Matt this week! I gave him a Zentangle kit for his birthday at the beginning of September. He is really enjoying it! The tangles on this tile are based on what appears on the Legend Card in the kit.
Zentangle drawn on an Official Zentangle Tile using a black, Micron pen. Shading done with graphite pencil.
Tangles: Chartz Hollibaugh Keeko Paradox Tipple Xircus
Over the weekend, I received this picture of a tile Matthew created!I’m not sure of all the tangle names… perhaps some of them don’t even have names. But it doesn’t matter… It’s still a great tile!
Zentangle drawn on a black Official Zentangle Apprentice tile using a white Sakura Gelly Roll. Highlights done with white charcoal pencil.
Tangles: Paradox Aura Leah Tipple
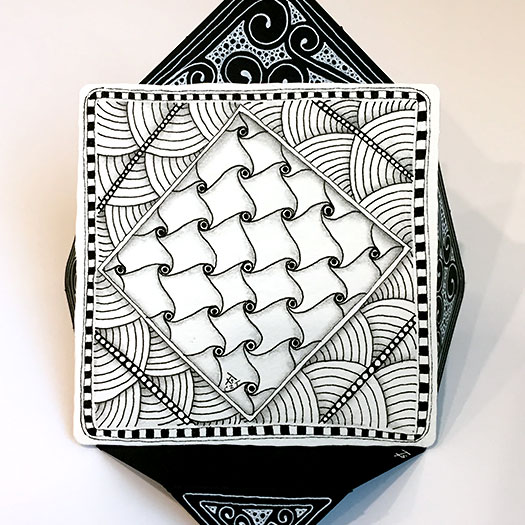
You’ve seen this tile with Cadent in the center before. It was featured in a post on July 5th . And also in the post about the upcoming classes for August .
But here’s another sneak peak for the Beginner's 2: New Strokes class ! You may have noticed that the description mentioned a 3D project?
We’re going to be making a display stand to show off your favorite tile on your desk at work or home!
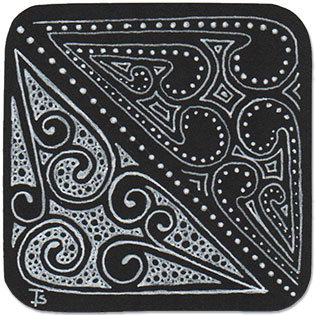
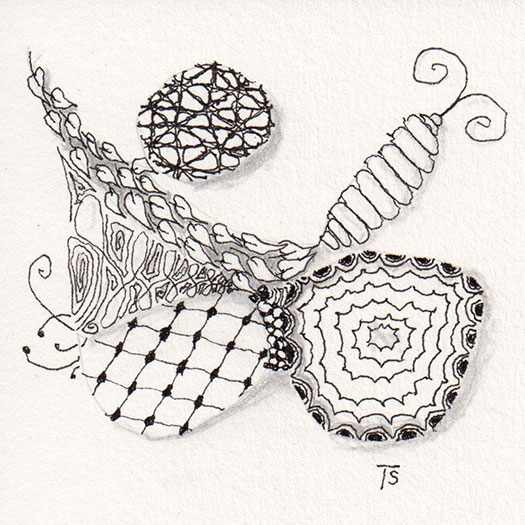
How do you Mooka?
I am playing around with the various ways of drawing Mooka.
Here, I’ve drawn half a little bijou-sized tile using a traditional style and then just added some dots to create a bit of texture. I also decided to add some auras in the empty spaces to fill in the design.
On the other half of the tile, I’ve drawn Mooka using a simplified method. Then I filled in the spaces with Tipple.
Amanda created this tile with the help of her family! She has four children that range in age from 7 to 17 years old.
She started by creating the string and then, each child would roll a dice and select a random tangle. The child would also choose where the tangle would go in the string.
The kids got a big kick out of challenging Mom, and they had a ton of fun. In addition, the final Zentangle came out great!
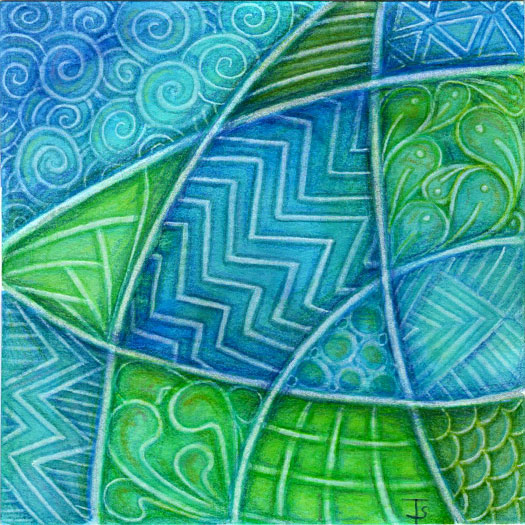
Folk art.
A few years ago, I was looking at various examples of American Folk Art. One of the things I liked about it was the bright colors and how the simple designs combined to create a more complicated finished product.
Here, I decided to use simple auras, perfs and tangles to create a more folk-art like tile. I like the simplicity of this design. Actually, if you look at the Zentangle Gallery , I’ve used it on another tile, (in a slightly different form,) recently!