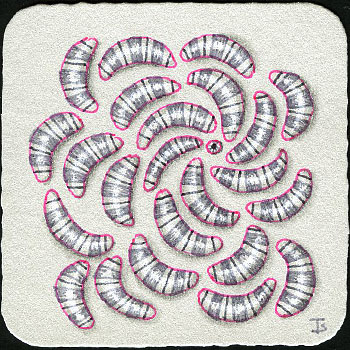
Pink and grey is one of my favorite color combinations. So I thought I would give it a try on one of the new, grey tiles from Zentangle.
Here is a quick study on a Bijou tile, using Molygon, wrapped around a central orb and filled with Marasu.
I think it’s interesting enough that I may repeat something similar on a standard-sized tile.
Zentangle drawn on an Official, grey, Zentangle Bijou tile using a pink, grey and dark grey, Uniball Signo pens. Shading done with graphite pencil. Highlights created with white colored pencil.
On Saturday, I participated in a Studio Tour for the Artist’s Group that I belong to. My studio was the second one in this particular tour.
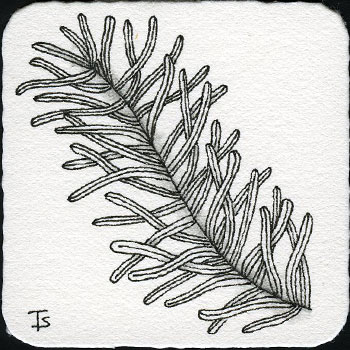
I created a Zentangle “make and take” project for the visitors to give those in the group who were not familiar with Zentangle to either sit down and do while here, or to take with them and do at home.
I used the tangle Verdigogh because it looks a bit like a sprig of Rosemary, which is a symbol of remembrance.
This is my first Zentangle created on a new grey Zentangle tile. This new color was just released by the company this week.
The color is a soft, light grey, that looks good with the entire range of Zentangle tools. I love having a grey tile because it allows me to add both shading and highlights for a full range of values.
Right now, you can get the tiles in various sizes from your local CZT.
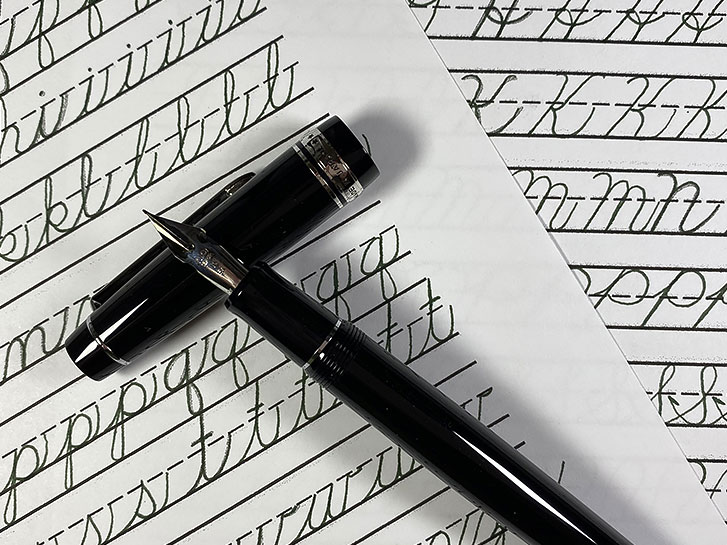
My handwriting is really bad. Actually, it’s so bad that I print everything. So, I’ve decided to do something about it.
I recently purchased a new fountain pen. It is a Pilot Custom 92. It has a really nice, flexible nib which is great for adding line weight while drawing. I also purchased a bottle of Noodler’s Zhivago ink. This is a beautiful, very dark green color.
So, I decided to combine my need to improve my handwriting with time to break in and use my new pen every day.
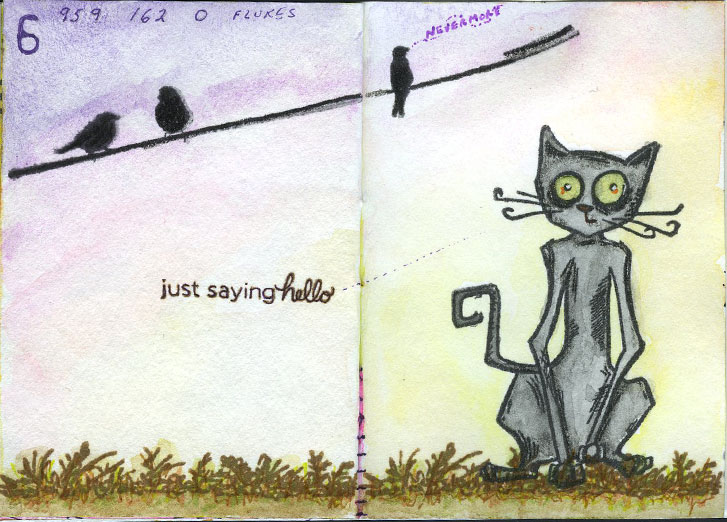
Meow!?
I don’t think you can have a Spooktacular Celebration without the traditional, familiar, black cat.
Here, our favorite feline was apparently contemplating dinner when one of the vittles decided to speak up for itself!
Perhaps our furry fiend will contemplate a nice bowl of kibble instead!
Images were stamped and then watercolor was applied. Colored pencil and gel pen were added for color and emphasis.
#microart #microartjournal #miniatureartjournal #miniartjournal #miniatureart #tinyjournalnation #allthingstiny #allthingsminiature #microartjournaling #tinyartjournal #travelersnotebook #inktober #spooktacular2019
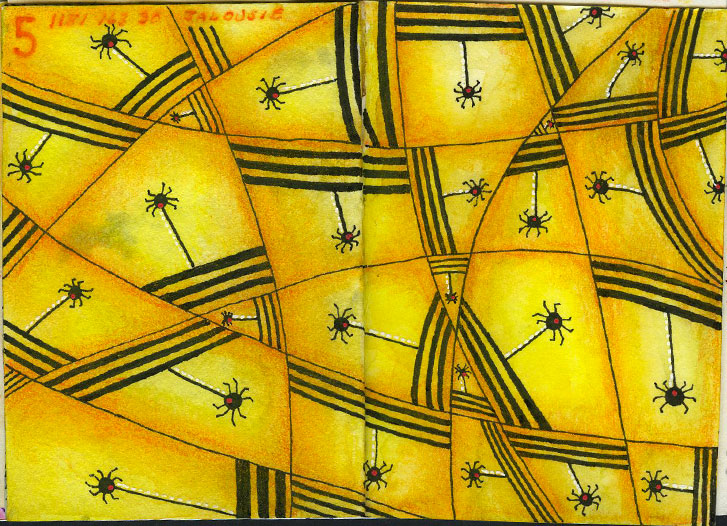
Jalousie? Teensy spiders just hanging around…
I’m so happy with how this came out! I wasn’t sure my idea would work. And it was still a bit mundane until I added the red dots to the spiders and the white dots next to their strings!
This was created using the tangle Jalousie, which was drawn first with black, Pigma Micron pens. Then watercolor was applied to establish the basic color range. Colored pencil, smoothed out with Copic Blender added depth to the colors. The red dots were added with a red, Posca pen. White dots were created with a white, Pentel, Juice Up gel pen creating a highlight along one side of the spiders’ strings.
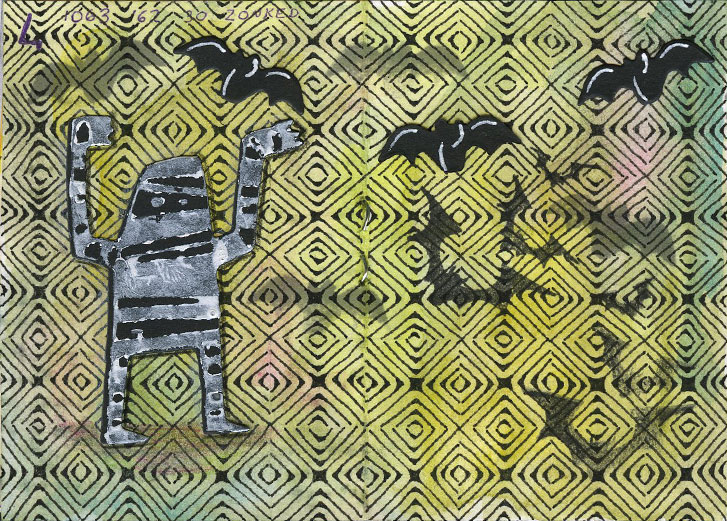
Zonked!
Every so often, I get a wild idea to try something… and it ends up taking much longer, or being more complicated than I thought it would be. This layout is one of those.
I probably should have drawn the Zonked larger. But I wanted the scale to be small so that the mummy and bats wouldn’t get totally lost in the design.
However, I don’t think I’ll be drawing this tangle again for a while!
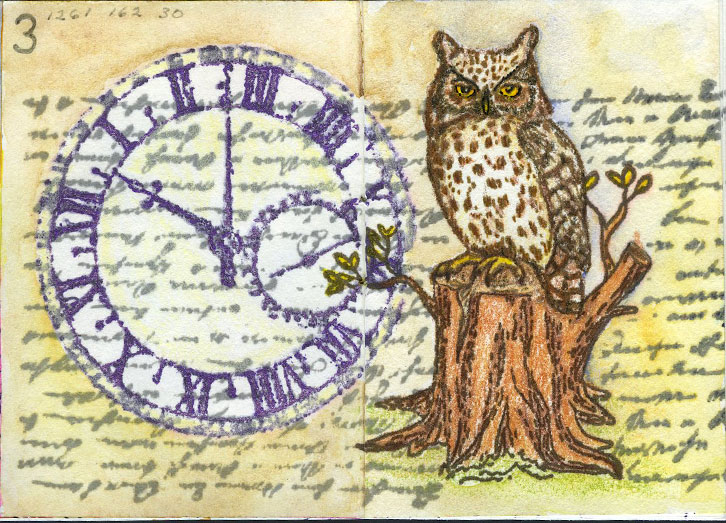
Whooo has the time?
Everyone who wants to make art, no matter your experience or education should make a little time each day to “just do it!” A tiny art journal is perfect because you can fill it quickly and the smaller size is less intimidating.
I wanted to create a layout with the feeling of the passage of time, and how we gain wisdom as we get older. So I chose these particular stamps with that in mind.
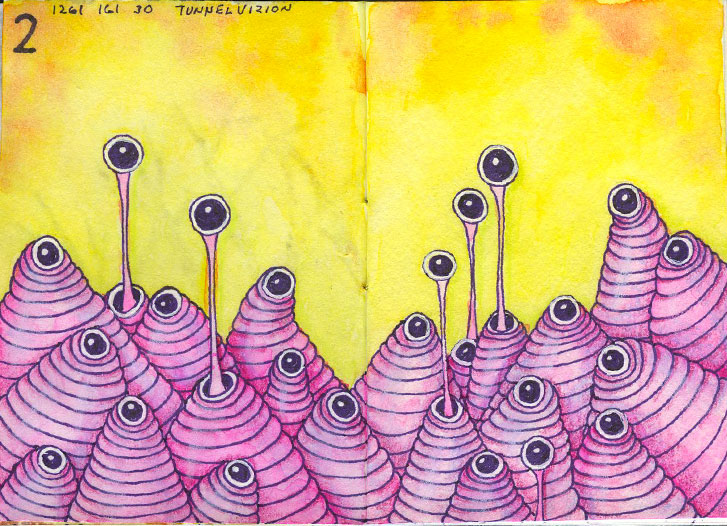
Today’s Inktober Zentangle prompt was TunnelVizion. I think this tangle makes a wonderful, creepy-cute critter that could be found on the Halloween forest floor!
Tangles drawn with purple, Sakura Pigma Micron pen. Watercolor was added to the background and each of the tangle elements. Colored pencil was used to give more dimension to the individual parts and a bit added to the background to intensify the green.
#microart #microartjournal #miniatureartjournal #miniartjournal #miniatureart #tinyjournalnation #allthingstiny #allthingsminiature #microartjournaling #tinyartjournal #travelersnotebook #inktober #spooktacular2019
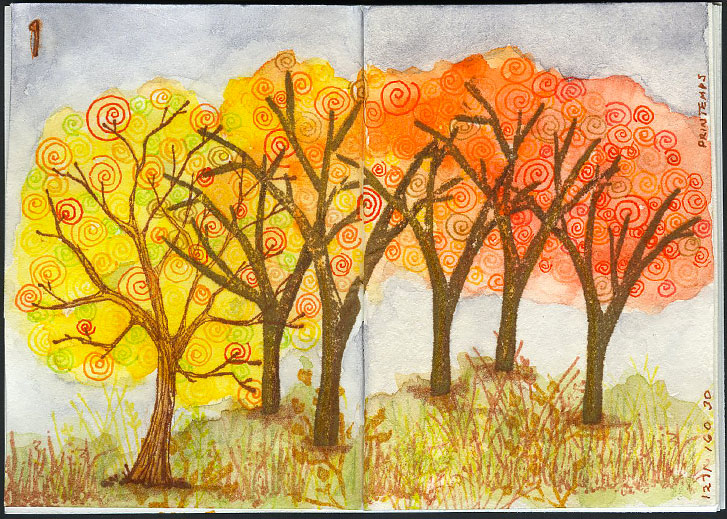
On the first day of Spooktacular2019, I incorporated the Inktober Zentangle prompt, which was Printemps in my tiny art journal layout. Here, I used them to make the brightly colored foliage in the trees.
The tree trunks were stamped on the page, then the tangles were added. Watercolors were applied and the foreground was stamped. Additional watercolor was added to the background and foreground. Finally some colored pencil was used for shading, color and texture.
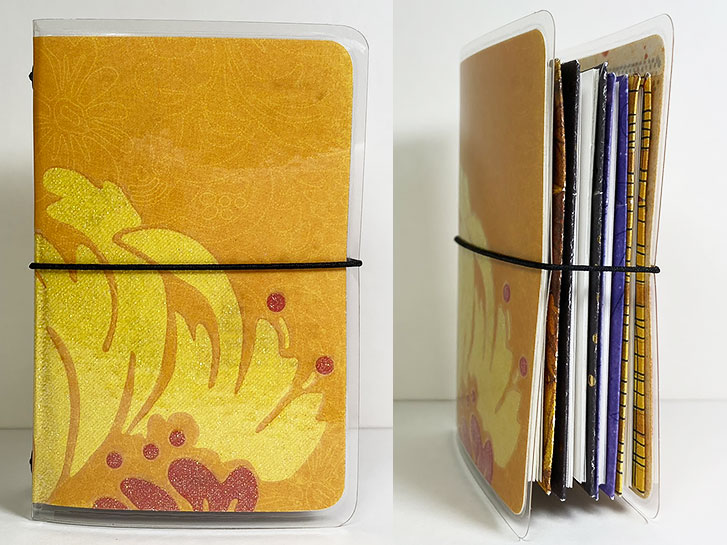
Yesterday, I showed you the cover of my tiny, Spooktacular2019, traveler's notebook . Today, I have the completed set for you. Above, you can see the set, closed, from the front and opening edge.
Right now, the inserts are blank inside. Today I will be beginning the artwork. The paper is from Bee Paper Company. It is from the spiral-bound, Super Deluxe Mixed Media book. I love this paper because it’s not too thick to use in a small book, but it holds up well to wet and dry mediums. Each insert has four, folded pieces of this paper and a decorative cover. This creates sixteen individual pages for art, or seven, double-page spreads. If used for spreads, there is a remaining front page for a table of contents and a last page that can be used various ways.
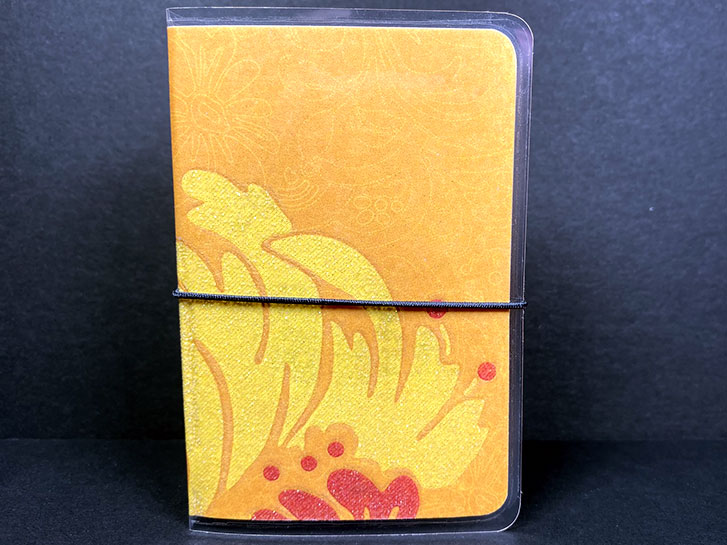
It’s almost time for the Spooktacular Anniversary on Facebook's Micro Art Journaling Group !
In honor of the occasion, I am making a new journal cover and inserts to use during the month of October.
The outside of the cover is a nice combination of fall colors with touch of sparkle.
The paper I used for the cover was blank on the reverse side, so I used various stamps to add color and texture to compliment the theme.
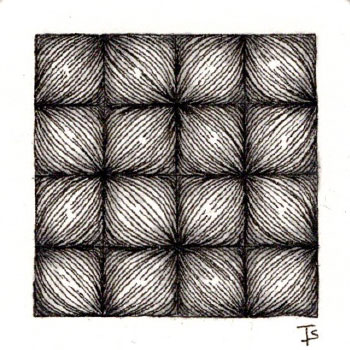
Most of the time, now days, I draw the “crazy” version of Nzeppel, rather than the “grid” version. So I thought I would do this for a change of pace.
I decided to add an internal aura to each bubble, just to provide some interest. That lead me to making the colored border.
Zentangle drawn on an Original, Zentangle Bijou tile using a black and a brown, Micron pen. Shading done with colored pencil. Border colored with Copic marker.
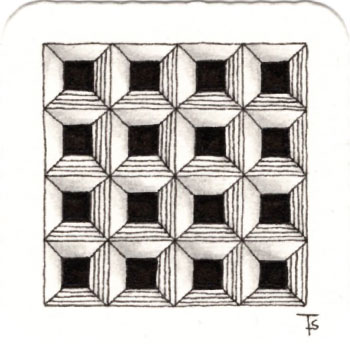
I liked yesterday's grid tangle tile so much, I decided to do it again!
I love the way Dex creates the illusion of depth in the paper. It’s as if you could enter one of the fragments and set up a room to sit and relax in.
Zentangle drawn on an Official, Zentangle Bijou tile using a black, Micron pen. Shading done with graphite pencil.
Tangles: Dex
It’s interesting how, as your Zentangle practice evolves, you sometimes veer away from grid-based tangles, preferring flowing, organic, individual elements.
Every so often, I feel an urge to return to those structured reticula, filled with repeated fragments. There’s something soothing about drawing them that fills you with peace and zen-flow.
For this small, Bijou tile, I chose Yincut. It is actually one of my favorites because of the overall look of the finished piece. It reminds me of an old-fashioned, lithographic print.

My second Aura Timeline tile!
You can read more about this project here. Zentangle drawn on Stonehenge White using a black, Micron pen.
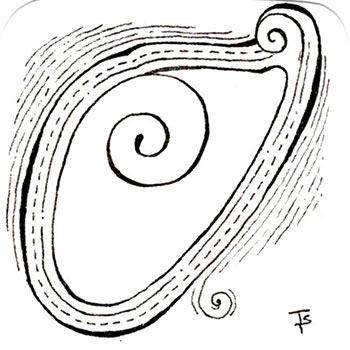
How do you Aura?
Here you can see my first exploration of this basic, Zentangle technique.
Auras are a mainstay of tangling. We generally think of them as drawing a parallel line, a little bit away from a previous line or shape.
But did you know that they could be so much more? That they could actually be part of your overall design?
Follow along with Eni Oken’s Aura Timeline Lesson , and learn how to take auras from boring to beautiful!
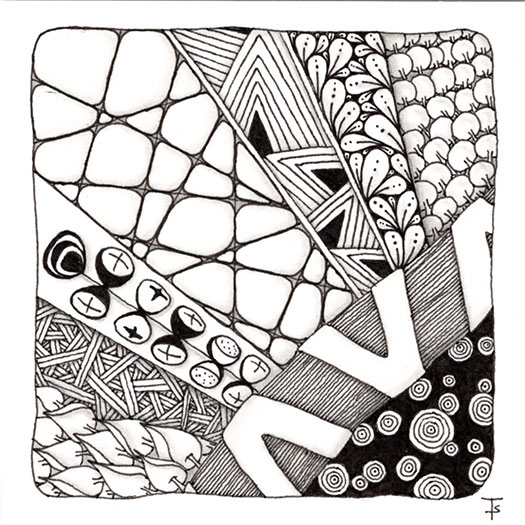
Back to classic style! Random string with random tangles!
Zentangle drawn on Strathmore Vellum Bristol using a black, Micron pen. Shading done with graphite pencil.
Tangles: Claws Crazy Nzeppel Flux Nexton Pods Pokeleaf Poke Root Sez Shard
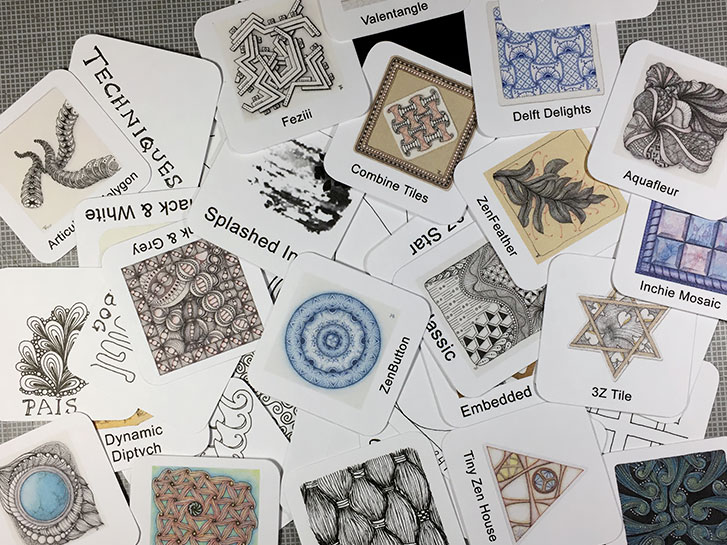
A few days ago, I told you about the Bijou Raffle Game that Eni Oken introduced to the members of Art Club.
This lesson is also available to anyone as a stand-alone class on teachable.com ! So you don’t have to be an Art Club member to view it!
I’ve been working with it, and decided to add some of my own cards that weren’t included in the bundle. Some of these are from other classes and tutorials, some of them are prompts for unusual tangles (or ways of using tangle) and some of them are for using specialized tiles.

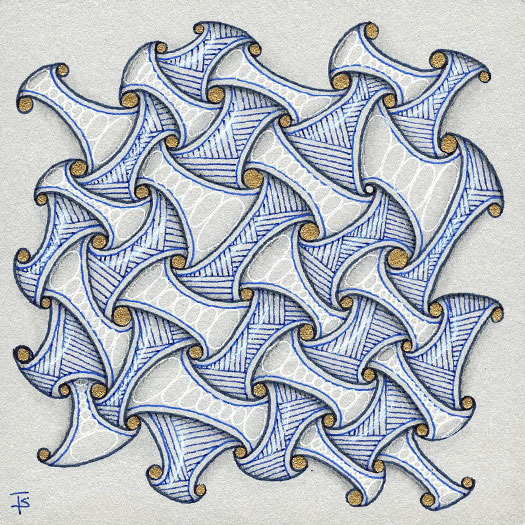
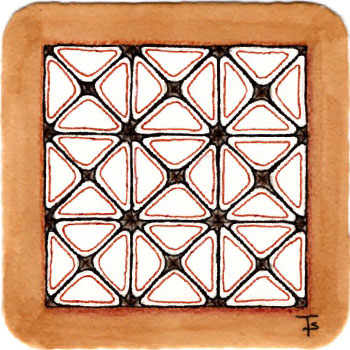
It’s interesting, when you create a monotangle, what meta patterns appear over the tile.
Here, because the basic tangle was executed across a triangular grid, circular, flower-like designs end up in the corners and sunken, shield-type shapes are offset across the tile!
I chose to add the lines to give the impression of screws in each small circle because I thought it would be more interesting and help break up the design a bit.