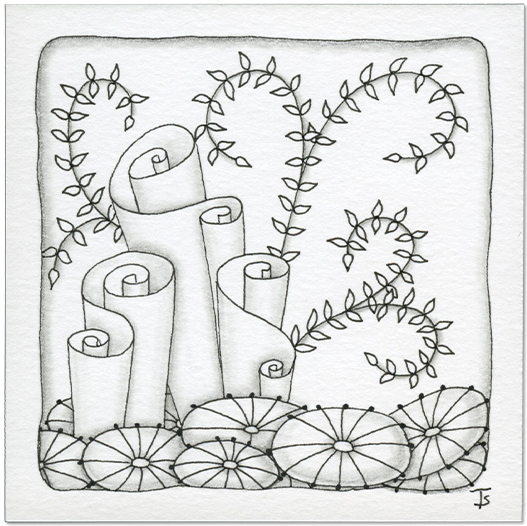
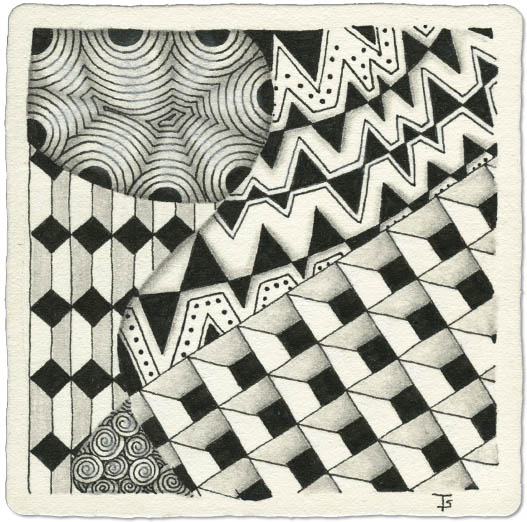
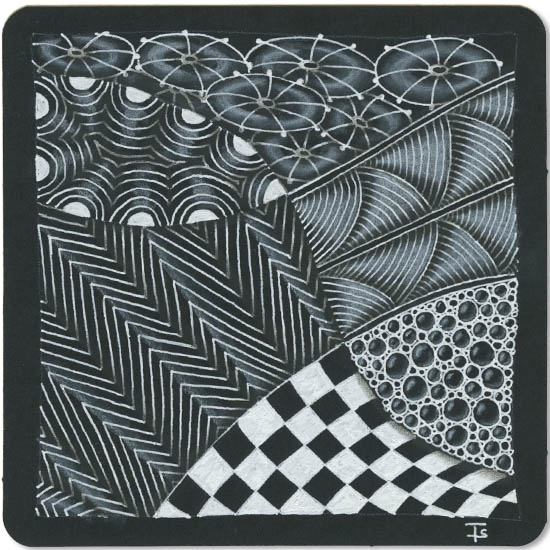
Random tangles, no string.
Sometimes, when I choose random tangles, I don’t use a string. This is the case here. I could see (in my mind’s eye) how these tangles would fit together so I just went with my mental vision.
I love drawing Cartoosh! It’s fun to create those connected spirals and then draw the lines to see what they turn into! This tangle is another one of my favorites.
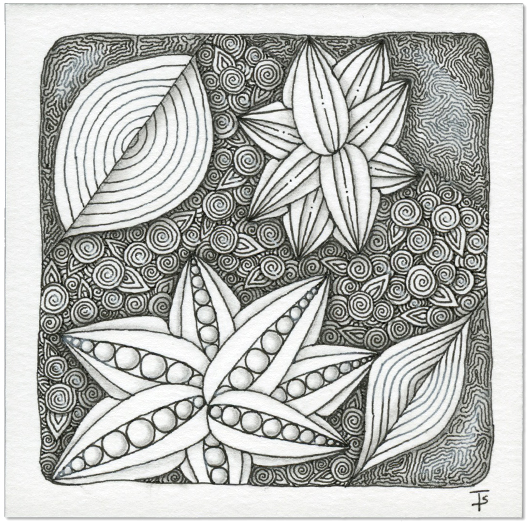
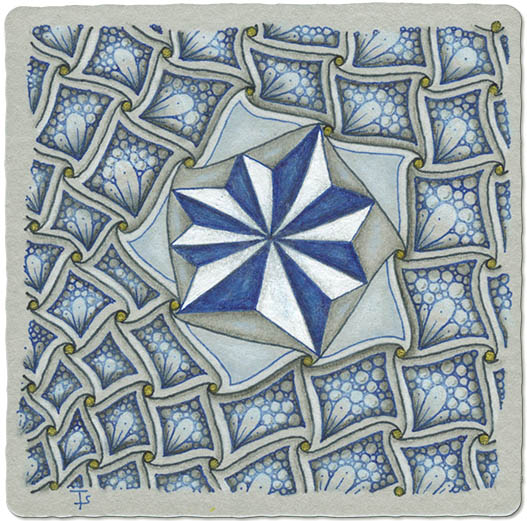
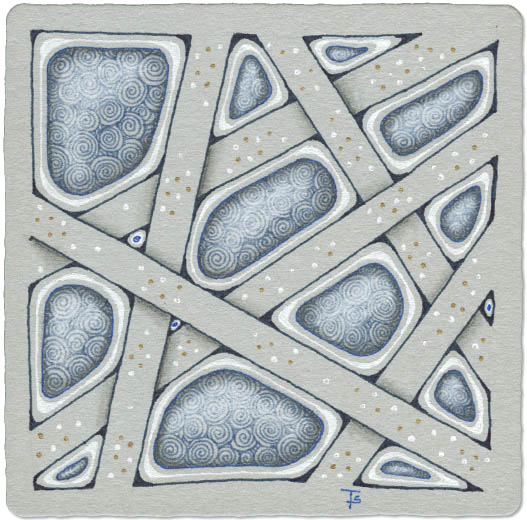
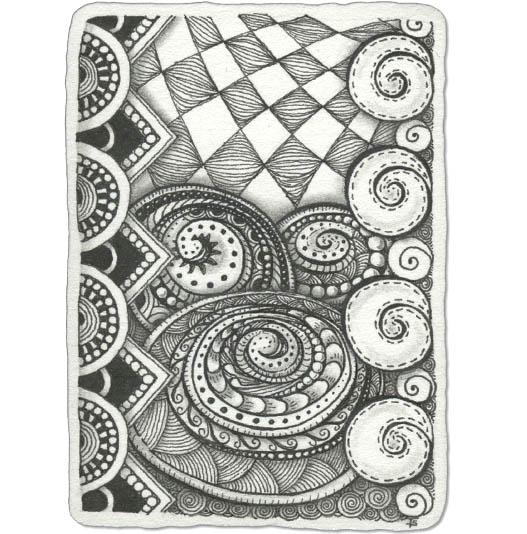
Random tangles, random string.
The string on this tile was a square with corners that run off the edge. Superimposed on the square were various sized circles, one on each side.
This set the stage for using medallion-style tangles in each circle. Since I had gotten Idoze and Aura-Leah during the random tangle draw, it was really obvious where they would go.
For the background I had a choice between a grid tangle and Pixoze and Amaze. I chose not to use the grid tangle because I felt it would lessen the impact of the four main motifs. Using what I learned doing the “One Zentangle A Day” book recently, I decide to place the tangle with the darkest tone, Amaze, in the corners and the lighter of the two, Pixoze, in the center.

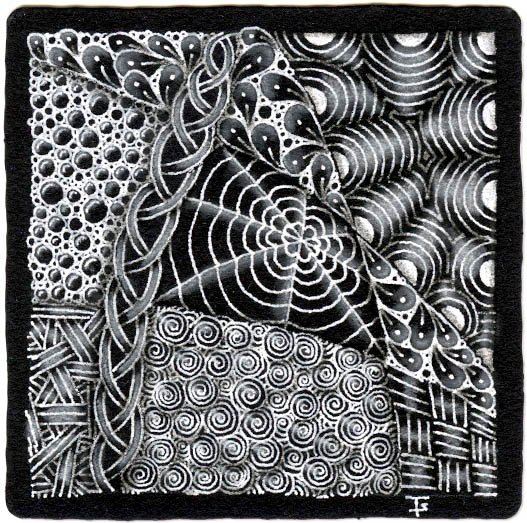
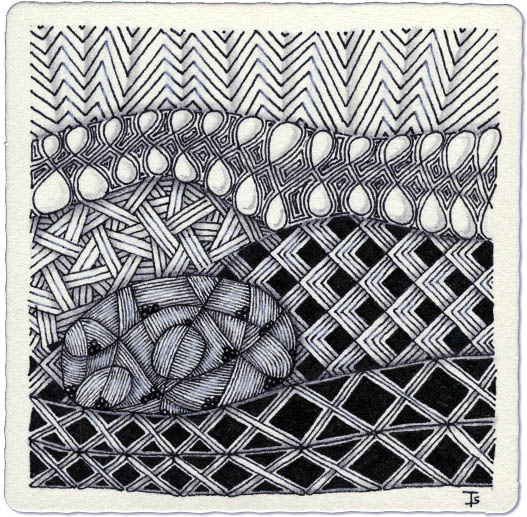
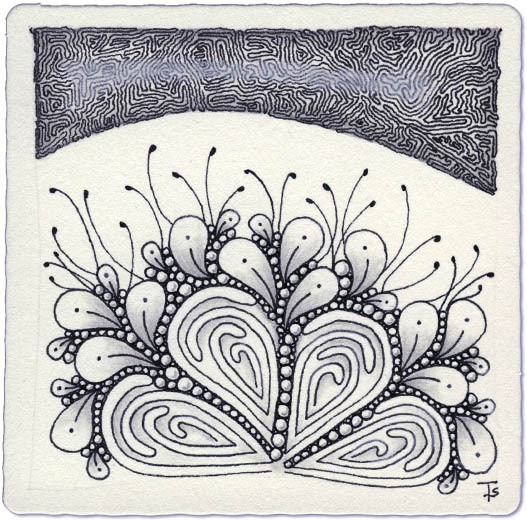
Random String - Random and Selected Tangles
When Leaflet came up in my random tangles for today, I immediately decided to put it in the center, flowing space. I wasn’t sure how it would work out, with quite wide and very narrow areas, but it came out better than I thought it would!
I also immediately decided where to put Fracas when it came up. I chose this spot because it reminds me of a spider web hanging out in a garden.
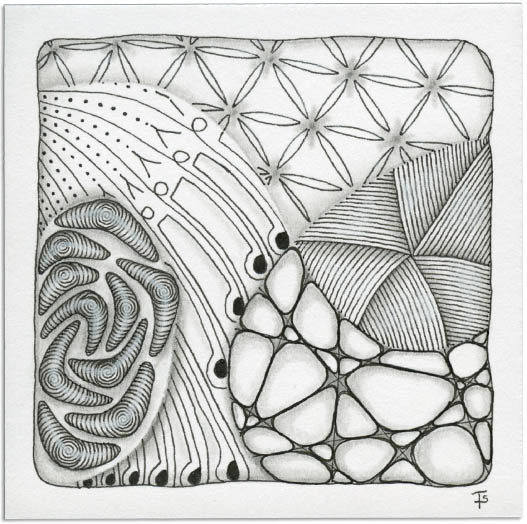
Unless I have something specific in mind for my morning tangling, I just draw some kind of random string on my tile. Sometimes I use a small french cuve template, as I’ve done on the tile above.
After the string is drawn, I count up how many “spaces” there are and I use a random number generator along with a long list of the tangles that I know to select n+2 tangles. The extra two are incase I feel the need to switch out because I have too many similar patterns, or one is a ribbon and I am going to do it on a line instead of in a space.
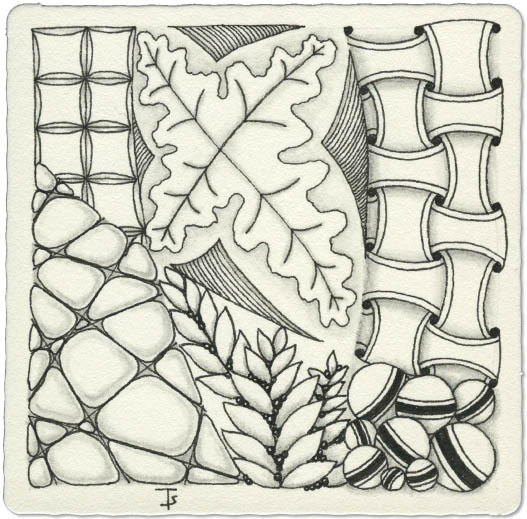
“One Zentangle A Day” by Beckah Krahula
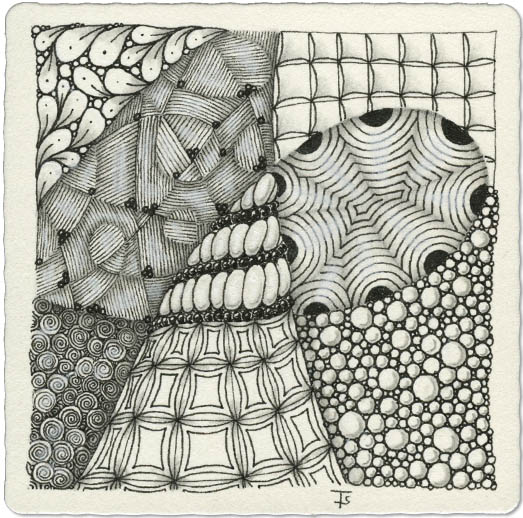
Day 20 - Another Look At Curvy And Linear Organic Patterns
The new tangles introduced in this lesson are Jetties, Sampson and ‘Nzeppel.
This tile is the final one I will be doing in this series. There is still a lot more in this book for anyone who is interested. If you don’t want to add it to your own library, you might want to check your local library if you want to continue with it.
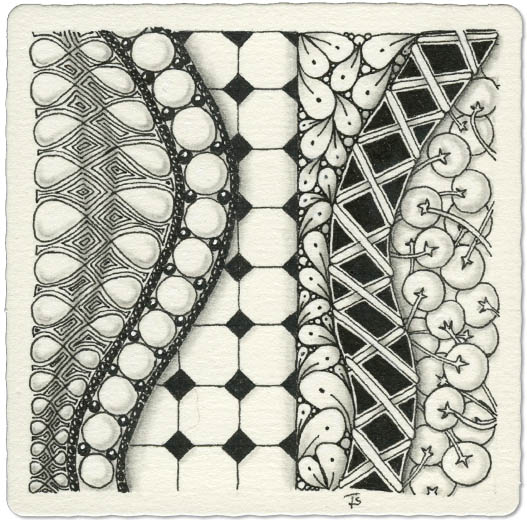
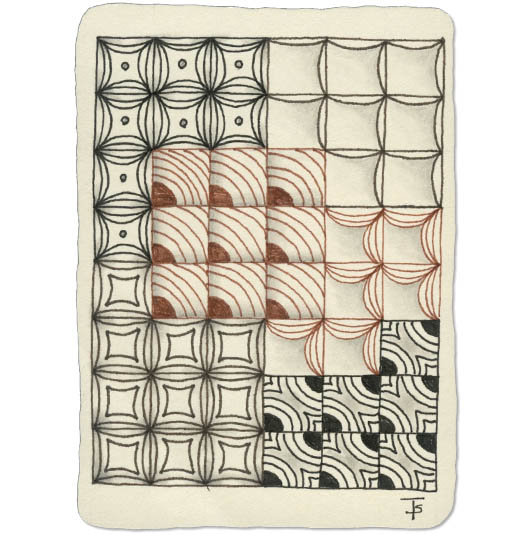
“One Zentangle A Day” by Beckah Krahula - Day 19 - Geometric Rectilinear Patterns
The new tangles introduced in this lesson are Beeline, Cubine and Rain.
With strong, geometric black areas, all three of the tangles introduced in this chapter are very bold. To provide a contrast to them, I used Crescent Moon and Printemps. I chose both of them because they consist of rounded shapes. In addition, Crescent Moon has bold black shapes around the edge which helps that area hold it’s own against the new tangles.
“One Zentangle A Day” by Beckah Krahula - Day 18 - Curvilinear Geometric Patterns
The new tangles introduced in this lesson are Cadent, Gneiss and Huggins.
Last night, when I was playing around with variations of Cadent, I had this idea that combined a geometric shape with both the triangular variation and the standard style of Cadent. I gave it a go on this tile. The result is a kind of layered effect in the center, where I placed the tangle Gneiss.

“One Zentangle A Day” by Beckah Krahula - Day 17 - Organic Patterns Intertwined
The new tangles introduced in this lesson are Courant, Sedgling and Vitruvius.
Organic patterns can be mixed together and play well with each other. As you’re tangling, you can see where tucking a few Pokroot under or beside another tangle would enhance both of them. It’s as if you have a florist’s shop of tangles from which you create a beautiful arrangement!

“One Zentangle A Day” by Beckah Krahula - Day 16 - Organic Patterns
Today’s new tangles are Pepper, Ynix and Squid. These are organic patterns that can fill almost any shape. They are versatile and can be done alone, or have multiple iterations in one area.
For example, the Ynix on my tile above. I have used a grouping of multiple fronds to fill a side and corner area. On the other hand, Each of the Pepper shapes stand alone, but still act as a group to frame the area filled with Nekton. Finally, the Squid at the center, bottom is a singlet, filling an area, but with empty space around it so it stands out.

“One Zentangle A Day” by Beckah Krahula - Day 15 - Organic Linear Patterns
This is the first exercise in Chapter 3. This chapter is devoted to Geometric and Organic Patterns. Although the term isn’t used in the book, if you are familiar with the concept of “Zentomology”, which is the classification of tangles, the ideas in this chapter will be familiar to you.
In this lesson, the tangles Yincut, Locar and Verdigogh are introduced.
“One Zentangle A Day” by Beckah Krahula - Day 14 - Decorative Value
The tangles introduced in this chapter are Changing, Dyon and Keeko.
Decorative value involves contrasting shapes and planes of color rather than having an established light source to produce interest and move the eye through the piece.
Tangling on a black tile is usually a good example of decorative value because you’re already starting with the basic shadow of a dark background.
“One Zentangle A Day” by Beckah Krahula - Day 13 - Florz and Onamato
In addition to the two new, dramatic tangles that are introduced, the lesson for this day also includes deconstructing tangles.
I have to be honest here… I don’t generally do well with this concept. I am not sure why, I have tried and tried… But I am just never happy with what I draw. I guess I need a class or two, or find some way to wrap my head around this concept!
“One Zentangle A Day” by Beckah Krahula - Day 12
Often there are secondary exercises in the chapters in this book. For Day 12, the secondary exercise is all about using Tangleations to change the value of a given tangle.
In this chapter, the author directs us to practice different versions of Bales, Beelight and Chillon and then to tangle on a “cream colored Artist’s Trading Card” using what we have discovered.
“One Zentangle A Day” by Beckah Krahula - Day 12 - Tangle Values
If you squint at your tile, you will notice that some tangles appear lighter and some darker. The levels from light to dark are referred to as the “value” of the tangle.
In the tile above, the lightest value section is the one with Chillon. The darkest value would be the one with Printemps. The other sections fall in between at various levels.
“One Zentangle A Day” by Beckah Krahula - Day 11 - Auras and Rounding
Rounding is done by adding ink in nooks, crannies and angles to smooth them out. You can see this on the tile above by looking where the Hollibaugh lines cross each other. The corners inside the resulting shapes have been rounded with the same dark blue ink used to draw the lines, creating bubble-like shapes inbetween the straight lines.
“One Zentangle A Day” by Beckah Krahula - Day 10 - Lessons From A Landscape
Three new tangles are introduced in this lesson: Echoism, Finery and Flukes. I did not use Finery for this tile.
When you look out across a pastoral scene, you may notice how distance makes objects lighter and the edges of things become a bit fuzzier. You can apply this idea to your tangling to add depth and draw the eye in.
“One Zentangle A Day” by Beckah Krahula - Day 9 - Black Tiles
Today’s lesson was all about drawing on black tiles. There were no new tangles introduced.
Drawing on black isn’t any more difficult than drawing on white. However, you do have to think a bit differently. You are adding the lightest value to the tile with your lines. However, you are still adding shading and highlights to the same places as on a regular black on white Zentangle.
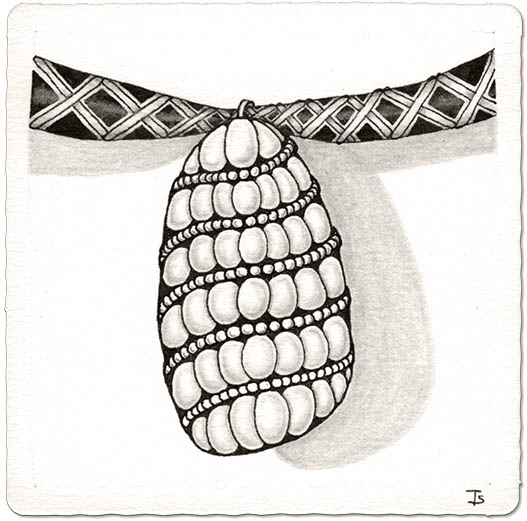
“One Zentangle A Day” by Beckah Krahula - Day 8 - Creating Dimension
Two new tangles are introduced in this lesson, Purk and Vega.
This lesson is all about how shading creates shape and volume. Darker shading pushes that area away from the viewer. Lighter colors and white highlights bring the area closer to the eye.
The ribbon appears rounded and shiny because of the darker areas along both edges and the highlight suggests a shiny surface such as satin. There is more darkness where it is squished and going into the loop at the top of the pendant.
“One Zentangle A Day” by Beckah Krahula - Day 7 - Tangleations
Today’s lesson was all about tangleations. When you start with a basic tangle as a beginning and vary it beyond the standard design, it is called a Tangleation. The assignment was to use tangles that were already introduced and draw them in new and different ways.
It was suggested to draw on an ATC. I chose to cut one out of paper I already had which I find works well for tangling.
“One Zentangle A Day” by Beckah Krahula - Day 6
The new tangles introduced for this day are Amaze, Flux and Mooka.
I used Amaze at the top of the tile to fill the space above the focal point design. The random lines create texture and darkness without overwhelming the rest of the tile.
The traditional Mooka shapes work well as a fan-like foundation from which the Flux can emerge.