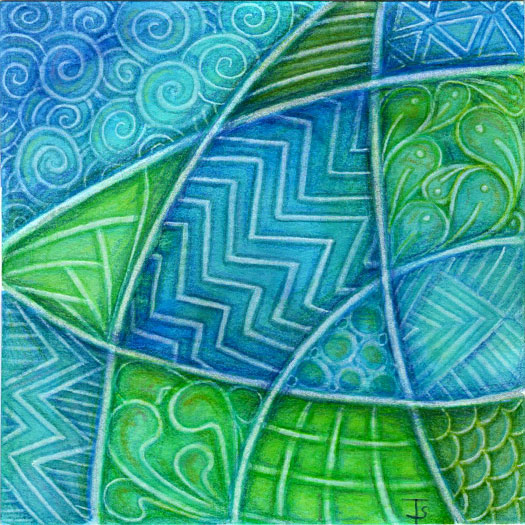
This tile was created following the instructions from Eni Oken ’s Art Club ’s latest lesson, Glazed Whitework .
It all started with a watercolor tile. It was an interesting challenge to draw the string and all of the tangles using a white colored pencil. Then more color was added creating the depth and shading you see here.
One of the most challenging things was to select appropriate tangles. It’s much more difficult to create detail with colored pencils than if you were using an inking pen.

Another tile from Eni Oken's Crazy Gold Auraknot lesson!
I am making progress with the lesson. Here, I’ve added the designs to the stripes of the tangle. I stuck with the black and white because I just wanted to get a feel for how to do it.
I’ll finally be using metallic ink on the next one!
Zentangle drawn on Strathmore Vellum Bristol using a black, Micron pen. Shading done with graphite pencil, colored pencil and copic markers.
On the back of this tile, created by Amanda, is written:
“If you can’t run, then walk
If you can’t walk, then crawl,
But whatever you do, you have to keep moving forward.”
—Martin Luther King, Jr.
As we are working on tiles, we hear or think of things that we want to remember going forward. So the back of our tiles become a kind of journal, over time, as we write notes on them.
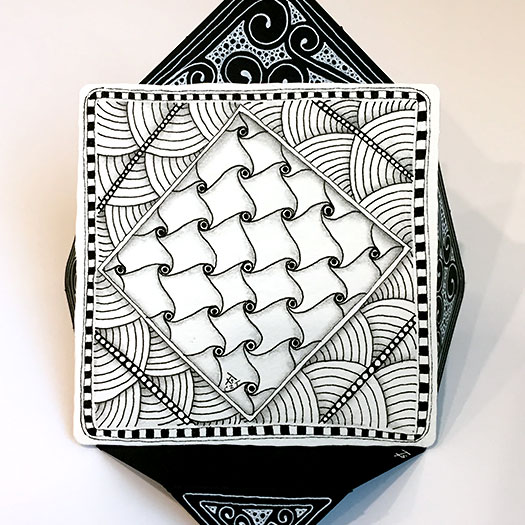
You’ve seen this tile with Cadent in the center before. It was featured in a post on July 5th . And also in the post about the upcoming classes for August .
But here’s another sneak peak for the Beginner's 2: New Strokes class ! You may have noticed that the description mentioned a 3D project?
We’re going to be making a display stand to show off your favorite tile on your desk at work or home!
All dressed up.
This little bijou is a remake of one I did at the CZT seminar. I decided to dress it up a bit by mounting it on a tan tile and adding a few frames. Huggins has become one of my favorite, meditative tangles!
Zentangle drawn on an Official Zentangle Bijou tile using a black and brown, Pigma Micron pens and white, Sakura Gelly Roll. Shading done with graphite pencil and Copic markers.
We’ve traded yesterday's spacial vortex for an ocean raft which we’re riding across the waves. So many ways to travel on this journey! I wonder what we will discover on the other side?
Zentangle drawn on an Official Zentangle Tile using a black, Micron pen. Shading done with graphite pencil.
Tangles: Cadent Knight's Bridge Shattuck
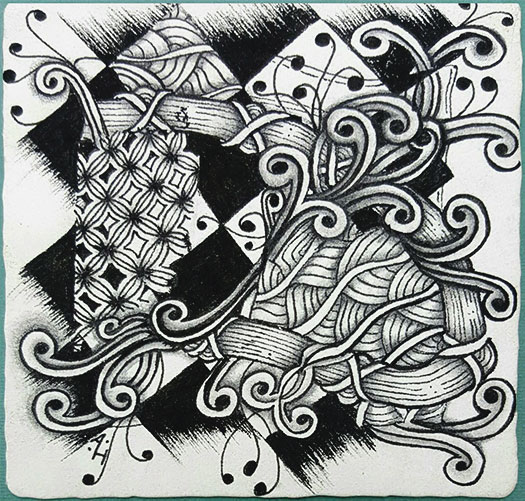
Velvet Elvis.
This odd-shaped tile is totally experimental. A couple of months ago, my older daughter came for a visit. One of the things we did while she was here involved using Oxide Distress Ink on scraps of black card stock. Besides just having fun, we were trying to see if the inks would work on black, since they contain white pigment under the dye ink. I had a couple dozen scraps of 4" x 3" paper, and we inked most of them.
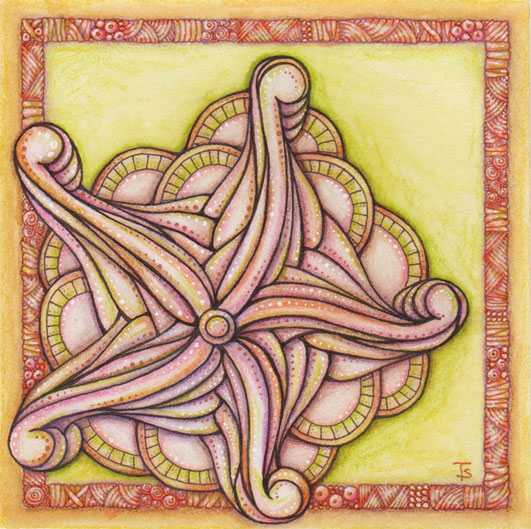
Starfish.
I decided to try an alternate color scheme for my Starfish tile, based on Eni’s Starfish Line Interrupted video lesson. I generally prefer cooler colors, such as blues and greens, but I also happen to like pinks and oranges on occasion. This choice is based on recently seen actual living starfish at the aquarium, where they tend more towards these colors in real life.
I added the frame, with the tiny details from the Tan Treasure lesson just to add some interest and frame the design.
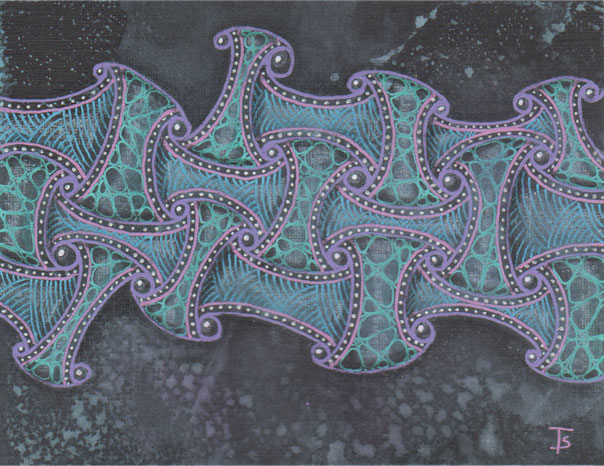
Bioluminescence.
She was fascinated by the lamp next to the sofa. She could see the creatures, slowly rotating around some central point. As their bodies moved in they became brighter, while the outer ones dimmed. She wondered what they fed on to create this scintillating glow.
Zentangle drawn on Strathmore Vellum Bristol using a black, Micron pen. Shading done with graphite pencil.
Tangles: Echoism Huggins Molygon Onamato Shattuck
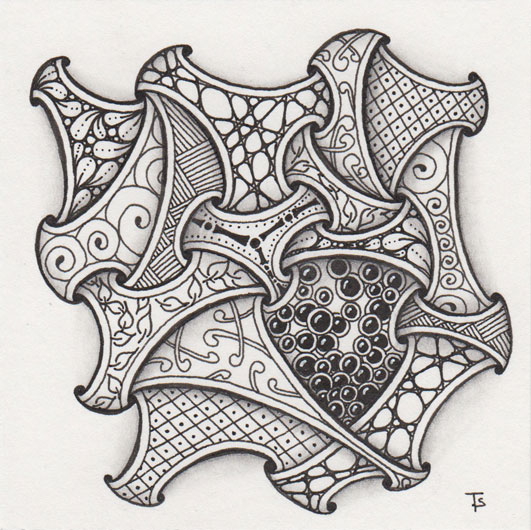
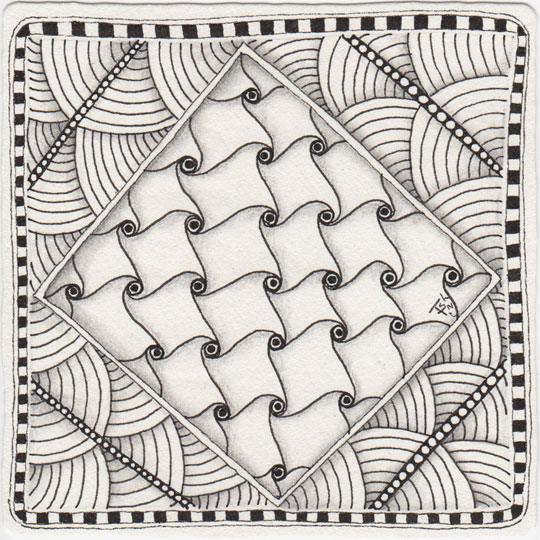
Interwoven.
Everything in their lives was interwoven. No single thing could exist without the other. Each element fed the whole.
Crazy Huggins is a wonderful example of single elements combining to make a complete design. In this version, I used a fair amount of shading to add additional dimension to each decorated section. I also used a heavier line weight around the outside to define each section and a finer width pen for the decorative elements. All of these things together create a more graphic finished tile.
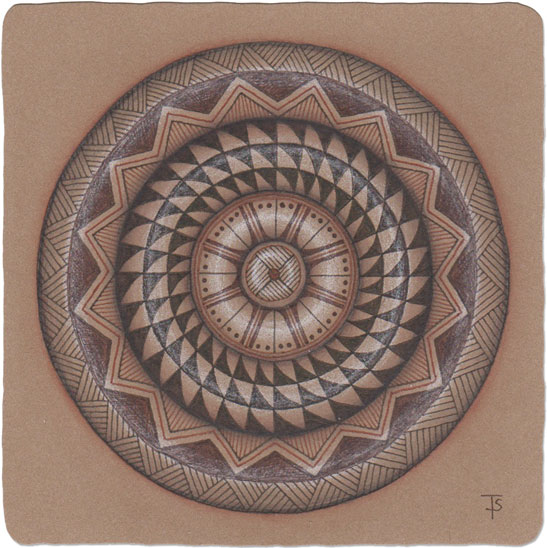
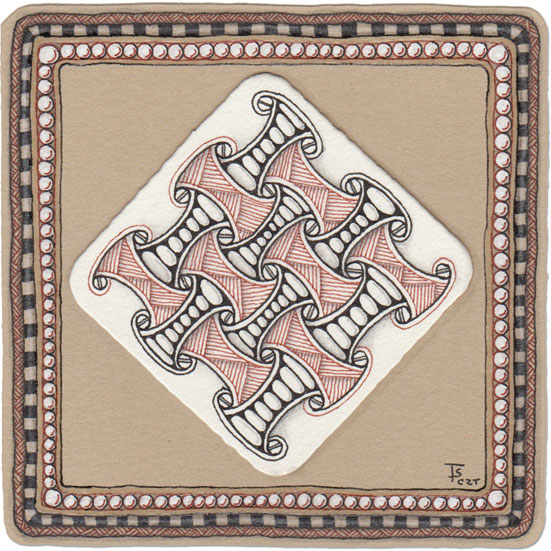
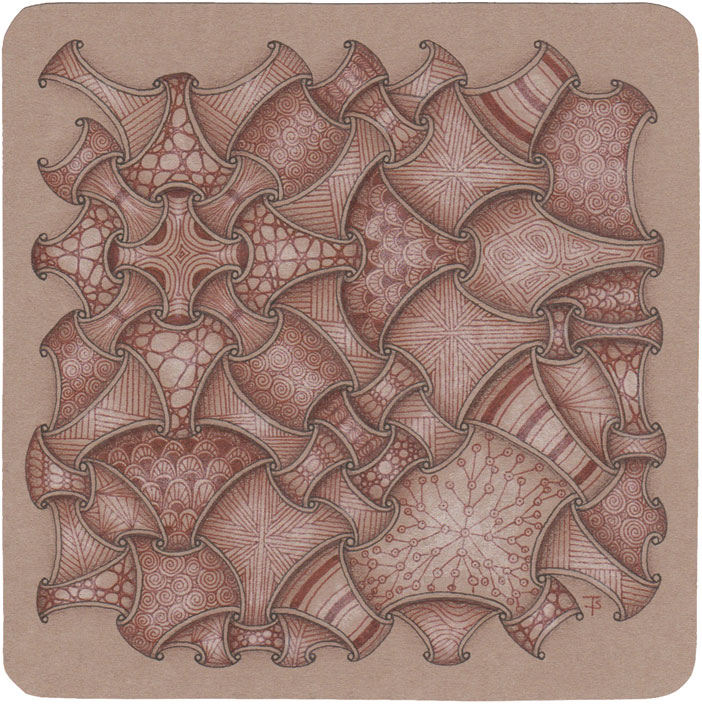
While I was working on yesterday’s tile, I was thinking that I would like to try this technique on a tan tile, with a Southwestern, Native American pottery theme.
I gave it a shot here. I’m not totally enthralled with it because I feel like the entire tile reads too “brown,” without enough light contrast. I will probably give this another try over the weekend. That said, I do like the tile for what it is!
WhollyHollibaugh.
Recently, Zentangle released a new video, #18, in the Kitchen Table series that illustrated the principle of seeing behind parts of a design through a window, or cutout in a tangle. Hollibaugh was used to illustrate this, so I decided to create this tile for my collection showing the concept. They call the tangle enhancement “Wholly Hollibaugh.”
Zentangle drawn on Stonehenge Kraft using black and brown Pigma Micron pens and Sakura white gel pen. Shading done with Copic marker and graphite and colored pencil.
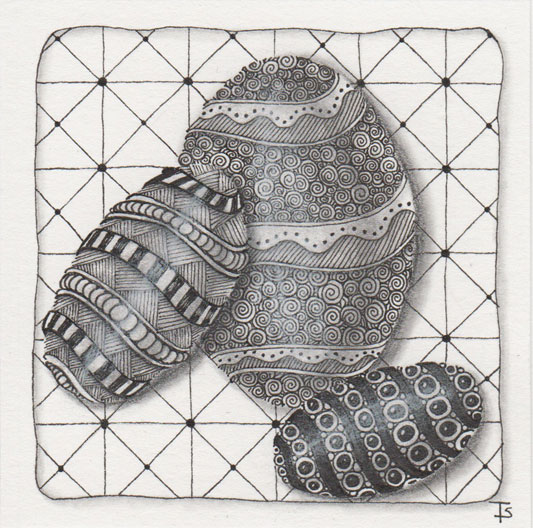
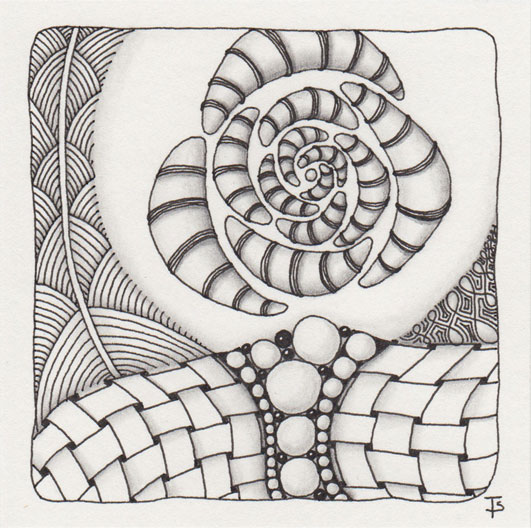
Incubation.
She found a group of eggs in various stages of growth in the Royal Nursery. She had no idea this was their method of reproduction until now. She wondered if each egg started with such elaborate patterns or if they were decorated after they were laid.
Zentangle drawn on Strathmore Vellum Bristol using a black, Micron pen. Shading done with graphite pencil.
Tangles: Caviar Meer Patena Printemps Purk Shattuck
Take two.
This Zentangle uses the same tangles that were used on Friday's tile . They are done, however, in a different string and on a black tile. I was curious to see how they would look.
I think Quandry looks good either way, and so does Shattuck. I definitly don’t like Toodles on the black tile. If I’m going to use it on black, I need to go about it a different way than I did here. I think the Bucky, done on black got really muddy because the lines were just to close together. It’s interesting, but not interesting enough. Sez and Fracas work on both.
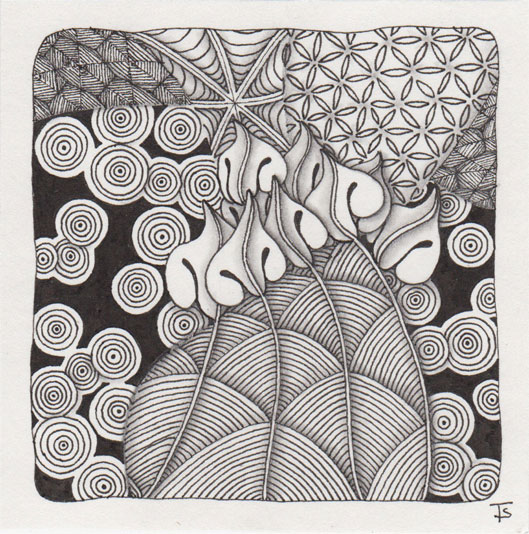
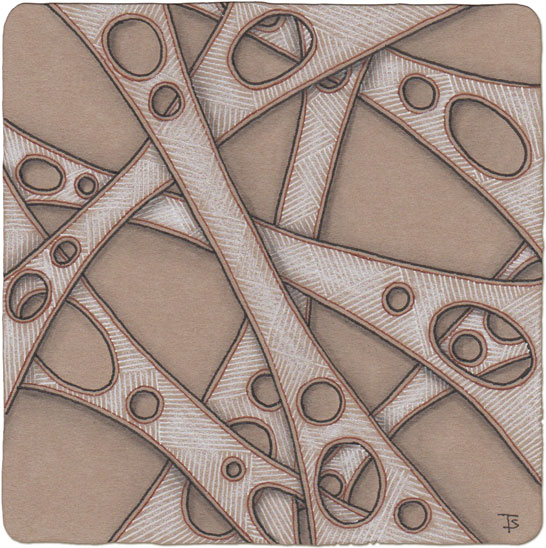
Decora.
The most interesting accessory in her small room in this section was the basket of Toodles. They grew everywhere on this station. The habitants used them for beauty, oxygen production, food, and their fibers produced by the fruits could be spun into textiles. At the end, the entire thing could be composted to start the cycle over again! She would collect some seeds from the biozone tomorrow. Perhaps they would be useful as she visited other habitats.
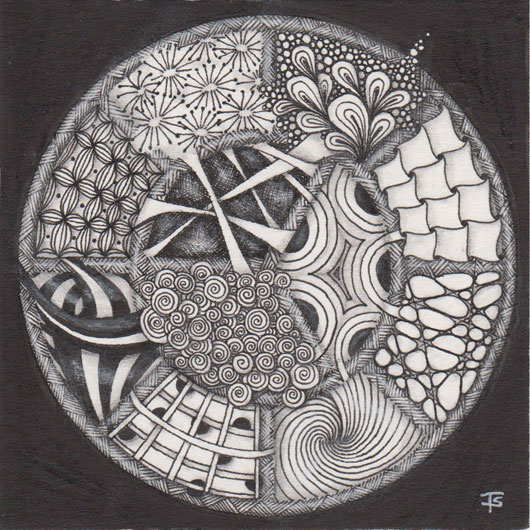
Palette.
Her basket was full of magical designs just waiting to be added to a frock or a cushion. Some plain, some fancy, some simple, some complex, woven together they created a magical mixture for the customers to choose from.
The basic string for this Zentangle came from the Tangler's Palette" stencils from Acadia Laser Creations on Etsy. I wanted this set of stencils as soon as I saw them. They offer so many different possibilites for creative play!
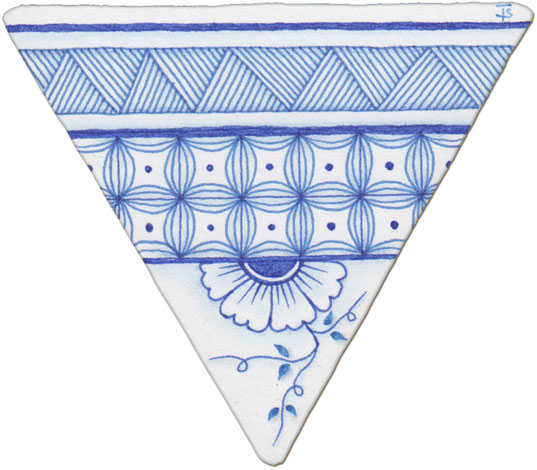
I decided to try the Delft Delights techniques on a 3Z-sized tile, thinking it would look a bit like a pottery shard. I also did a bit of research into patterns used on Delftware, so that I could find tangles that corresponded. The ones shown here I actually found on examples on the internet!
Zentangle drawn on 3Z-sized Strathmore Vellum Bristol using blue Zig and Staedtler markers. Shading done with colored pencils.
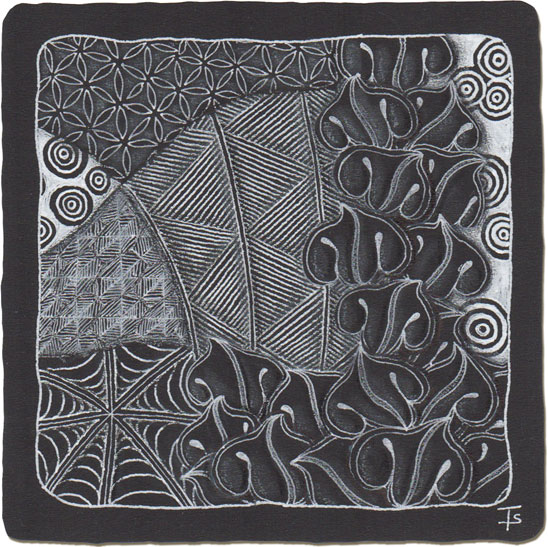
For my final Crazy Huggins sampler, I cut a large, apprentice-sized tile from a new paper I got recently. I filled the tile with Crazy Huggins shapes, then filled each element with another tangle. Somewhere along the line, the design developed a mind of its own, and decided not to be symmetrical anymore. But, honestly, I think that just made it “interesting!”
This tile took quite a while to complete. I knew it might take a bit longer, but it turned out to be a lot longer! And, when I finished filling in all the shapes, I wasn’t sure I liked it. But, in true, Zentangle fashion, I continued on and shaded the design. However, it wasn’t until I added the highlights that I decided everything was fine.
While this isn’t an exact negative of yesterday's Project Pack exercise , it’s almost there.
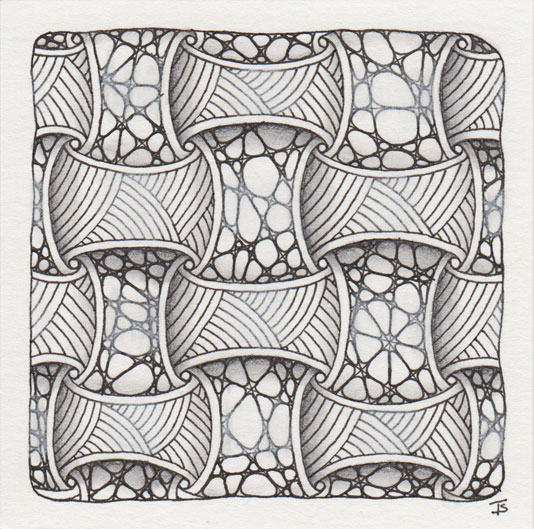
In this case, the tile is a standard, 3-1/2" square and the basic tangle, Huggins, isn’t the crazy version. I also changed up the highlight area in the center of each Huggins element a bit.
I’m finding that doing the black tiles is actually also improving my regular shading. Either that, or the agility of my brain is getting better at switching between the two types.
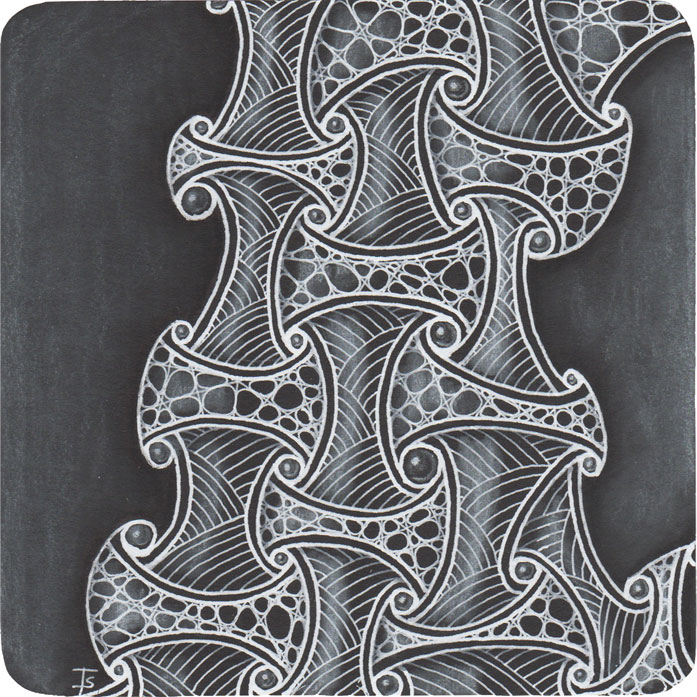
The concept for this tile is from the Zentangle Project Pack 1 series. This time we’re drawing on an Apprentice tile. Since I don’t have any, I cut an appropriately sized tile from black paper.
In this video , Molly takes us through the steps of creating a large version of Crazy Huggins and then filling each element with another tangle. The fills alternate between Crazy ‘Nzeppel and Shattuck, depending on the direction of the Huggins element.