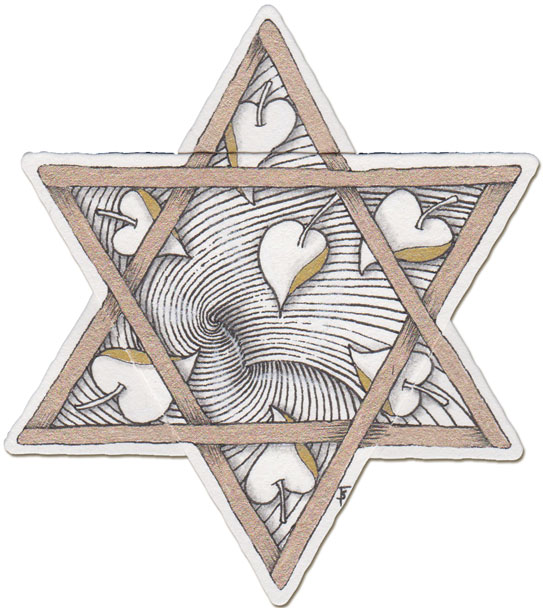
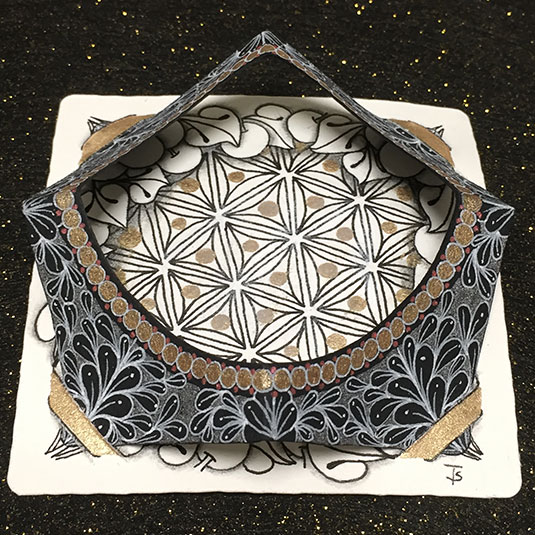
This tile is from Project Pack 2, The Twelve Days of Zentangle. On day eleven, Rick and Maria used 3Z tiles assembled into stars! The video shows you how to make two different stars from both black and white 3Zs. I chose to make the white one this time.
This project was a lot of fun, and not all that difficult. The biggest problem I had was drawing over the gold ink with the micron pen. My pens hated it, and I had a lot of problems with it. Other than that, I liked working on the star shape, and enjoyed the process.
Testing 1-2-3.
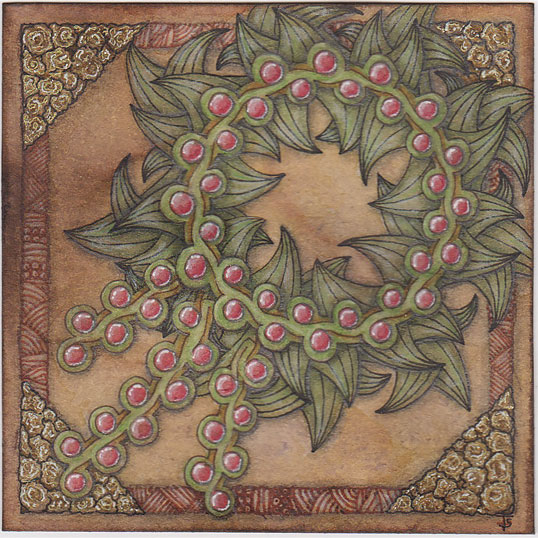
I wanted a relatively simple project because I’m still shuffling stuff from the old studio to the new one.
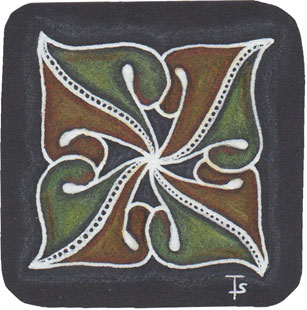
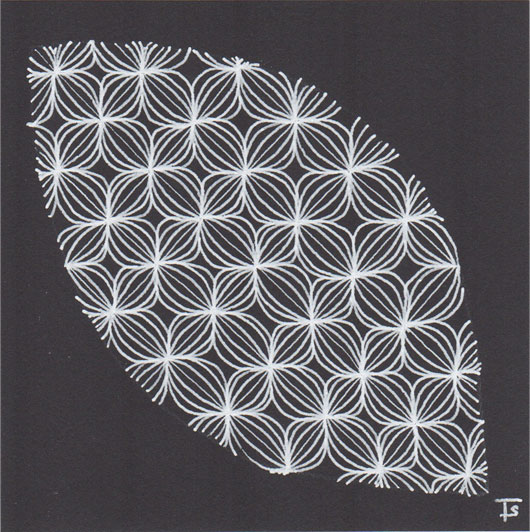
I used a small, bijou cut from some black paper. Working on black is my specific project for this month. I chose Toodles because it’s a nice, graceful tangle that I like to draw. It also provided me with some larger areas to fill with color.
I wanted to experiment with colored pencils on black. In this case I chose the Faber Castell Polychromos. I used the lightest/brightest shades of green, orange and yellow. Two shades of grey were used for some of the shadowing. Over all, I think the colors are rather dull. I am going to keep looking through my stash for something that has better coverage of the black.
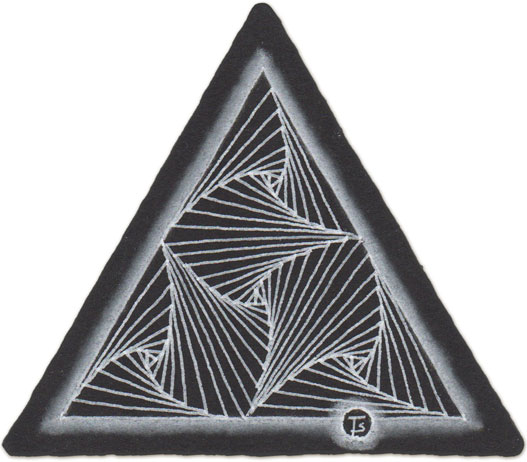
This is my first, official, 3Z (triangular shaped) Zentangle. These tiles are 3-1/2 inches on a side. That makes the overall drawing area smaller than a standard tile.
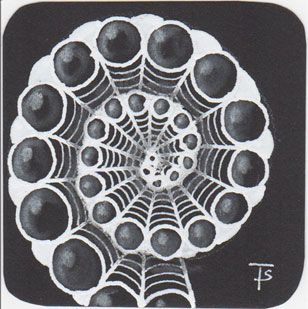
I did this following the video here , for Project Pack 1. I’m beginning to warm up to these black tiles. I found doing this one fun! Part of it is the design. It was easy, calming, and I really love the results! I also like the way the white charcoal is used here, and it wasn’t hard to do. Over all, I’m happy with this one.
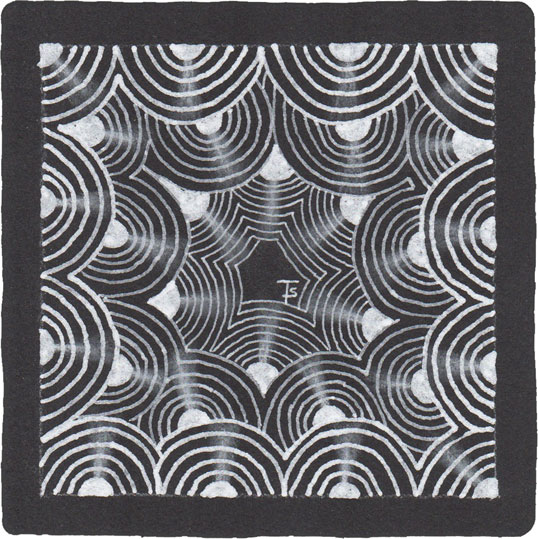
When you are learning to tangle, Crescent Moon is one of the first that you learn. It teaches the concept of creating an “aura” near something that has already been drawn. Auras are frequently used to build repeating designs or to add emphasis or separation.
This Zentangle is from Project Pack 1.
Zentangle drawn on a black, Official Zentangle tile using three different sizes of white, Sakura gel pens. Highlighting done with white charcoal pencil.
Happy New Year!
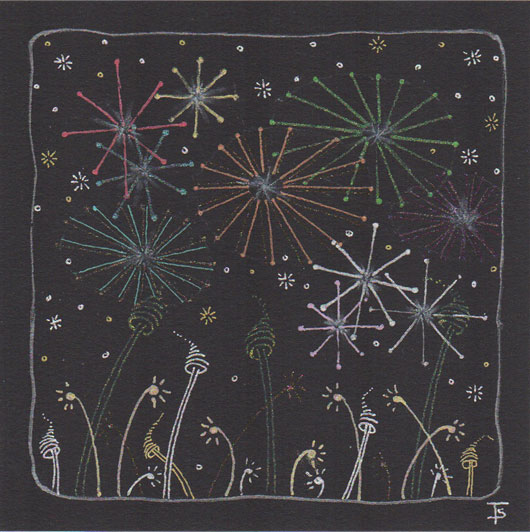
This Zentangle was created while going through all of my metallic and glitter gel pens. While they generally all have a reasonable shelf life, I have some that are more than 10 years old. They don’t work, the ink has separated, and some have even leaked. It was time to start fresh in the new year. So I used the tangles Aah and Pepper to create fireworks in the sky, representing the New Year’s celebrations as I tested the various pens. Unfortunately, they don’t all show up well when scanned, but you get the idea!
This is the fourth exercise from Project Pack 1. It is a second version of Bales. This tile is very, very simple. It’s all about the added lines transforming the regular seed shape found in the tangle into something beyond itself by repeating the strokes to fill in the centers.
It was fun and very calming to draw this Zentangle. But I feel it is just so plain, compared to what I normally draw!
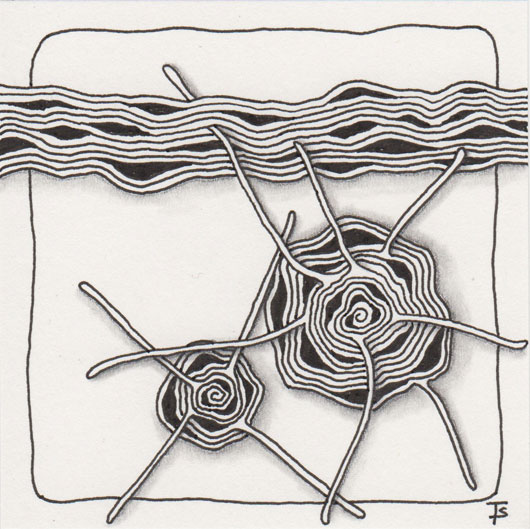
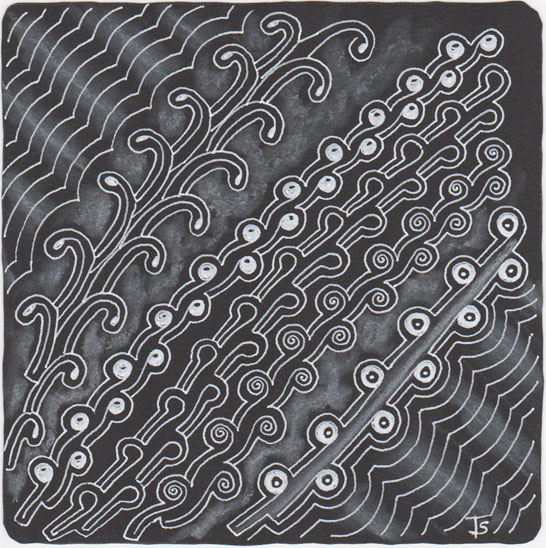
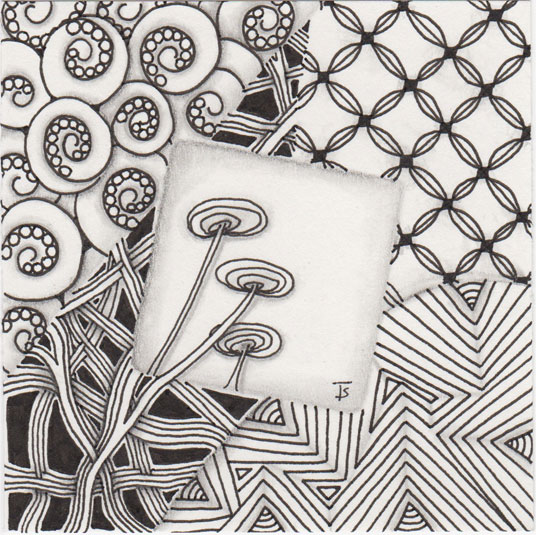
This tile is from Project Pack 2, The Twelve Days of Zentangle. On day four we are doing a twist on Diva Dance. Here, you see it drawn both as a ribbon and as a spirals (Diva Dance rock-n-roll.) However, a new technique has been added. It looks as if the tangle has developed arms. Rick refers to these as “sproings!” You can learn all about them by watching the video, here .
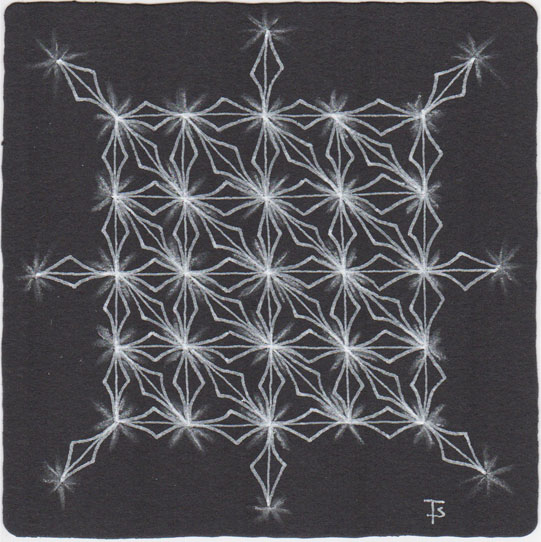
This is another exercise from Project Pack 1. This time, we’re drawing a variation of Bales on a black tile. You can watch Martha create this version here .
The differences between mine and the video are that I used the narrowest Gelly Roll to draw the grid lines, and then the 08 to draw the diamonds. I also chose to use the white pastel a bit differently. I drew small lines radiating between the lines at the intersections. Then I use my tortillon to lightly draw across the lines. This gave more of a “starlight” or “twinkling” effect which I liked much better.
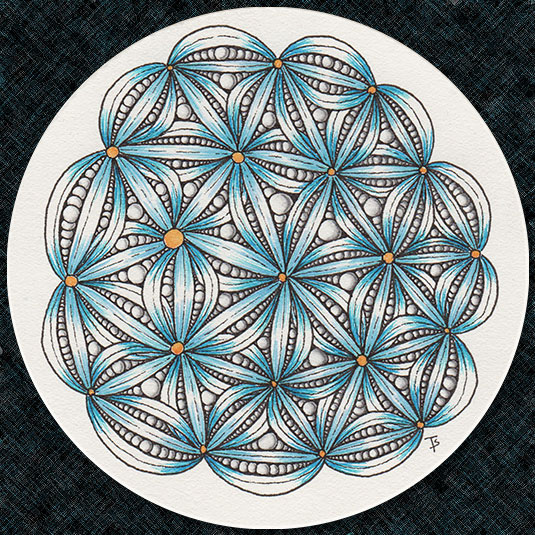
This tile is from Project Pack 2, The Twelve Days of Zentangle. On day three, Maria introduced a new tangle: Rumpus! This is an interesting tangle that starts off with a few dots and then builds like a symphony to a finale with sections being drawn behind one another. You, too, can be mesmerized watching her draw in the video here .
In addition, another technique, which she refers to as “enthatching” is introduced. This is where fine lines are stroked out from a corner or a center to add color and dimension. Here, I used various blue-inked pens and markers to add color to the design.
Merry Christmas.
Here’s wishing you all, friends, family, fellow tanglers, a very Merry Christmas. May this day be filled with joy, good company, and lots of fun for you all.
Zentangle drawn on Strathmore Vellum Bristol using a black, Micron pen. Shading done with graphite pencil.
Tangles: Dewd Shattuck Zailz
On the second day of Project Pack 1, a new tangle was introduced: Dewd. This is a fun tangle that can be used as a fill or a ribbon. You can watch the video for this exercise here .
Since I had already done a couple of tiles incorporating Dewd ( here and here ,) I just wanted to do something simple. I decided to see how many variations I could come up with for Dewd.
This tile is from Project Pack 2, The Twelve Days of Zentangle. On day two, we are using two Zentangle tiles.
The first tile, which is black, has a hole cut in the center. Then tangling is done around the empty space. I added red metallic gel pen dots around the center frame and I used a grey metallic gel pen to fill in the spaces in the Flux. Metallic ink just doesn’t show up very well in photographs, unfortunately!
This is a small, bijou -sized tile. It is 2" x 2" square. I don’t have the actual Project Pack No. 1 yet, so I cut a small tile from Strathmore Black Art paper. I bought a 12"x12" pad of this paper a few years ago. I don’t think they still make it in this form, but Strathmore still makes a black, cardstock weight paper that could be used.
This little tile is the first exercise for this Project Pack. You can watch Molly Holligaugh guide you through the design here , on the Zentangle channel on YouTube.
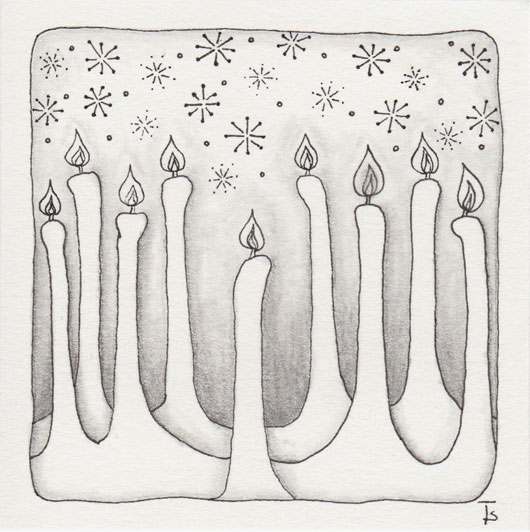
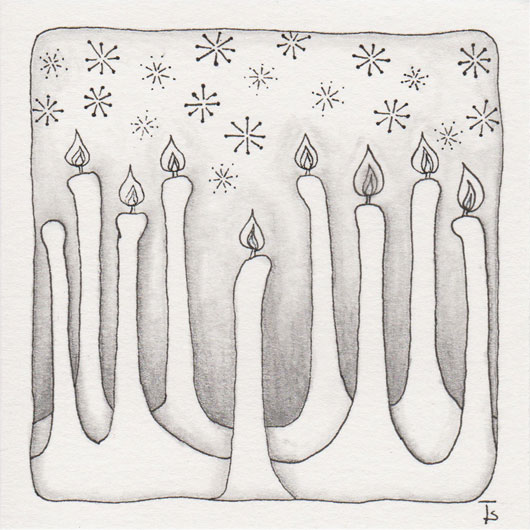
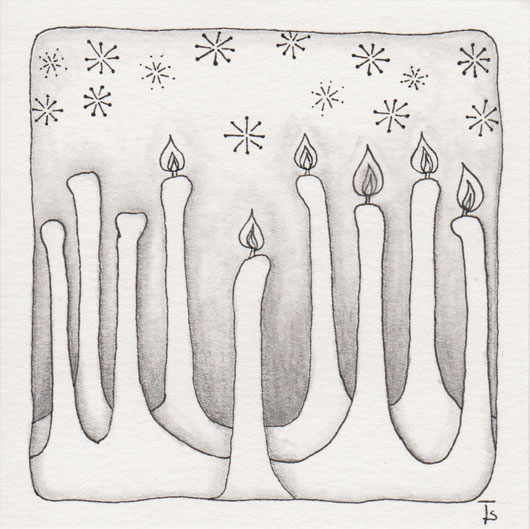
Happy Hanukkah!
Zentangle drawn on Strathmore Vellum Bristol using a black, Micron pen. Shading done with graphite pencil.
Tangles: Aah Grass Border
This tile is a direct result of following the instructions on the blog post for the First Day of the 12 Days of Zentangle over at zentangle.com .
The purpose of this exercise was to draw each of the tangles that are used to teach a brand new person how to tangle. The most common tangles used for a beginner’s tile are Crescent Moon and Hollibaugh and they are often followed by Florz (or Bales) and Printemps. However, we are instructed to draw each of the tangles with a “twist.” For example, Cresent Moon is drawn using triangles and angled auras, and Hollibaugh is drawn so that the strips look more like roots and are intertwined with each other.
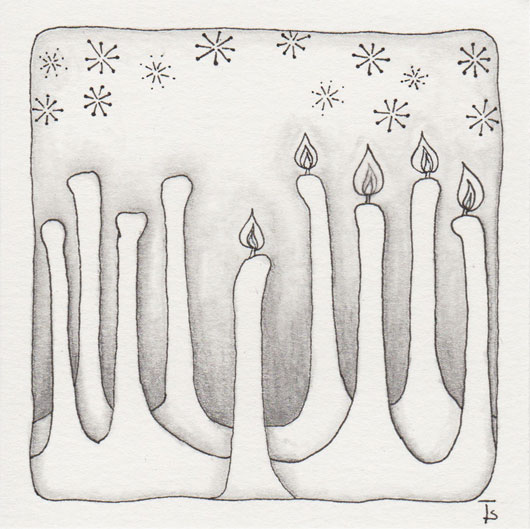
Happy Hanukkah!
Zentangle drawn on Strathmore Vellum Bristol using a black, Micron pen. Shading done with graphite pencil.
Tangles: Aah Grass Border
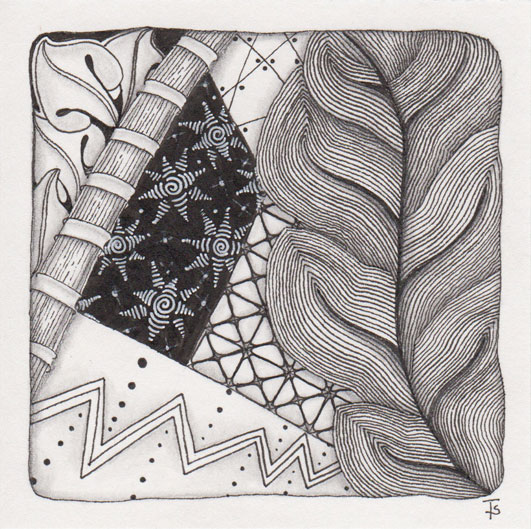
Portal.
The view through the portal was of a crazy, star-strewn universe. She knew she didn’t want to linger. It was too dangerous for her and the ship. Besides, she really wanted to go home. She realized she missed the familiar feel. All the exotic adventures were fun, but sometimes you just want to be comfortable and know what is expected and what to expect.
Zentangle drawn on Strathmore Vellum Bristol using a black, Micron pen. Shading done with graphite pencil.

Happy Hanukkah!
Zentangle drawn on Strathmore Vellum Bristol using a black, Micron pen. Shading done with graphite pencil.
Tangles: Aah Grass Border
Happy Hanukkah!
Zentangle drawn on Strathmore Vellum Bristol using a black, Micron pen. Shading done with graphite pencil.
Tangles: Aah Grass Border
Happy Hanukkah!
Zentangle drawn on Strathmore Vellum Bristol using a black, Micron pen. Shading done with graphite pencil.
Tangles: Aah Grass Border