How do you art journal? Do you draw in a book? Do you create individual works of art? Do you use a spiral bound book you bought at your local craft store? Do you “junk journal”?
Do you journal regularly? Daily? Never?
Lots of questions to think about!
I normally art journal daily… but the tools I use vary depending on what type of art I am creating!
If I am tangling (Zentangle) I generally use a zentangle tile. This is a stand alone piece of art paper. While the size can vary somewhat, they all have the same “quality”.
Sometimes I use a larger, spiral bound, mixed media book from a commercial producer. I use these larger books for bigger pieces which can be collage, mixed media, color charts, color wheels, drawing or mixed media works.
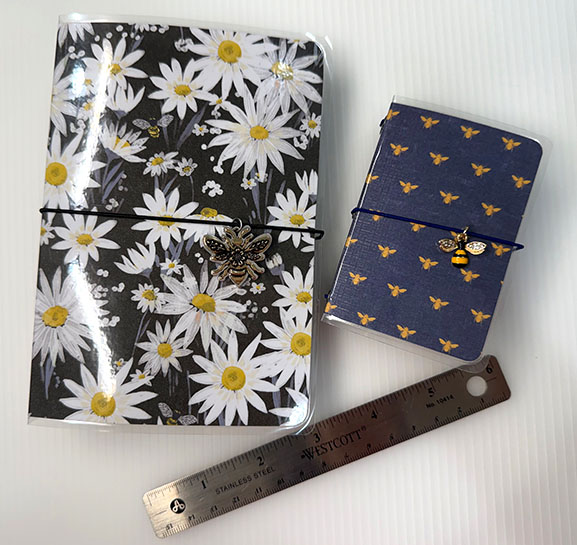
One of my favorite methods is to use smaller Traveler’s Notebooks. I use two different sizes. The first is micro… The artbooks inside measure about 2 inches wide by 3 inches high, when closed. The second is a Field Notes size. The artbooks inside measure 3-1/2 inches wide by 5-1/2 inches high when closed.
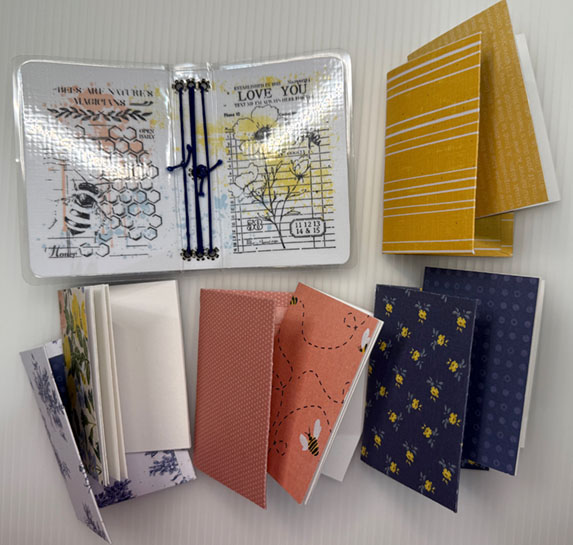
At the top of this article you can see the outside covers, the Field Notes is on the left with the Micro on the right.
I like both of these sizes, depending on what I am doing, because they fit easily in a pocket or bag.
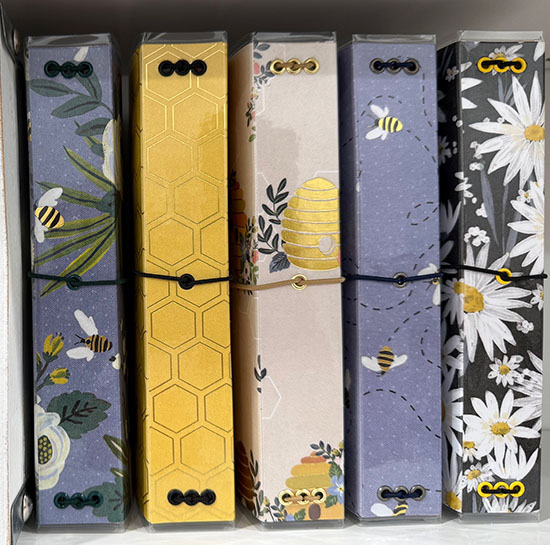
For the month of April, I am working on “bee” themed art. This idea was inspired by some bee-themed scrapbook paper pads I found at Hobby Lobby.
I created books for both sizes. Above is the set of Field Book size that I created. I often do this, making several at one time so that I can give them as gifts or pass them to friends who are interested.
For the larger size cover, I use the Sizzix die: 662467 Bigz L Die By Katelyn Lizardi Pocket Traveler’S Notebook. This die has been discontinued, but you sometimes find them on EBay or Amazon for sale.
I cut and assembled the two-piece cover and then laminated it. I used 1/8 inch eyelets to reinforce the holes, then the elastic was strung to hold the inserts and one to hold the book shut. I often add a charm or other decoration to the closure elastic for decoration.

Inside each cover there are four folders, and inside each folder is a “booklet”.
The folders were created from the Sizzix die: 662466 Thinlits by Katelyn Lizardi Traveler’s Notebook Inserts. This set has also been discontinued, but, again, you may be able to find it occasionally on EBay or Amazon.
The parts for each folder are cut individually from bee-themed scrapbook paper and glued together. The inside of each is backed with another piece of paper and there are pockets on each side.
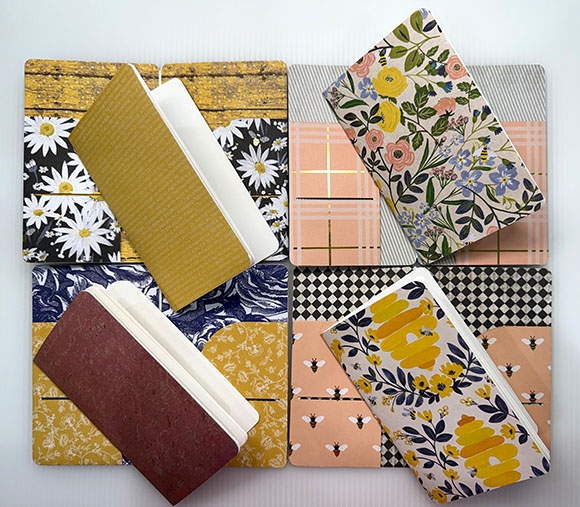
Here, you can see the inside of the folders with the pockets and another view of the booklets.
The booklets were created by cutting 4 sheets of mixed media paper. I use Canson 9-inch x 12-inch mixed media spiral books because the paper works really well for this application and the price isn’t terrible.
The covers are the same size as the pages, and cut from coordinated “bee” paper.
The booklet is held together with a single staple in the center. Then I used a corner rounder on the pages to match the shape of the folders.
The number of pages is specifically to create one “cover page” and a week’s worth of full-spreads. A full spread is when the book is open flat, using both the left and right sides.
I like this method because it isn’t intimidating like a regular “book” with 40-100 pages! It is within possiblitiy to create seven works of art rather than getting ovewhelmed thinking about creating a hundred or more!
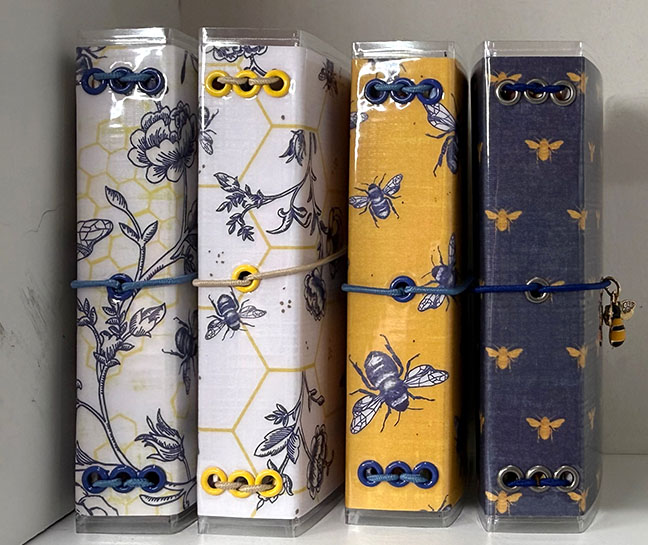
I also created several of the micro sized books. Here are all of them together.
Inside each cover is four pocket folders and for art booklets. The folders are cut from a single piece, then they are folded and glued. I often add a “liner” when the pocket paper is single-sided.
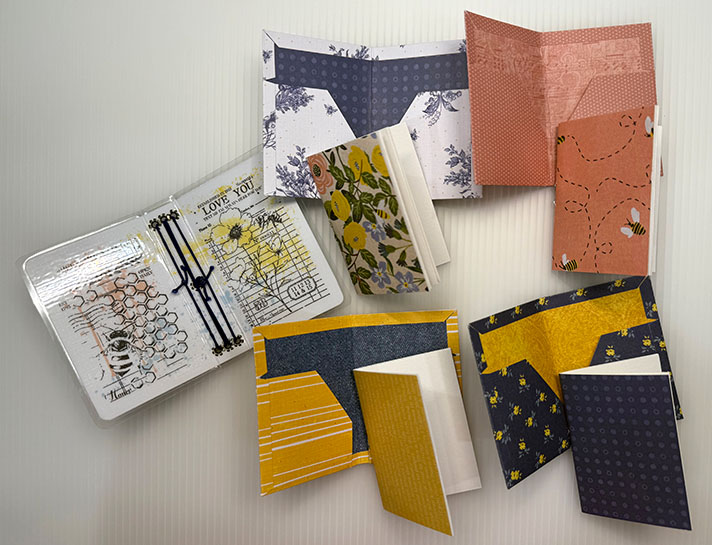
Here you can see the inside of the folders.
The booklets have the same number of pages as the larger size, and are cut from the same paper. The assembly is the same.
Conclusion: Unless you are an “old hand” and have been art journaling for years, you might want to try something small and simple.
If you don’t want to make books like I have done above, you don’t have to! You can easily create the “booklets”! They are a perfect way to get started!
If a large size is intimidating, start with a “micro” art journal!
If you don’t know what to do with your art journal after you make it, there are a series of tutorials here:
Note: NOTE: As you go down this list, some of the tutorials are mentioned as being on Facebook in the Micro Art Journaling group. This group is no longer active. Soon, I will be going back and filling them in on the pages on this website, so if you are interested in them, stay tuned! For now, you may be able to figure them out on your own, using the image as an example! They are not difficult!-
Tutorial - Simple Background 1
-
Tutorial - Simple Background 2
-
Tutorial - Simple Background 3
-
Tutorial - Simple Background 4
-
Tutorial - Two-Step Background 1
-
Tutorial - Two-Step Background 2
-
Tutorial - Two-Step Background 3
- This one is just an example using the background from #3 above!
Tiny Art Journal - Galaxy
-
Tiny Art Journal - The Artist
- Another example using stencils to create a scene from background from #2 above!
Tiny Art Journal - Freedom
- Another example for background tutorial #4
Make Your Mark
- Another example for background tutorial #6
Steam Gear
- Another example for background tutorial #5
Mermaid Bubbles
- Another example for background tutorial #7
Fabulous
- If you simply use another piece of mixed media paper for the cover of your art journal, you could use this idea for the cover!
The Cover
- And finally, here is an idea for a “table of contents”: Table of Contents
I hope you find these tutorials and examples helpful, even if it’s just to jumpstart your imagination!
Happy Arting!
Tandika*
#bookbinding #travelersnotebook #artjournaling #microartjournaling