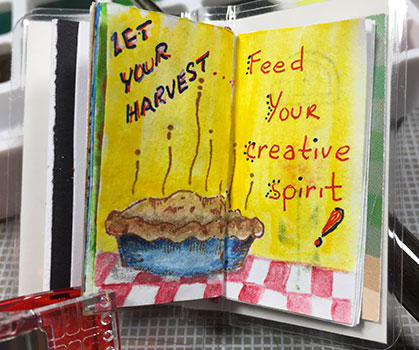
Jokes and puns about pie abound in this household. It’s a popular food item, and also a popular numerical value.
However, I set all of those aside, (perhaps to be revisited in their own tiny art journal,) so that I could use something that related better to the theme of the book I am working on.
If you will remember back, I did a page where the fruit was harvested . Now, I’ve baked all the fruit into a pie!
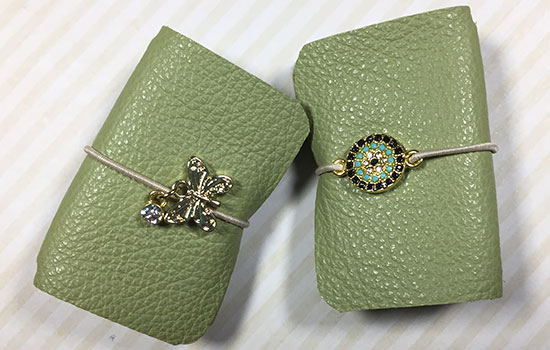
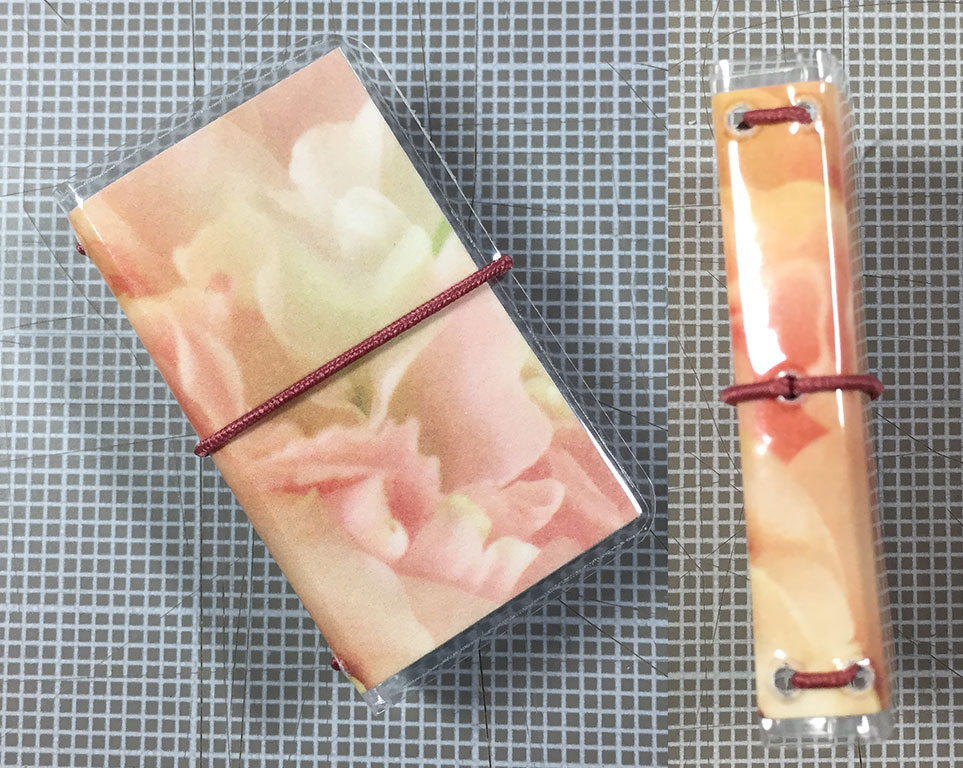
Today, I can show you the covers that fit the insert booklets you saw yesterday!
I used the green leather you saw previously. I ended up using oatmeal colored elastic and I added some charms. I made two complete sets. The one on the right is for me, and the one on the left is a gift for a friend!
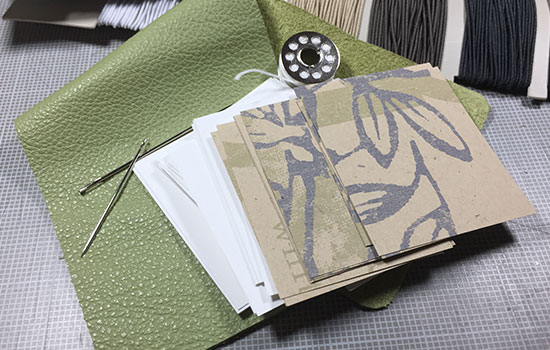
Here, you can see all four booklets in each cover. I wanted that many because each booklet has enough pages to do one spread per day for a week. So by having four booklets, you basically have enough pages to do a spread every day for a month.

The first step in figuring out how to make my micro art journal from the parts I showed you yesterday was to figure how to make the inserts, and what size they should be.
Next, I selected Canson Mixed Media paper to use as the pages. I chose this paper because I already know it handles wet media well. It is the paper that I use to make Gelli plate prints. I’ve also used it in spiral notebook form as art journals.
After working in my teeny, tiny, micro art journal for a week or so, I’ve decided on a size that I like, for the time being.
I figured out the sizes for everything and made myself a set of templates.
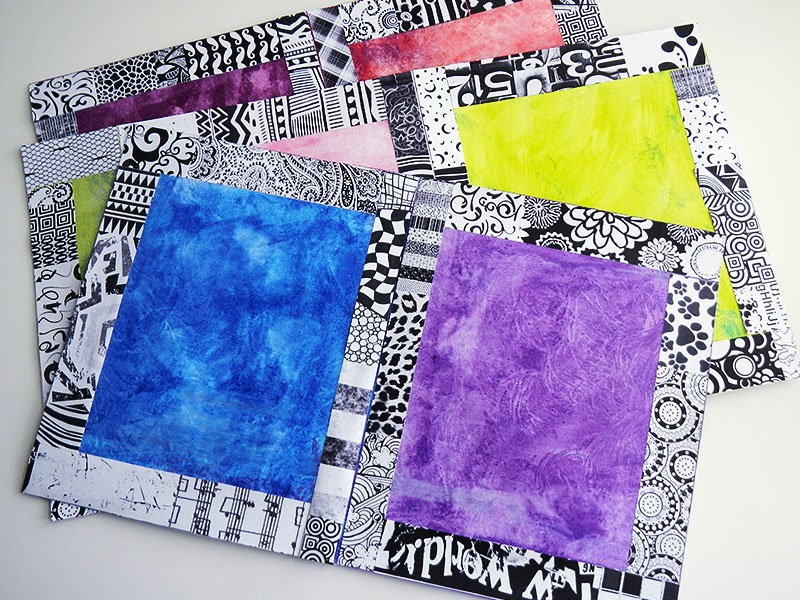
And after I decided what to use for the cover, I found paper that will look nice for the covers of the inserts!
Doing a happy dance!
Tandika*
#microart #microartjournal #miniatureartjournal #miniartjournal #miniatureart #tinyjournalnation #allthingstiny #allthingsminiature #microartjournaling #tinyartjournal
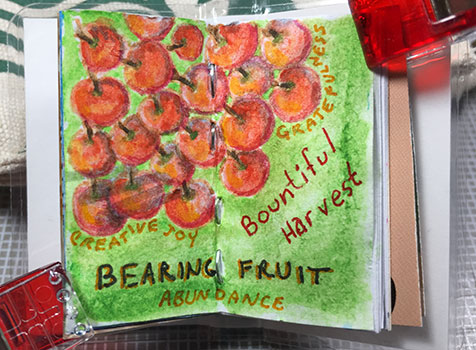
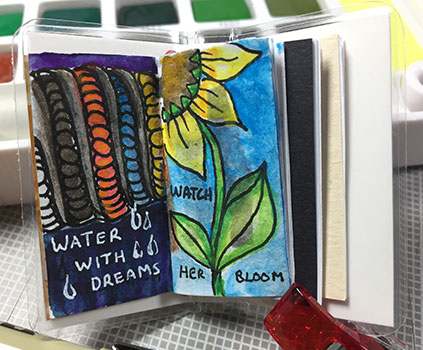
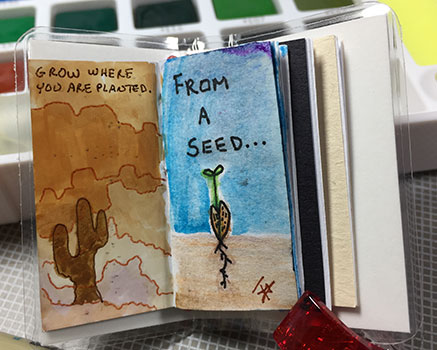
I’ve planted lots of “seeds”, tended the garden, and now it’s time to reap the rewards!
Another spread in the tiny Traveler’s Art Journal! I had drawn Pokeroot on the page, and there were a few gray marks. So I just went with it, incorporating it into the theme.
If you are interested in Tiny Art Journals, you might like Micro Art Journaling Facebook group!
Tandika*
#microart #microartjournal #miniatureartjournal #miniartjournal #miniatureart #tinyjournalnation #allthingstiny #allthingsminiature #microartjournaling #tinyartjournal
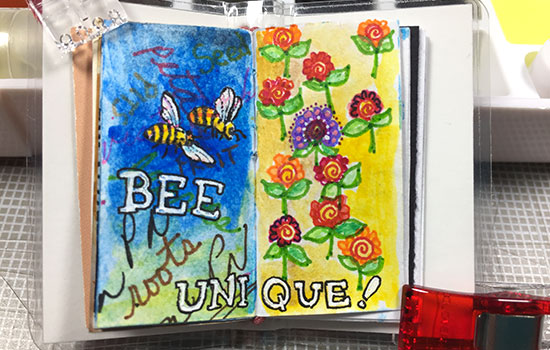
Again, working on pages with markings. And then I added more to the page on the left. I added a tiny stamp with two bees and then used my watercolors to paint them and the page, over the markings.
I had already drawn the flowers on the page on the right, but I added watercolor, micron and gel pen.
Finally, I added the words.
It is fun trying to scale down my normal art journal techniques to fit in this tiny book! A double-page spread is 1-5/8 inches square! Not a lot of room to work in!
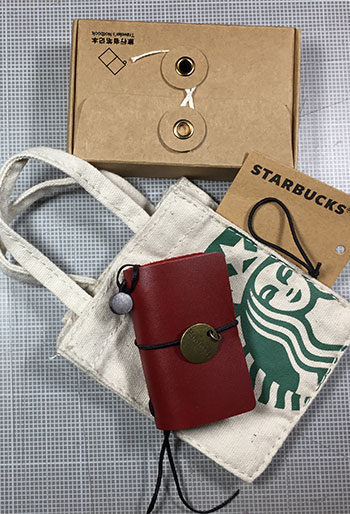
I loved my teeny, DIY, Traveler’s Notebook so much, that I decided to purchase a commercially made one with a leather cover from Amazon.
It arrive in a tiny box! I thought this was really adorable. When I opened it up, the book was inside.
The book itself is very nice, although I thought the cover was just a bit too thick in proportion to the size. However, I’m ok with it because it will probably last forever.
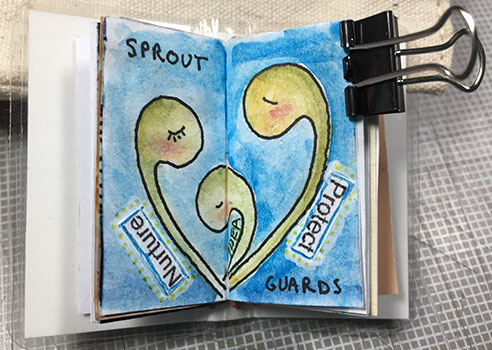
For the third set of pages in my teeny, tiny Traveler’s Notebook, I decided to create a two-page spread.
I decided to use Mooka shapes to indicate parts of a plant and create a “family.”
I wanted to illustrate that when you have a good idea for your artwork, you need to nurture it and protect it so it comes to fruition.
Tandika*
#microart #microartjournal #miniatureartjournal #miniartjournal #miniatureart #tinyjournalnation #allthingstiny #allthingsminiature #microartjournaling #tinyartjournal
Last week I made a tiny Traveler's Notebook . Then, I started using the first booklet insert as an art journal, and showed you the first two pages . Today, I’m showing you the next two pages.
When I made this book, I was thinking of it as a “test”. I wasn’t, originally planning on drawing in the booklets inside, so I used scrap paper. As a result, several of the pages already had various markings on them.
Yesterday, I showed you the tiny Traveler's Journal that I made. Yesterday, I started using the first insert booklet as a tiny art journal.
I chose the theme of “seeds”. So these are my first two pages. The first is inside the cover and the right side is the “title page”.
Working this small does take some rethinking about the techniques normally used in a standard-sized book. For example, the width of a mark made by a Copic marker is much larger, in proportion, than I was normally used to.
I’ve been totally obsessed with Traveler’s Notebooks since seeing a mini one turned into an art journal on Facebook!
So I decided to try my hand at making them. I’ve made several of various sizes. But today, I wanted to show you a little tiny, mini one. Above, you can see the front and the spine.
The flower design is continued on the back.
Here is the spine, showing how two elastics were strung, and with the closing loop undone.
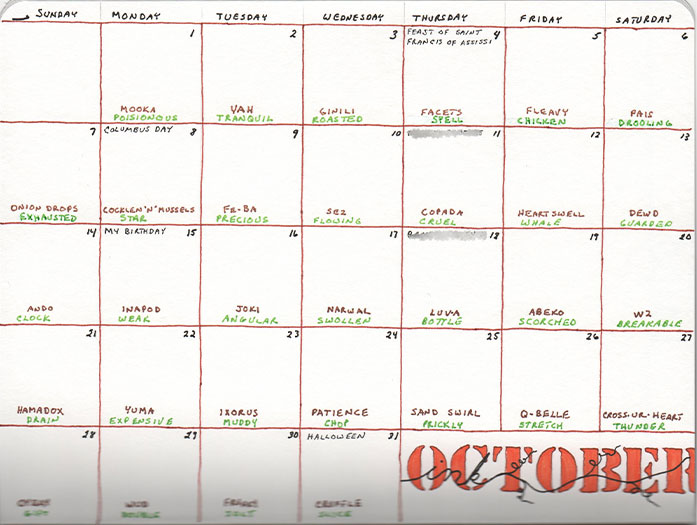
Inktober.
Are you familiar with Inktober? It is a month long challenge started by Jake Parker designed to instill in artists a daily, ink-drawing habit. You can read all about it (and get the list for this year) from the Inktober website .
There is also a tangled version of Inktober. The list of prompts for that are here .
I’m starting a new Journal Junkies Art Journal on October 1, so I’ve cheated a bit and added in my calendar and a few other pages already. I’ll be using it for several things, including whatever I do for Inktober.
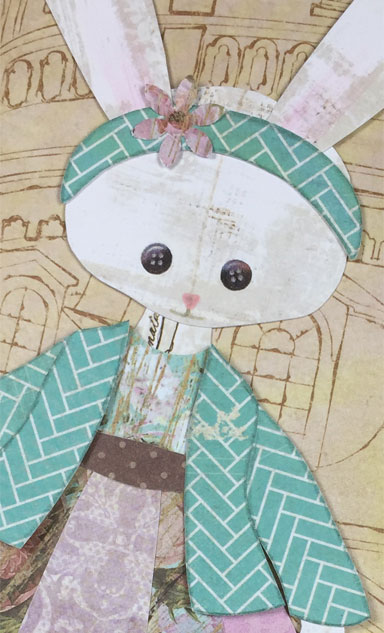
Miss Bunny.
I’m sure you know that even though I do a lot of tangling, I also do other kinds of art. For examples of another kind, you can look at the Art Journal Pages gallery .
One of my favorite things to do is cut up printed or painted (or stamped!) paper into shapes and make pictures out of it. So I decided to indulge in a couple of my loves to creat and easter card!
This page took more time that I thought it would.
To begin with, the page started with just the strips glued around the edge. I hadn‘t even decided what I wanted to put on the page.
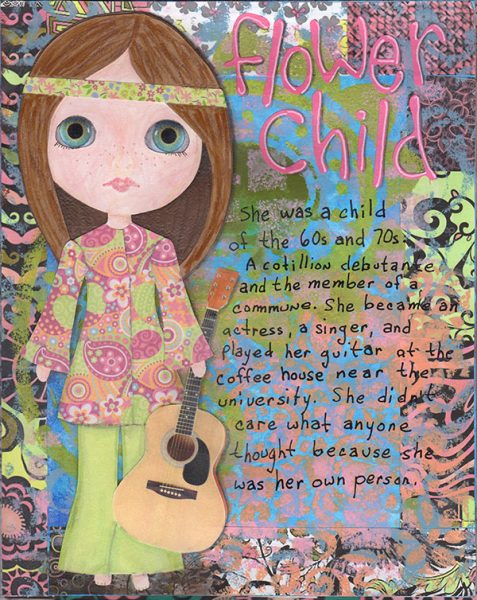
I knew I wanted to do a hippy, flower child type doll somewhere in this journal. Then I remember that I had templates for a B.E.D. (Big Eyed Doll) and I thought that would work, so I cut out the parts for the doll‘s body.
This page was an ever-changing experiment. You can see where I left off a few years ago.
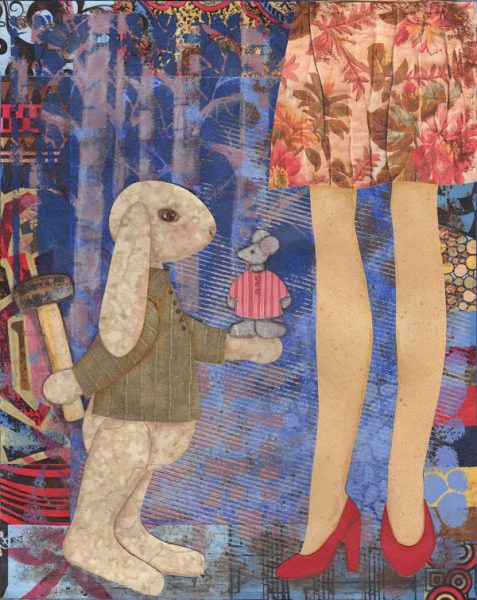
It all started with the bunny paper doll. I wanted to experiment with a doll that faced sideways, and with one that wasn‘t a human figure. So I cut the bunny out of an old wallpaper scrap. Then I thought it would look good with a jacket. But after that, I set it aside a bit because I wasn‘t sure where to go with it.
I have mixed feelings about this page. This is where I left off with it when I quit working on this art journal.
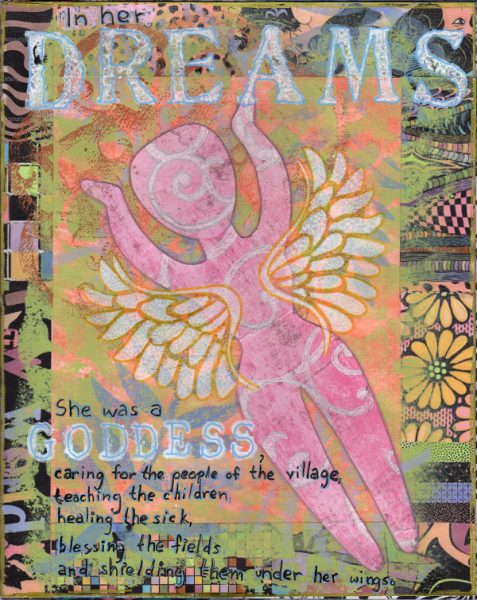
I knew I wanted it to be a goddess figure. The shape is very much like primitive statues found in various archaeological sites.
I also wanted to add wings to it. I couldn‘t decide if I wanted to mask off the doll, or just put them right over it. The easy, simple method won out and I just stenciled them over the doll figure.

This is the second page in the art journal. As it happens, it was almost the same color scheme as the cover. Here‘s what I started with.
In addition to the words, I finished the apron with some drawn flowers and leaves and added a sash. Since she works in a restaurant, her hair needed to be tied up, so the head band was a must. Other than that, I mostly added dimension and shadow to her clothing using colored pencil.
From this, to that! When I stopped working on the art journal, the front looked like this.
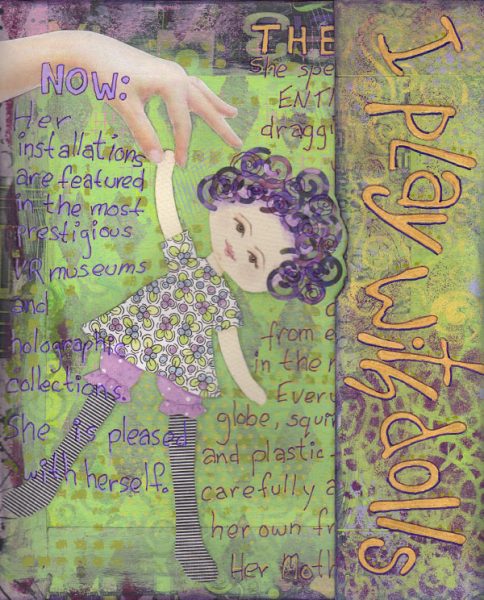
The doll and hand were already glued down, but the doll wasn‘t finished.
The flap, which folds over from the back to keep the journal closed, had nothing done to it after the book was assembled. But that‘s good, because I can show you the process I used.
I used coordinated Copic markers to color in the black and white design stripes.
If you have been a fan of this site for a few years, you may remember that I started an Art Journal a few years ago. I based the book‘s design on Teesha Moore‘s Amazing 16 Page Journal . I really like this type of art journal because the 8-inch by 10-inch format is a good size to work in and 16 pages is an attainable goal. Having a specific, low number of pages also allows me to explore a single theme in each booklet.