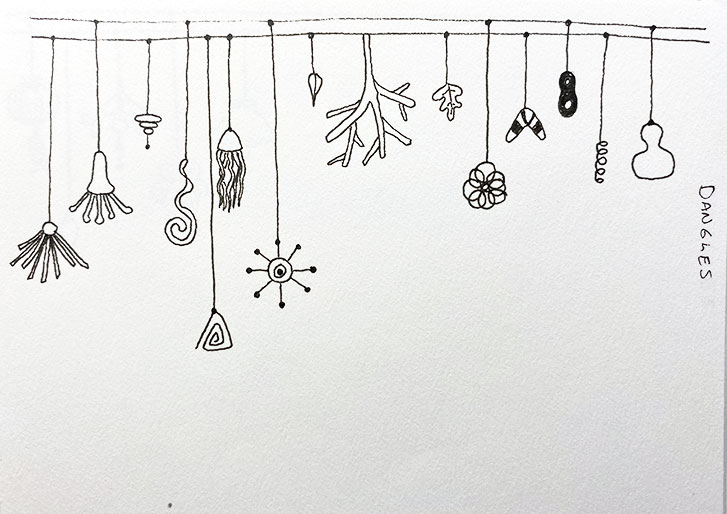
Yesterday, I showed you some dangles that were on a page in my small sketch book.
Today, I’m showing you some more dangles, but these are a slightly different style. These are more like the style illustrated in "The Art of Drawing Dangles: Creating Decorative Letters and Art with Charms" by Olivia A. Kneibler.
This style is a bit less abstract, choosing to create dangles illustrate items from nature and real life.
Doodle Dangle it!
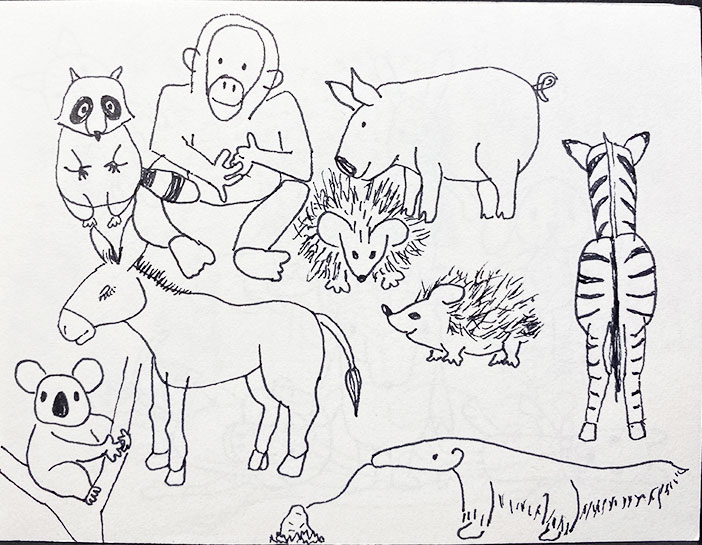
Yesterday’s doodles were a variety of animals.
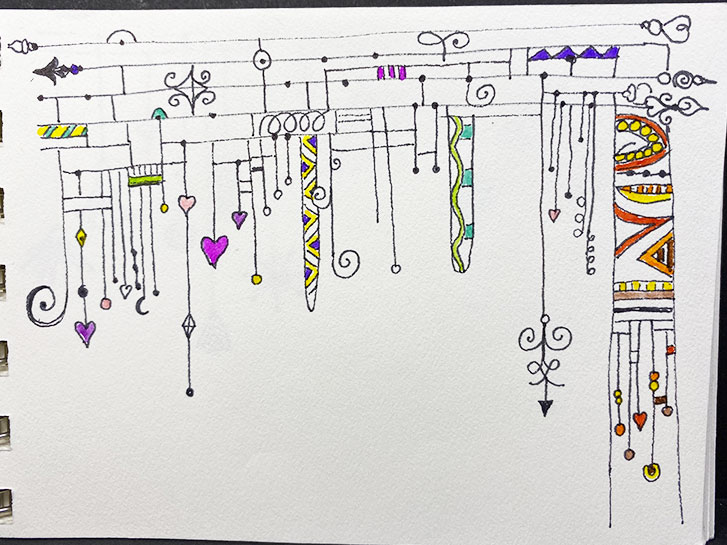
Today, we’re going for a variety of decorative, dangling elements that,together, create a composition.
The modern dangle concept illustrated here comes from Joanne Fink, first shown in her book "Zenspirations, Dangle Designs" .
This is a bit more structured doodling that can be a lot of fun!
Give it a try. Don’t forget to tag your post: #doodledoit!
#doodledoit
How do you doodle?
Just about everyone does it.
Maybe you doodle around the margins of your notes in school. Perhaps you like to play with your pen when you’re on the phone. How about while you’re waiting for an appointment?
Doodling helps to pass the time. It engages the brain. And it’s good practice for motor skills.
If you don’t doodle, maybe you should give it a try! You can get a little sketch book … one that fits in your pocket. Add a pen or a mechanical pencil and you’re good to go!

As I was cleaning up and rearranging this weekend, I came across this tablet of really nice watercolor paper.
I had purchased this to make some Zentangle tiles, but it turned out that this paper didn’t work well for that purpose.
So I’ve decided to make a new art journal from the remainder of the paper. To keep this fairly simple, I’m just folding each sheet of paper in half, and using two sheets to create a signature. This paper is heavy (140 lb) so using 3 sheets in a signature creates a wide variation between the open edges that is a bit too much for my taste. Two sheets creates a bit of variation, by I’m fine with it. The alternative would be to trim the irregular edges, but I would rather not do that.
Sometimes, you just need tiny pencils! These are 1-1/2" to 1-3/4" long.
#microart #microartjournal #miniatureartjournal #miniartjournal #miniatureart #tinyjournalnation #allthingstiny #allthingsminiature #microartjournaling #tinyartjournal #travelersnotebook #inktober #spooktacular2019
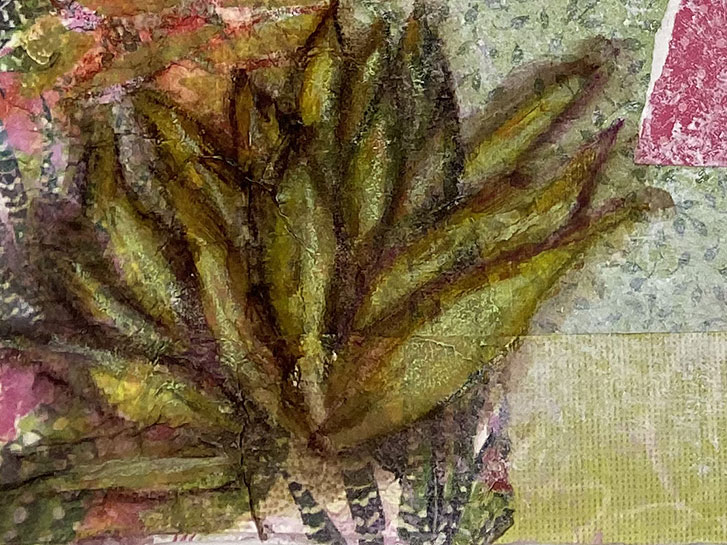
I have been working on a mixed media project for a while now. It’s not finished, by any means, but I thought I would give you a bit of a peek at what is happening.
Another part of the same work.
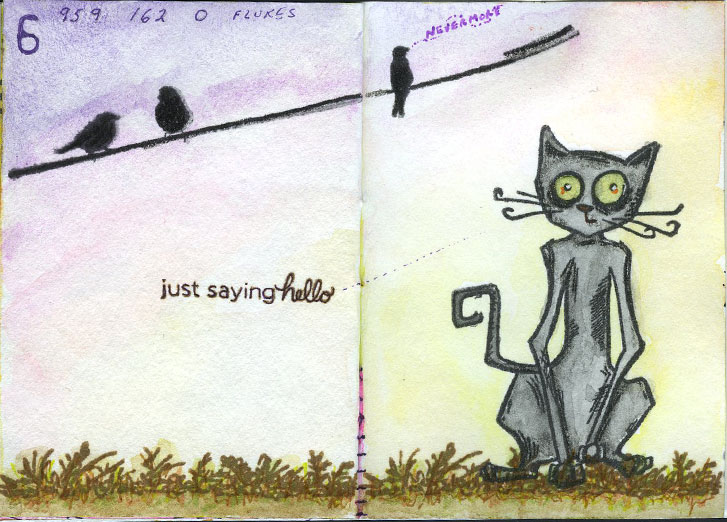
Meow!?
I don’t think you can have a Spooktacular Celebration without the traditional, familiar, black cat.
Here, our favorite feline was apparently contemplating dinner when one of the vittles decided to speak up for itself!
Perhaps our furry fiend will contemplate a nice bowl of kibble instead!
Images were stamped and then watercolor was applied. Colored pencil and gel pen were added for color and emphasis.
#microart #microartjournal #miniatureartjournal #miniartjournal #miniatureart #tinyjournalnation #allthingstiny #allthingsminiature #microartjournaling #tinyartjournal #travelersnotebook #inktober #spooktacular2019
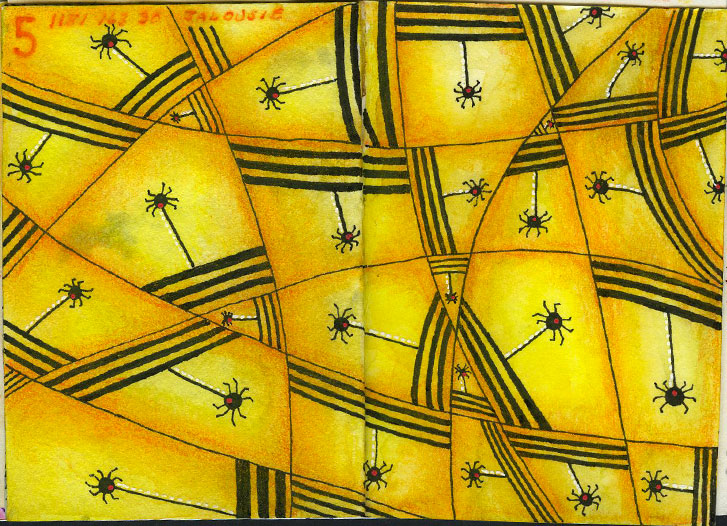
Jalousie? Teensy spiders just hanging around…
I’m so happy with how this came out! I wasn’t sure my idea would work. And it was still a bit mundane until I added the red dots to the spiders and the white dots next to their strings!
This was created using the tangle Jalousie, which was drawn first with black, Pigma Micron pens. Then watercolor was applied to establish the basic color range. Colored pencil, smoothed out with Copic Blender added depth to the colors. The red dots were added with a red, Posca pen. White dots were created with a white, Pentel, Juice Up gel pen creating a highlight along one side of the spiders’ strings.
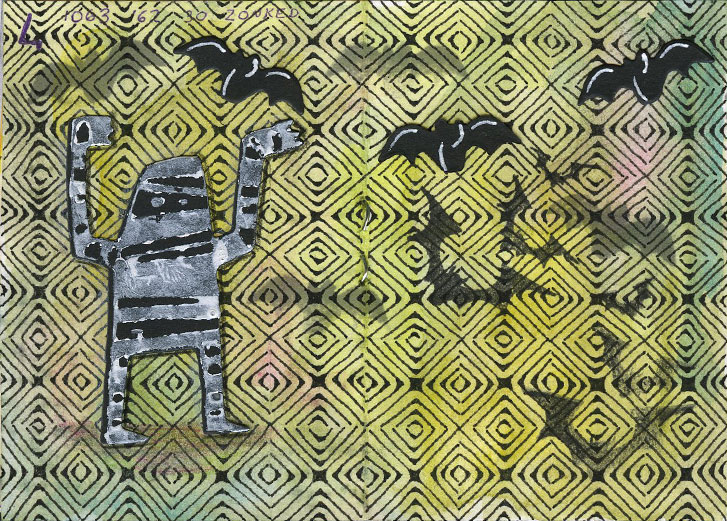
Zonked!
Every so often, I get a wild idea to try something… and it ends up taking much longer, or being more complicated than I thought it would be. This layout is one of those.
I probably should have drawn the Zonked larger. But I wanted the scale to be small so that the mummy and bats wouldn’t get totally lost in the design.
However, I don’t think I’ll be drawing this tangle again for a while!
Whooo has the time?
Everyone who wants to make art, no matter your experience or education should make a little time each day to “just do it!” A tiny art journal is perfect because you can fill it quickly and the smaller size is less intimidating.
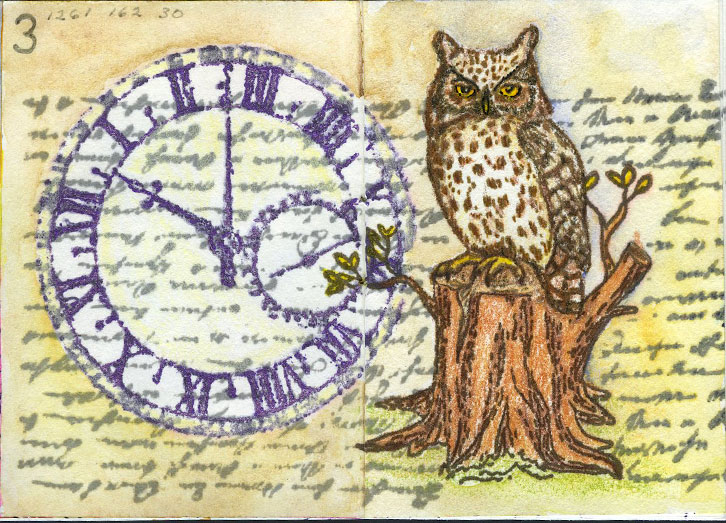
I wanted to create a layout with the feeling of the passage of time, and how we gain wisdom as we get older. So I chose these particular stamps with that in mind.
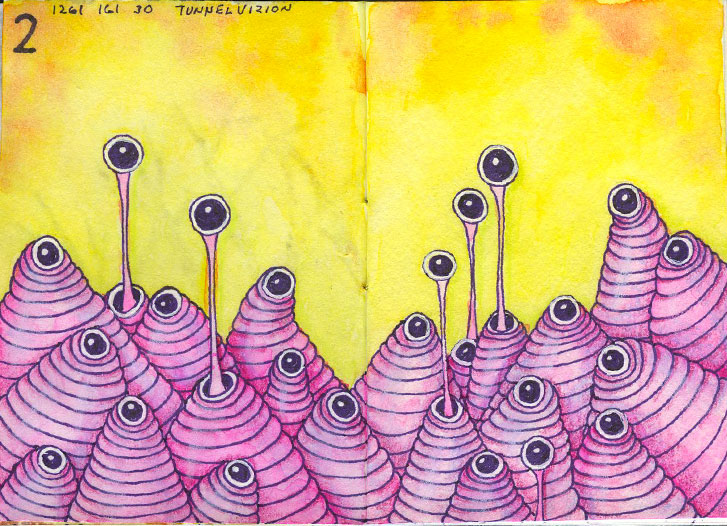
Today’s Inktober Zentangle prompt was TunnelVizion. I think this tangle makes a wonderful, creepy-cute critter that could be found on the Halloween forest floor!
Tangles drawn with purple, Sakura Pigma Micron pen. Watercolor was added to the background and each of the tangle elements. Colored pencil was used to give more dimension to the individual parts and a bit added to the background to intensify the green.
#microart #microartjournal #miniatureartjournal #miniartjournal #miniatureart #tinyjournalnation #allthingstiny #allthingsminiature #microartjournaling #tinyartjournal #travelersnotebook #inktober #spooktacular2019
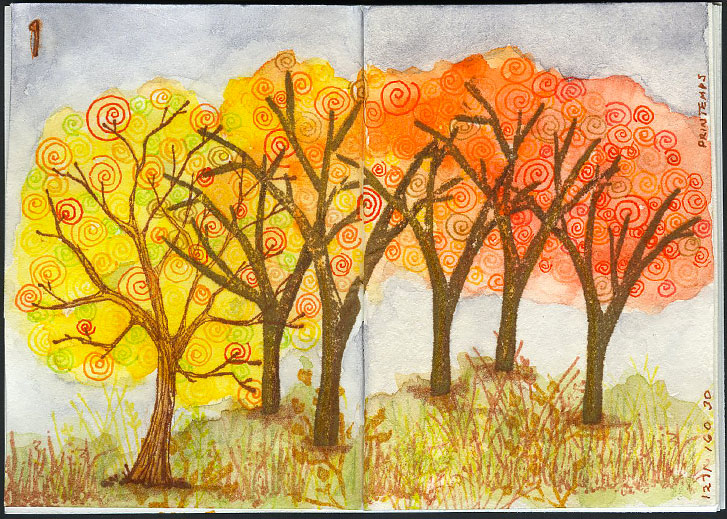
On the first day of Spooktacular2019, I incorporated the Inktober Zentangle prompt, which was Printemps in my tiny art journal layout. Here, I used them to make the brightly colored foliage in the trees.
The tree trunks were stamped on the page, then the tangles were added. Watercolors were applied and the foreground was stamped. Additional watercolor was added to the background and foreground. Finally some colored pencil was used for shading, color and texture.
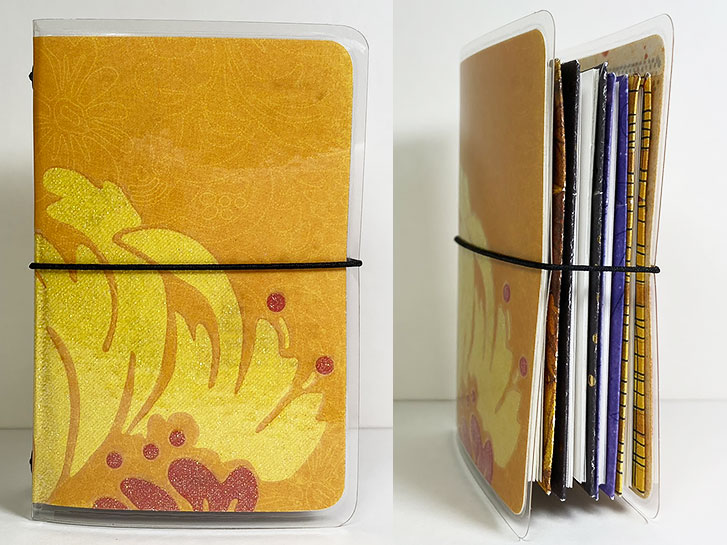
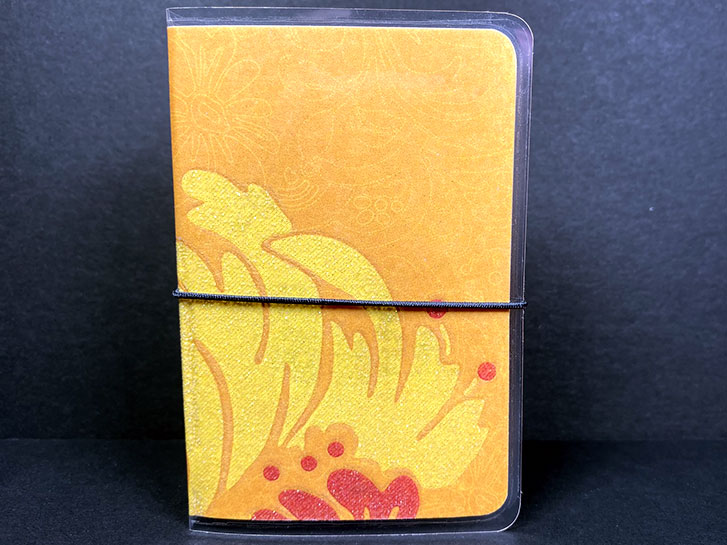
Yesterday, I showed you the cover of my tiny, Spooktacular2019, traveler's notebook . Today, I have the completed set for you. Above, you can see the set, closed, from the front and opening edge.
Right now, the inserts are blank inside. Today I will be beginning the artwork. The paper is from Bee Paper Company. It is from the spiral-bound, Super Deluxe Mixed Media book. I love this paper because it’s not too thick to use in a small book, but it holds up well to wet and dry mediums. Each insert has four, folded pieces of this paper and a decorative cover. This creates sixteen individual pages for art, or seven, double-page spreads. If used for spreads, there is a remaining front page for a table of contents and a last page that can be used various ways.
It’s almost time for the Spooktacular Anniversary on Facebook's Micro Art Journaling Group !
In honor of the occasion, I am making a new journal cover and inserts to use during the month of October.
The outside of the cover is a nice combination of fall colors with touch of sparkle.
The paper I used for the cover was blank on the reverse side, so I used various stamps to add color and texture to compliment the theme.
Yesterday, a friend and I got together so I could show her how to replace the pages of an existing, hard-covered book and create a Junk Journal.
I did one a couple of weeks ago. In the first post , I showed you how to remove the original pages and cut and fold new ones.
In the second post , I showed how easy it is to attach the new pages to the empty cover.
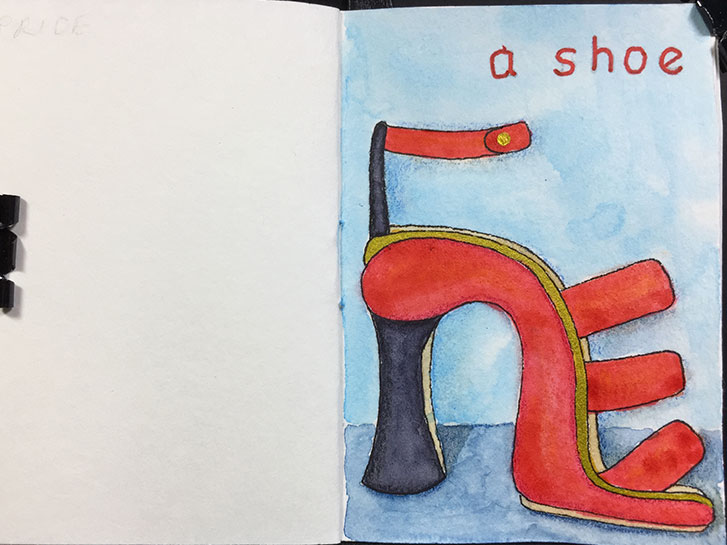
For the month of June, the Micro Art Journaling Facebook Group is doing an interesting challenge. There is a “cloud” of prompts. When you have a list, people usually start and the top and work their way down. With a cloud (the prompts are placed randomly positioned in an image) there is no starting, ending, or ordering. You can just choose randomly.
So, the first one I’ve done, is “a shoe”. I thought it would be fun to just do a super-high, bright red, strappy women’s high heel! It wasn’t difficult and lots of fun.
In yesterday's post , I showed you how I was changing a small book into a type of junk journal. Today, I’m continuing with how I created the new book. We left off with cutting out a number of new pages from all different kinds of paper.
The next step is to stack up all of the pages, and align them at the spine. Then use clothes pins or binder clips or something similar to hold all the pages tightly in space near the spine edge.
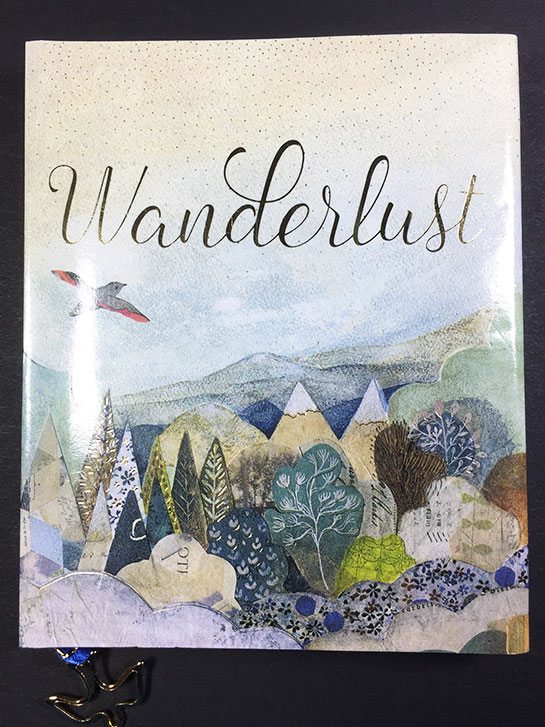
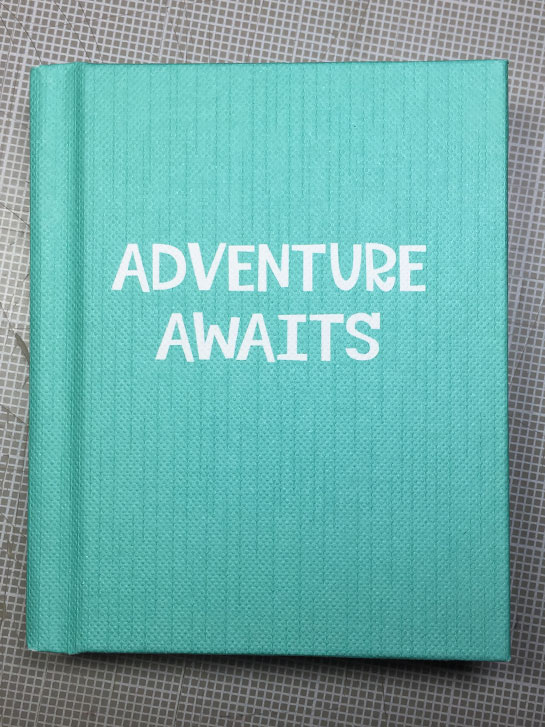
This is a small gift book.
It measures 82 mm wide by 11 mm high.
Here, the dust jacket has been removed and set aside to be used in this or another project! As you can see, the word “Wanderlust” is imprinted on the cover. I liked it and I think it will work well for a journal!
A major critera for making this kind of Junk Journal is that the pages must not be glued to the spine. When you open the book, there should be a space, as shown in the picture.
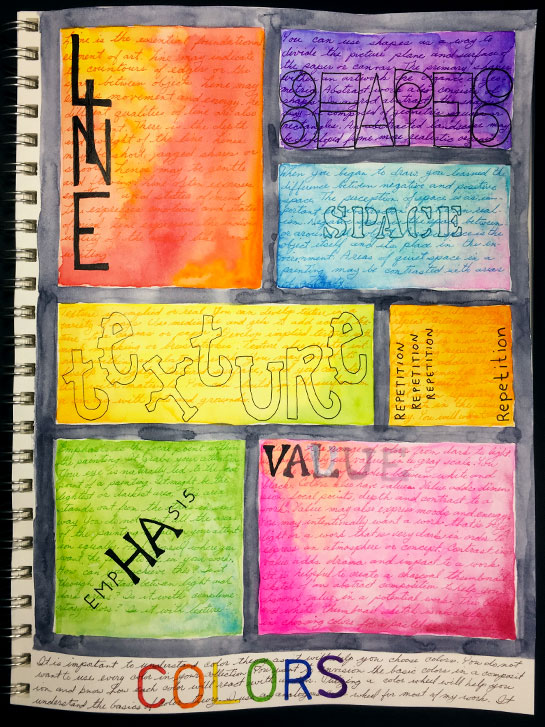
One of my favorite things to do is use colored pencil to add depth and definition to a page.
If you compare today’s image with the one posted yesterday, you can see how the page is coming to life.
I used Koh-I-Noor Hardmuth Polycolor pencils. They tend to be a bit more opaque than some of the others. In addition, they will blend a bit if rubbed with a stump.
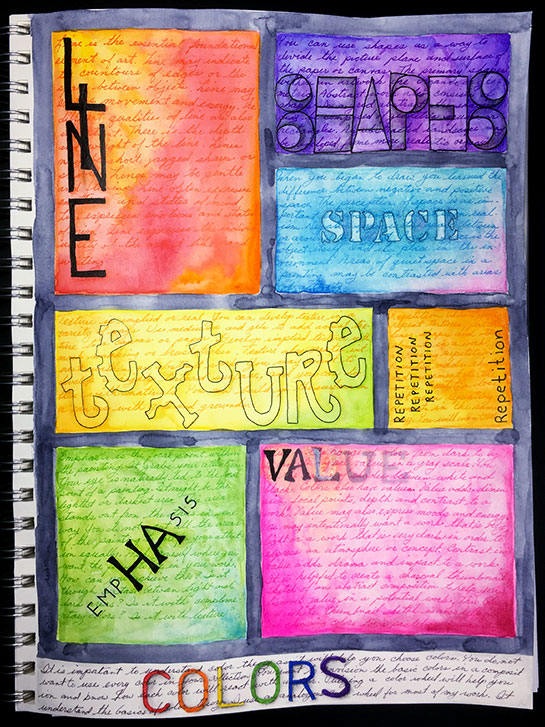
The next layer that I’ve added to the page in my sketchbook is text, or lettering.
Each block in the design is about a particular art concept. So I’ve added the key word that matches the text in each block. I tried to match something in the text design to the concept.
As an aside, you see a mistake in one block. When you want to add lettering, it’s a good idea to print out the word on a piece of scrap paper and keep it in front of you! I’ll be fixing this in the next layer or two.