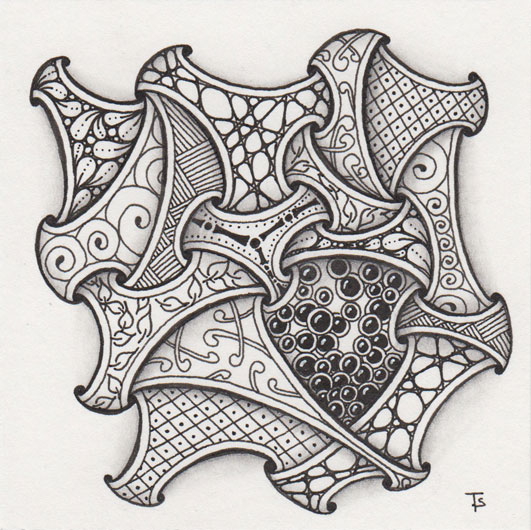
Button, button.
Amanda has jumped on the Zenbutton band wagon! She’s done a few others, but this one is one of my favorites so far. I really wanted to share it with everyone so you could see more things that can be done with fragments.
In just a couple more weeks, Amanda and I will be heading to Rhode Island for CZT 30. We’re so excited, and we hope to learn lots to share with all of you here, when we come back. While we are gone, make sure you follow us on Facebook (there’s a link over there on the top, right side of this page!) We will be posting pics of our adventures for you!
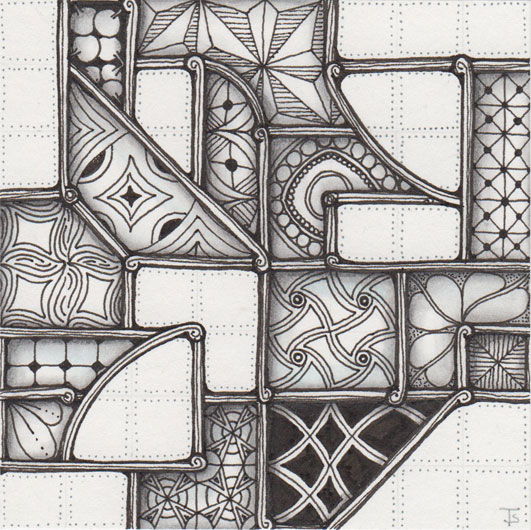
Fragments, as introduced in the Zentangle Primer, are a really interesting and powerful way of creating patterns. Essentially, they are designs that fit into a grid. I’ve already done a few of these, which you can see here . I really love playing with the very geometric patterns. Drawing them gives me practice with being precise. But the real magic comes when it’s time to shade! It’s amazing how a simple design can suddenly have so much depth and structure just from the addition of some pencil.
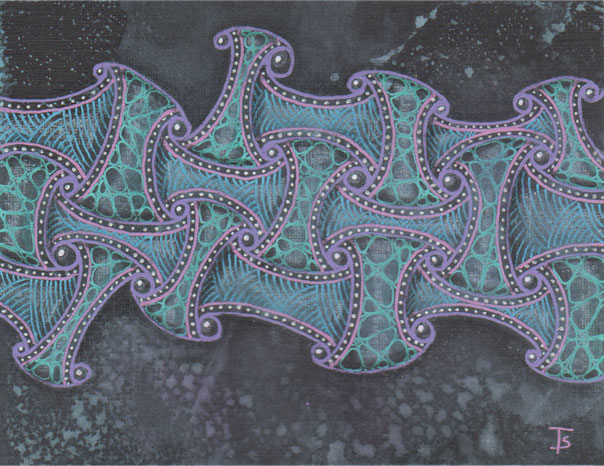
String theory.
She knew that diving into the black hole to escape the pirates would be risky. But she really didn’t know how wild the ride would be. The view screen showed her the strings of realities she could follow. Which one should she choose?
Zentangle drawn on Strathmore Vellum Bristol using a black, Micron pen. Shading done with Copic marker, colored and graphite pencil.
Tangles: Coral Marasu Scute Scena
Life saver.
She tossed the ring out into the ocean, not knowing if it would work. This was no ordinary water. It was a sea of freezing chemicals that a human could not survive. Even the plants (yes, there were plants in it!) were oddly floating along the surface in areas. In some places, plumes of frozen gasses erupted into the air and in others, chunks of ice floated. This was a body of water like none she had seen before!

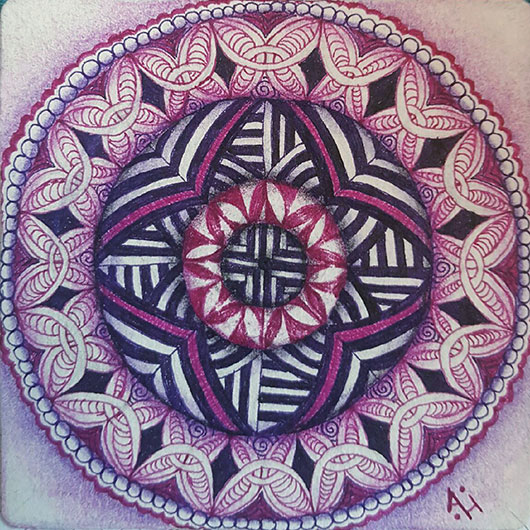
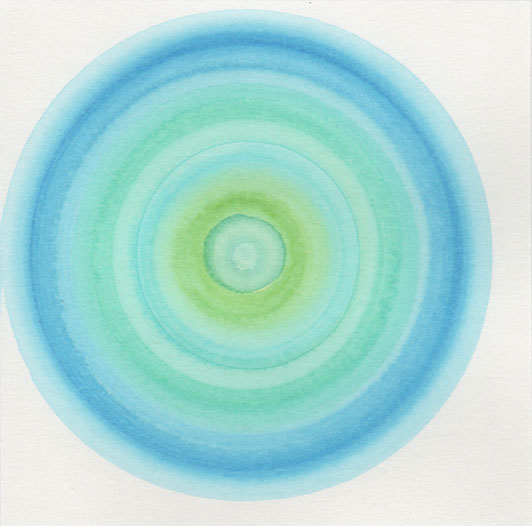
SpundalaZ.
Yesterday, I reviewed various tools that could be used to create the base for a SpundalaZ. Today, I’m showing you one done on one of the bases, this one.
I used colored pencil to push the coloring a little more towards violet in various areas, and also added the violet coloring to the background with Distress ink and colored pencil. But you should still be able to see where the rings and color changes are.
Warning: Lots of images ahead!
If you are an active tangler, you probably know about ZenButtons. I’ve posted a few that I’ve done recently . But do you know about SpundalaZ? These are another type of Zentangle button, but they are created over a base design. This post is about how that base design can be created.
The basic premise is that you need to be able to rotate the tile around the center point, and while it is rotatating, create greyscale or color concentric areas on the tile.
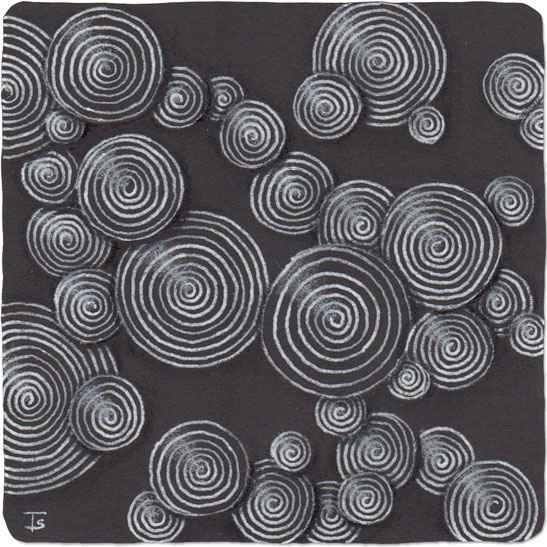
If you recall, I posted a similar tile a couple of days ago. It was the same tangle, in almost the same size and layout, but drawn with black ink on a white tile. That tile was drawn in July, 2010, when I was first learning how to tangle.
I decided to recreate that tile, but using everything that I’ve learned since then. To begin with, I reversed the coloring and used white ink on a black tile. That gave me the opportunity to play with highlights and shading. You might think that you can’t really “shade” on a black tile… but you actually can. Most paper isn’t blackest black. In this case, I was able to find a colored pencil and a black Copic that were even darker than the paper. Even though you might not notice it without studying the image closely, those shadows are there, and they do make a difference!
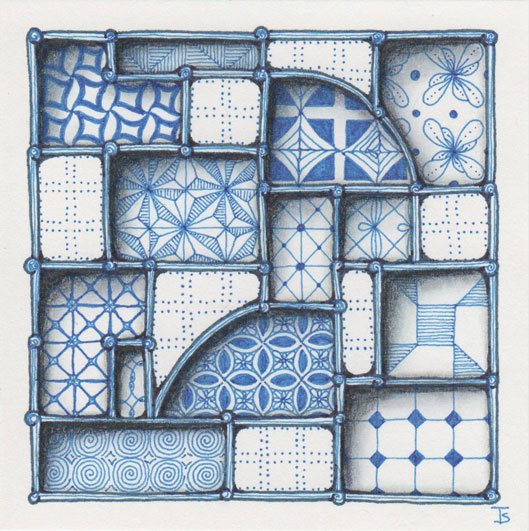
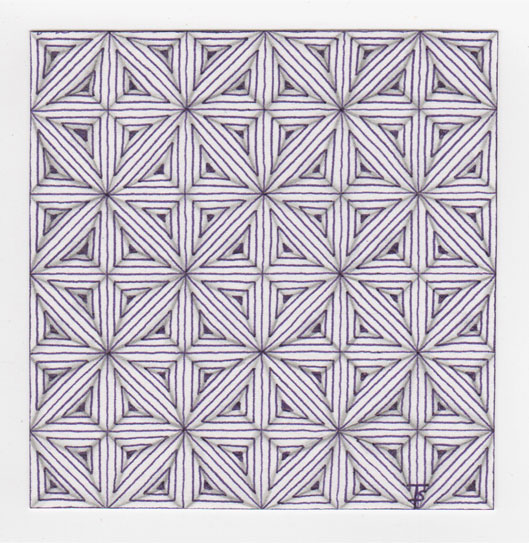
This is my second tile from Eni's Fragmented Windows lesson . I really wanted to try this in blue because it reminded me so much of floor plans. I also made the grid a bit smaller than the first one. I’m not sure if I like it better, or not. I did have to use a finer tipped pen to draw the fragments because the squares were so tiny!
Zentangle drawn on Strathmore Vellum Bristol using blue and dark blue, Pigma Micron pen. Shading done with Copic marker, colored pencil and graphite pencil.
Starting here.
When I first starting tangling, I didn’t have too many problems with patterns that had straight lines. But circles were really difficult for me. It is difficult, almost impossible for me to write in cursive, and I suppose there are similar difficulties with drawing circles in many ways.
So, I figured I would start out really big. My thinking was I could do these, starting from the center, and carefully go round and round, rotating my paper, and it should work.
This is my first tile from Eni's Fragmented Windows video lesson ! I’m really excited about this method because it is a very unique way of exploring the various Fragments from the Zentangle Primer . It was a lot of fun to do. Eni refers to the sections with designs in them as “windows”, but to me, they look like rooms in a floor plan.
This one follows the lesson rather closely, but I’m looking forward to creating more tiles incorporating my own spin on the concept.
Velvet Elvis.
This odd-shaped tile is totally experimental. A couple of months ago, my older daughter came for a visit. One of the things we did while she was here involved using Oxide Distress Ink on scraps of black card stock. Besides just having fun, we were trying to see if the inks would work on black, since they contain white pigment under the dye ink. I had a couple dozen scraps of 4" x 3" paper, and we inked most of them.
Caution.
The stinging pods were almost hidden against the background design. Only their vibrating movement gave them away when she looked carefully. She was so glad that she noticed them before they paralyzed her!
Zentangle drawn on Strathmore Vellum Bristol using a black, Micron pen. Shading done with graphite pencil. Pastel pencil highlights.
Tangles: Antidots Canard Flux Zinger
Planetary jewels.
Each planet she visited had special gemstones. Either forged in fire, such as the agate pendant or grown in the sea, like the beautiful pearls… They were collected and traded for other goods in the market. You see, even the finest, most valuable jewels cannot be eaten when you are hungry.
Zentangle drawn on Strathmore Vellum Bristol using a black, Micron pen. Shading done with graphite pencil.
In the beginning.
When I first learned about Zentangle, there were about 100 “official” tangles. There are 164 now, and a few are added every year. To learn the tangles and practice them, I used to draw monotangles in my sketchbook. This one, of BB, is from before I started putting dates on them, so the most recent it could possibly be is early 2010. I’m posting it today, even though this is actually really old, because it was brought to my attention that there was no example of BB on my website!

Dance.
I love sayings about dance. For example, one of my favorites is “Dance like nobody’s watching.” So dance is my inspiration for this tile. It’s as if all the Mookas are having a midnight party, each one dancing to the music and all of them together creating a wonderful ballet of shape and color.
This is probably my last tile in this series of Mookas for the time being. Although I’ve been having a ton of fun, it’s time to move on to something else!
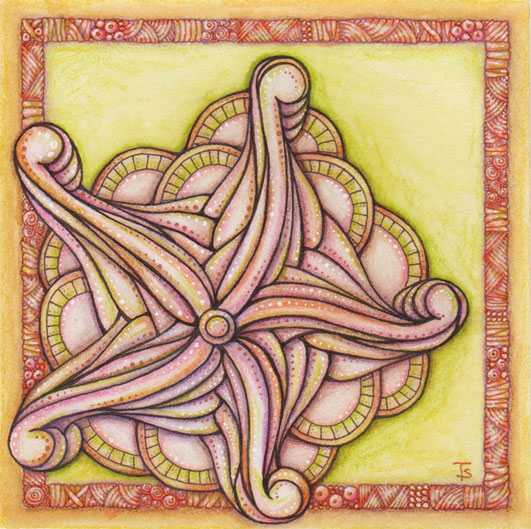
Starfish.
I decided to try an alternate color scheme for my Starfish tile, based on Eni’s Starfish Line Interrupted video lesson. I generally prefer cooler colors, such as blues and greens, but I also happen to like pinks and oranges on occasion. This choice is based on recently seen actual living starfish at the aquarium, where they tend more towards these colors in real life.
I added the frame, with the tiny details from the Tan Treasure lesson just to add some interest and frame the design.
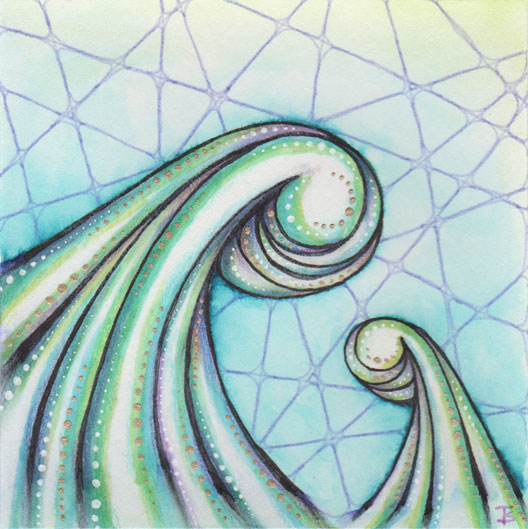
Line interrupted.
This tile was actually supposed to be just a practice for the full Starfish from Eni’s new Sarfish Line Interruped video lesson. However, I was having so much fun, I decided to complete the tile adding a companion baby Mooka 3d and a lightly tangled background!
I liked this so much, I can hardly wait to do the actual starfish design.
Want to play along? You can get this video by signing up right now for Eni’s Art Club !
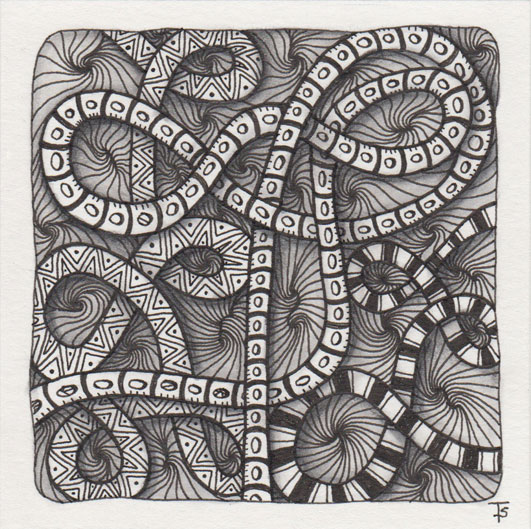
Bioluminescence.
She was fascinated by the lamp next to the sofa. She could see the creatures, slowly rotating around some central point. As their bodies moved in they became brighter, while the outer ones dimmed. She wondered what they fed on to create this scintillating glow.
Zentangle drawn on Strathmore Vellum Bristol using a black, Micron pen. Shading done with graphite pencil.
Tangles: Echoism Huggins Molygon Onamato Shattuck
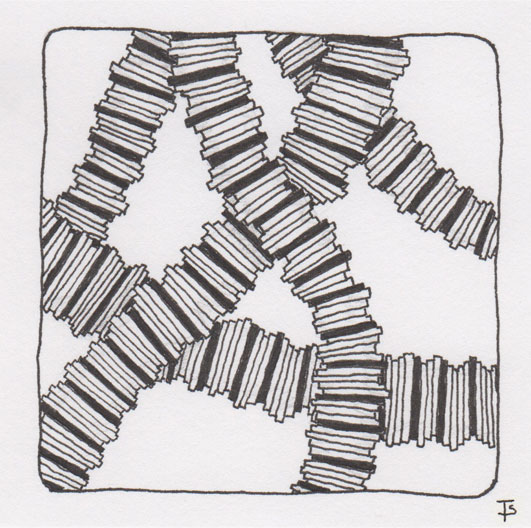
Interwoven.
Everything in their lives was interwoven. No single thing could exist without the other. Each element fed the whole.
Crazy Huggins is a wonderful example of single elements combining to make a complete design. In this version, I used a fair amount of shading to add additional dimension to each decorated section. I also used a heavier line weight around the outside to define each section and a finer width pen for the decorative elements. All of these things together create a more graphic finished tile.
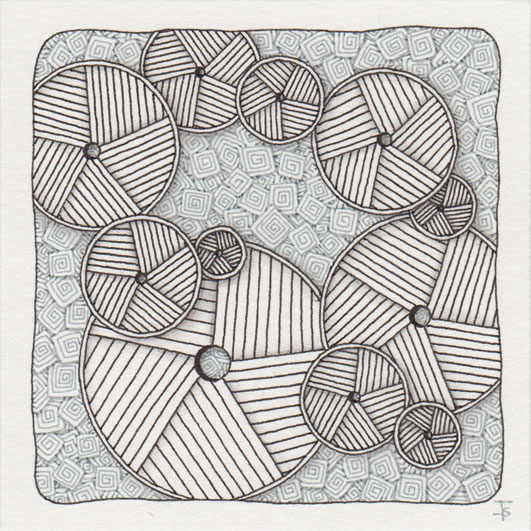
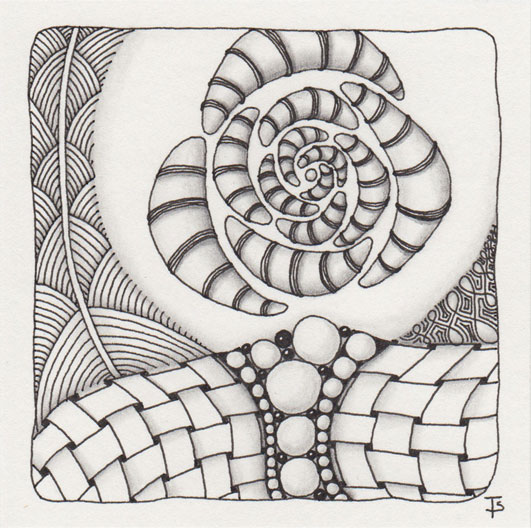
Daily grind.
They used the disks to grind the seeds into a fine flour. The flour was used to bake the unleavened bread that was eaten with every meal. Even though they lived in a world populated with technology, they still created the food by hand. She was impressed with their dedication to their tradition.
This week, one of the things I am focusing on is contrasts. Here, I kept it simple by using the contrasting shapes of circles and rectangles.