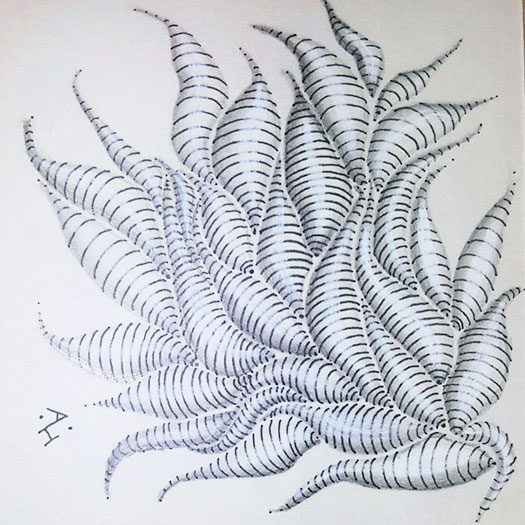
I haven’t posted anything from Amanda recently, so I thought I would show you a Zentangle she created that inspired one that I did. If you remember, a while back, I posted a tile similar to this, except mine was reversed: white gel pen on a black tile.
We were talking about this particular tangle, and she asked why there weren’t very many of my tiles using it. I told her that I have trouble drawing this one because it seems to want to make itself in only small sizes.
I am still working on my project from this week. I’m sure most of you have figured out what I’m making, but just in case you haven’t, today I’m posting something totally different.
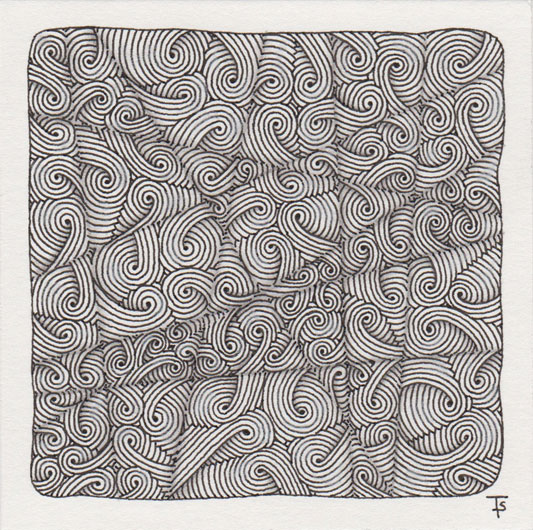
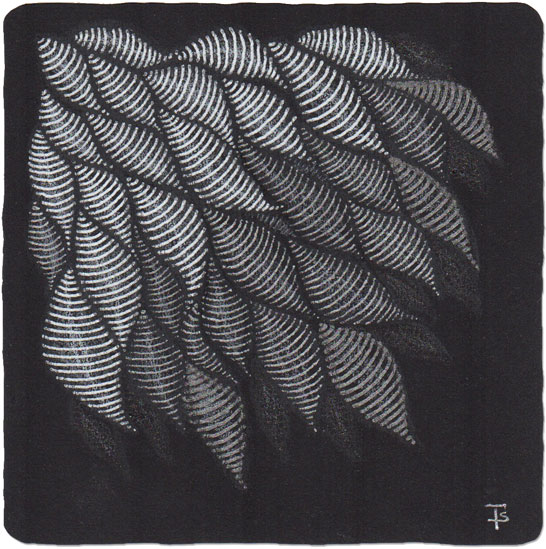
This monotangle of Sand Swirl was fun to do. Sometimes it’s very calming to just draw auras!
I will be showing you my project towards the end of next week (I hope,) and you’ll finally get to see all the tiles put together, so stay tuned!
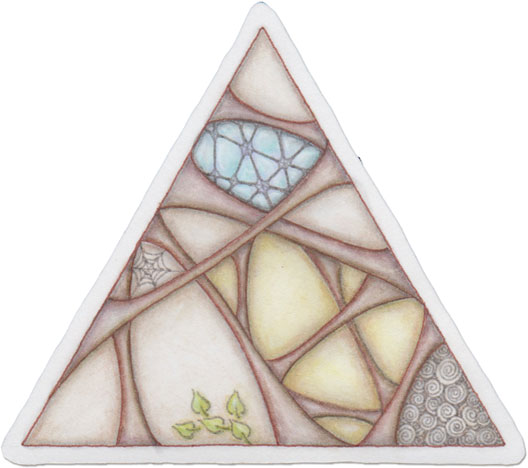
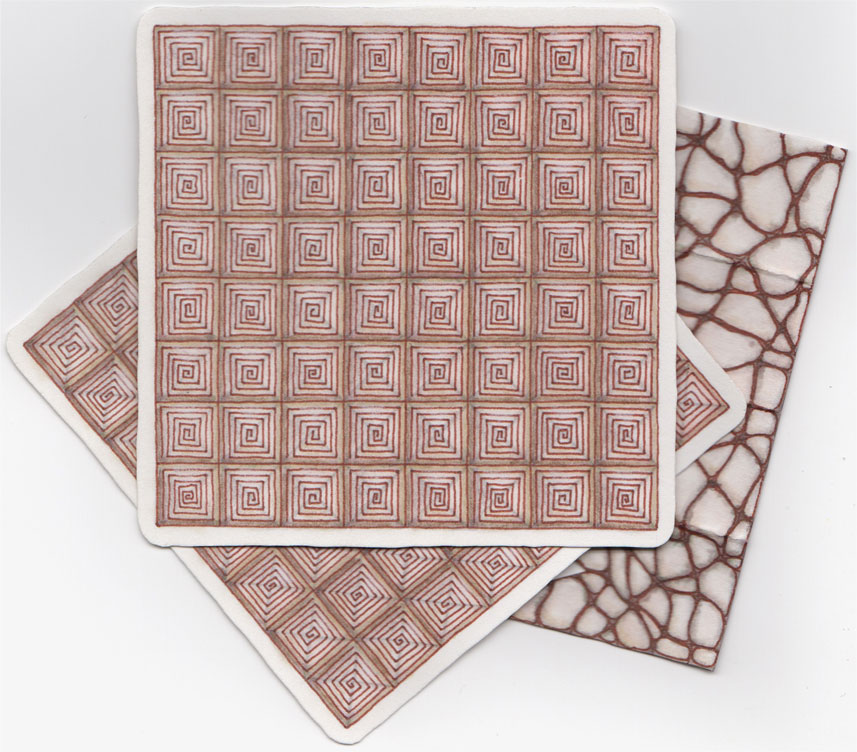
This is the second of a pair of tiles for my current project . I didn’t want both tiles to match exactly, but I wanted them both to have the same theme. The pictures of these have come out a bit paler than the actual tiles. Hopefully, the pictures of the end result will show the colors better!
Zentangle drawn on Strathmore Vellum Bristol using a brown Pigma Micron pen. Shading done with Copic marker and colored and graphite pencils. Color was done with Distress Ink markers.
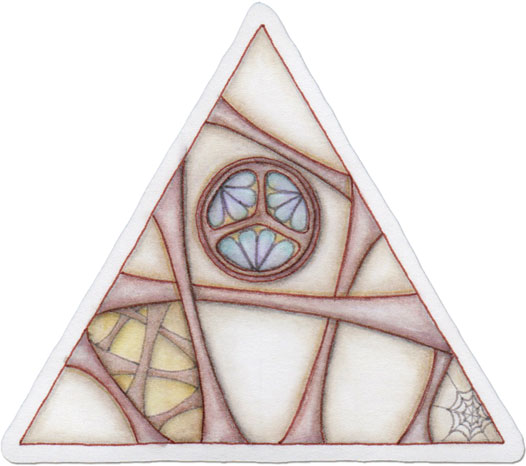
Another piece in my current project! I had so much fun making this part. I hope the rest of it goes like this!
Zentangle drawn on Strathmore Vellum Bristol using a brown Pigma Micron pen. Shading done with Copic marker, colored and graphite pencils. Color was done with Distress Ink markers.
Tangles: Hollibaugh Kuke Web
Twofer.
In last Friday's post , I talked a little bit about project I was working on, and I showed you the first piece.
Here it is again, with two more tiles I’ve completed. Both of these have the same tangle on them, Emingle. I liked the contrast of this tangle with the first piece. But it didn’t occur to me how long it would take to draw that many little lines on two entire tiles. I finally finished these yesterday!
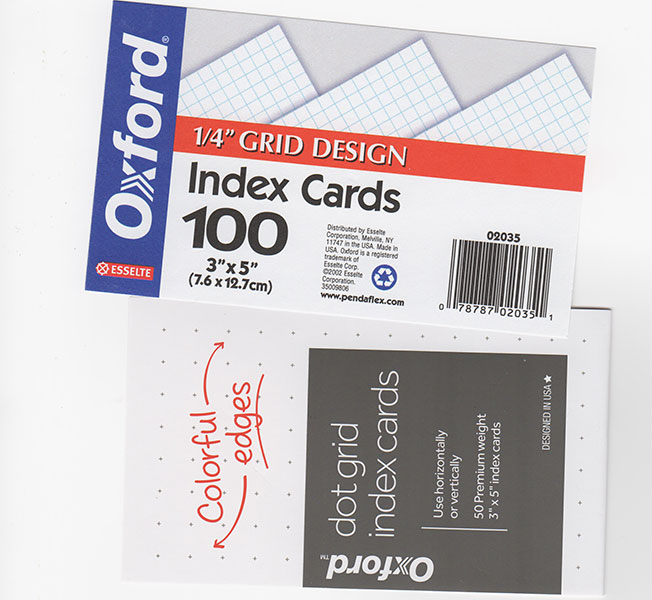
Not all index cards are made alike!
Generally, when we think of index cards, we think of the standard 3-inch by 5-inch cards with lines on them to write on. Maybe, if we cook and record our recipes, we’re familiar with the same thing, only a bit bigger, 4-inch by 6-inches. Most of us have also used the ones that do not have anything on them. They are just plain white.
Guess what I am making!
I have been kind of “stuck” since about the beginning of the year. I got through figuring out how to handle black tiles, but then I couldn’t seem to get going on anything else I wanted to accomplish. Suddenly, about a week ago, something in the stars changed and I started making Zenbuttons, something I’ve wanted to do for some time. Now, I’m giving you a sneak peek at another project I wanted to try. I’ll be working on this next week. It will take a while because it requires tangling on several tiles to complete the project!
Amanda asked me, the other day about Indy-Rella. I told her I hadn’t used it very much because I always end up drawing it so tiny. She did it on a white tile, using black ink, making the elements rather large, which inspired me to try this. I started with the white pen. But I still didn’t get mine as larger as hers. So I thought it might be fun to add different color inks that would make it look like they were fading out on the tile.
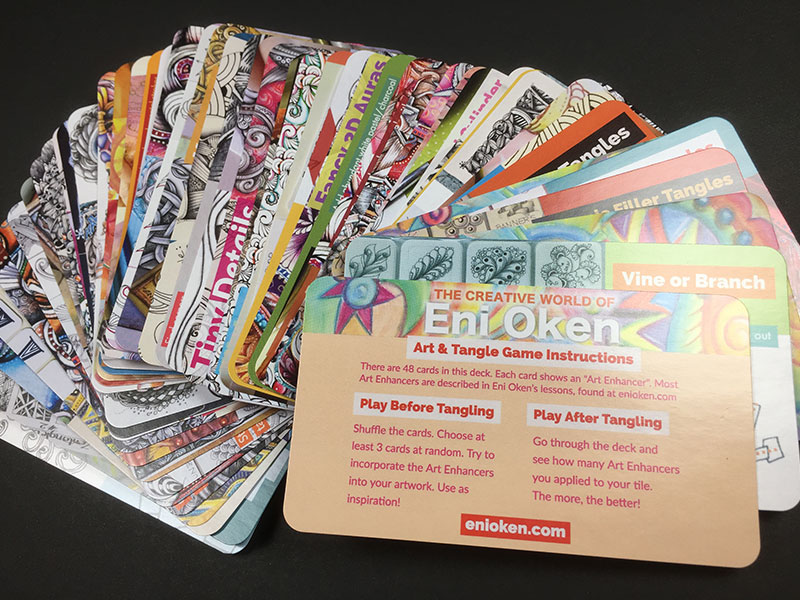
Tangle games.
I’ve been tangling a long time. I generally tangle every day. Sometimes I get stuck, and don’t know what to do, or I can’t think of anything that thrills me.
There are a few tricks that will help, the most common ones are picking strings and tangles at random. I do that a LOT.
But I’m at the point where I often want to go beyond the common. I’ve been a member of Eni Oken's Art Club since it’s inception. So that means I’ve learned a lot of really fun techniques that I could be incorporating into my tangling. But I don’t always think about them, or remember them.
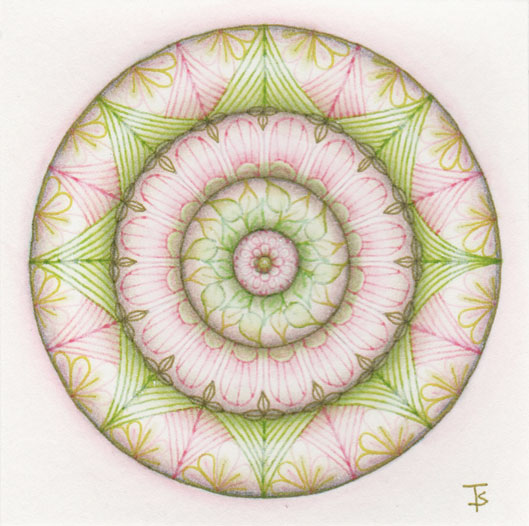
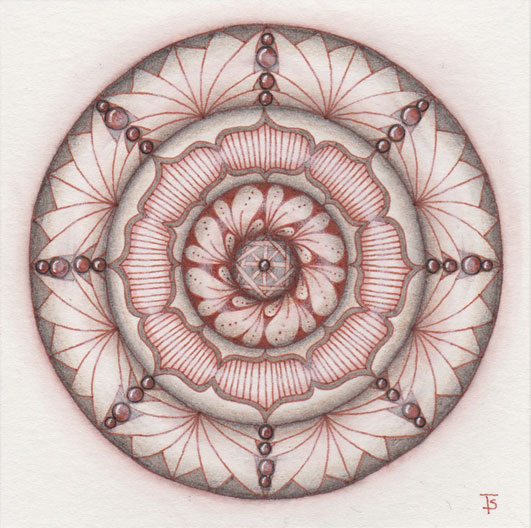
Today’s Zenbutton is brought to you by the season: Spring!
Here, the weather can’t make up it’s mind. One day we’re handed Spring, another Summer and then we’re back in Winter. I have to check the weather report before I can get dressed!
So, I decided that I wanted to encourage Mother Nature and gift her with a Zenbutton that embodied flowers and leaves and the happy spring colors of warm pinks and yellow greens. It was fun looking through my tangles to select the ones that would work for this tile. I hope you enjoy looking at it as much as I did making it!
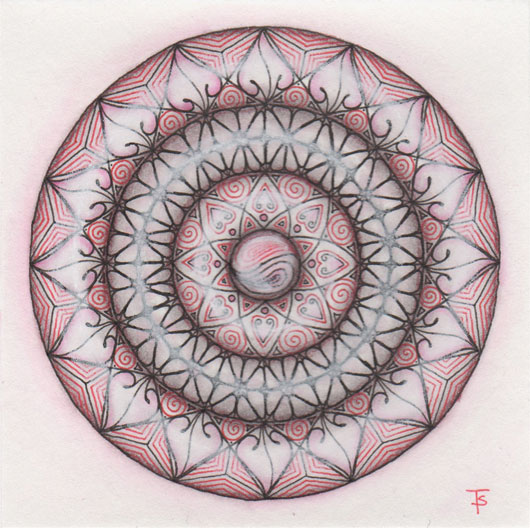
Yes, another Zenbutton! Last Valentine’s day I really wanted to participate in the Valentangle challenge. I ended up admiring everyone else’s work, but didn’t get anything of my own done. So, now that I’m on a Zenbutton kick, I did the challenge from February 5th! I did use four circles rather than 3. And I went with “hearts and flowers”, in as much as Toodles looks a bit like a heart, and I used actual heart shapes on the innermost ring. I thought the spirals looked a bit like roses, specially with the addition of the tiny black triangles, which reminded me of leaves.
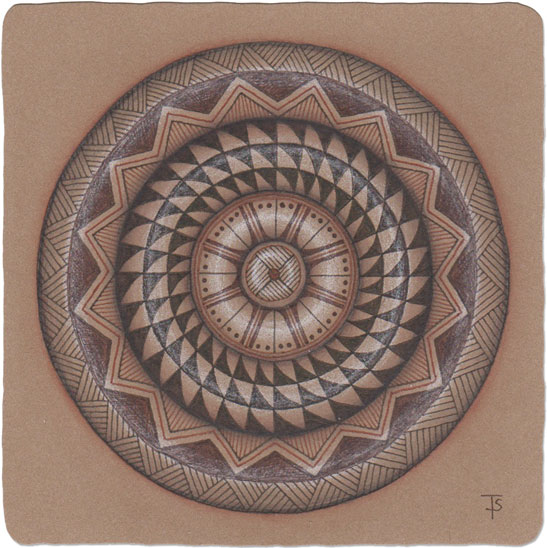
While I was working on yesterday’s tile, I was thinking that I would like to try this technique on a tan tile, with a Southwestern, Native American pottery theme.
I gave it a shot here. I’m not totally enthralled with it because I feel like the entire tile reads too “brown,” without enough light contrast. I will probably give this another try over the weekend. That said, I do like the tile for what it is!
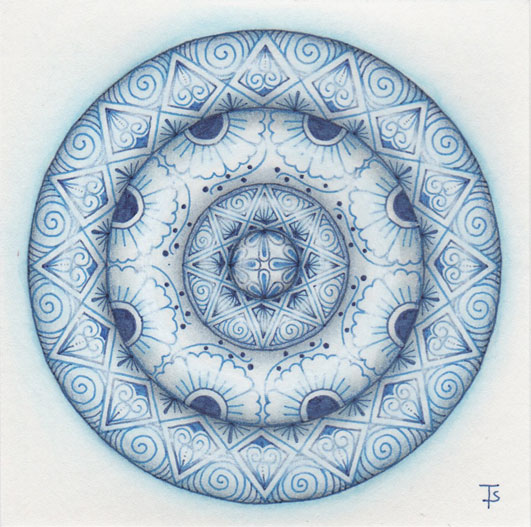
I had so much fun creating yesterday’s Zenbutton I decided that I wanted to do more of them in different styles. So, for this one, I’m using Marguerite Samama’s Delft Delights style.
If you need instructions in this style, they are available from AcadiaLaserCreations on Etsy.
Zentangle drawn on Strathmore Vellum Bristol using a blue Pigma Micron pen and a cobalt Copic Multiliner. Shading done with colored and graphite pencils. Highlights done with white colored pencil and Sakurka Gelly Roll pen.
This tile uses a basic technique referred to as a Zenbutton. CZT Marguerite Samama is credited as the inventor of this technique. She was experimenting with methods for using Fragments in different ways when she discovered it.
You can watch an instructional video, created by Melinda Barlow, CZT, here , to see the basic technique.
I’ve been thinking about trying it for a few days. Yesterday, I sat down and went for it. For my first attempt, I’m very happy with the results. I will definitely add this to my tangle enhancing techniques!

Textural.
She was selecting the contents based on the feeling of the objects. This trip was for a world where the beings did not “see” things the way most did. They had no eyes. Instead, everything was based on texture and sound. So touching each item, with her eyes closed became very important.
Zentangle drawn on Strathmore Vellum Bristol using a black, Micron pen. Shading done with graphite pencil.

On Sunday, April 8, 2018, the home of Certified Zentangle Teacher, Cris Strovilas Letourneau, burned to the ground. Not only did Chris lose her home and everything in it. Her husband also perished.
Chris has been a major contributor to the Zentangle community. She is the author of Made in the Shade, a Zentangle Workbook , and coauthor of Pattern Play: a Zentangle Creativity Boost (Volume 1) , both of which are available from Amazon. She is the encouraging moderator of several Zentangle Facebook Groups and an active participant in even more.
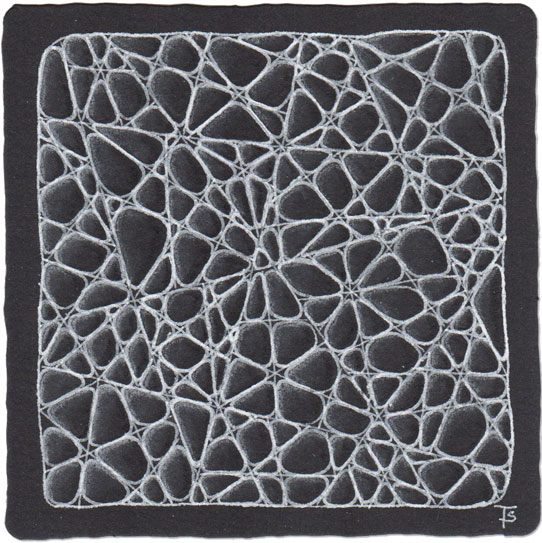
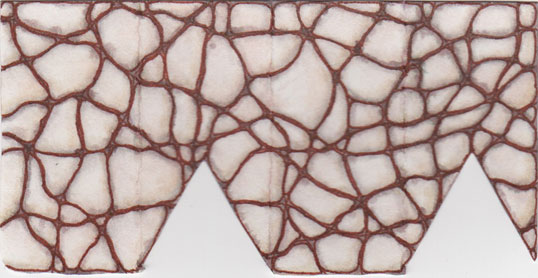
I look at this tile and I see many things. From a layer of stones arranged as the floor of a patio to stretched out Cat’s Cradles or perhaps a section of lace. Maybe I’m looking at some sort of atomic level structure under the microscope. Who knows what it is?
Crazy N’Zepple works as a fill for sections in a design or as a full design in it’s own right. It’s easy to do and the end results are always surprising. I love to use it as a warmup when I’m not sure what I want to do. Give it a try, and let it surprise you, too!
Jumble.
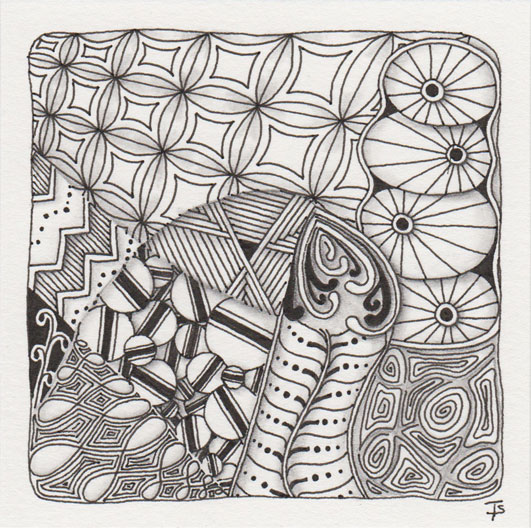
Others always wondered at how so much cargo could come out of such a tiny ship. They just didn’t understand. She’d captured so many universes in her travels. And now she could store infinite amounts in each one. All she had to do is make sure they traveled together!
It has always fascinated me how shading opens up, raises, or pushes back sections of tangles on a tile. Here, this crazy combination took on all kinds of dimension just from shading various edges. Don’t skip shading your tiles. It’s as interesting and meditative as the drawing!

This Zentangle is brought to you today by Thomàs Pádro . He has named this one Pickpocket. I’ve actually done a slight variation here. Instead of straight lines, I’ve chosen to curve mine a bit. I think it softens the design, making it a little less rigid and a little more feminine. I also chose to make it appear as if two different kind of materials were woven together by adding the grey auras to every other section instead of all of them.
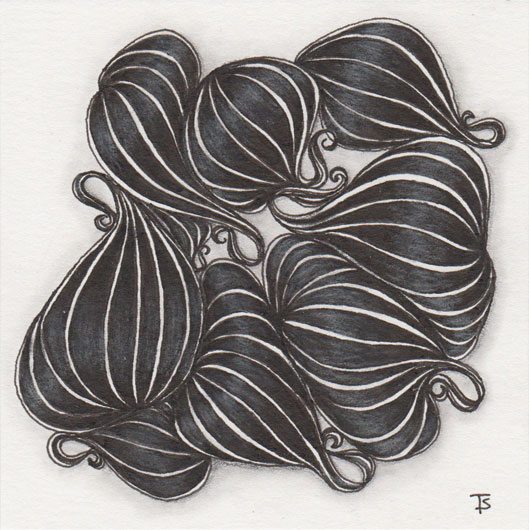
Squashed together.
This is a tangle that, until yesterday, I really didn’t like very much. When I pulled it from the tangle jar, I just kind of plopped it into my tile as a type of medallion, because I really didn’t know what to do with it. Then I watched this video from Helen Williams. Her blog is A Little Lime, and has lots of interesting tangle related information! .
Her method is so much more fun and makes a much more interesting finished image. Here, the gourds are used as more of an organic fill, rather than a center piece. The concept could also be incorporated into a standard Zentangle with other tangles mixed in. I’ll have to give that a try in the future!