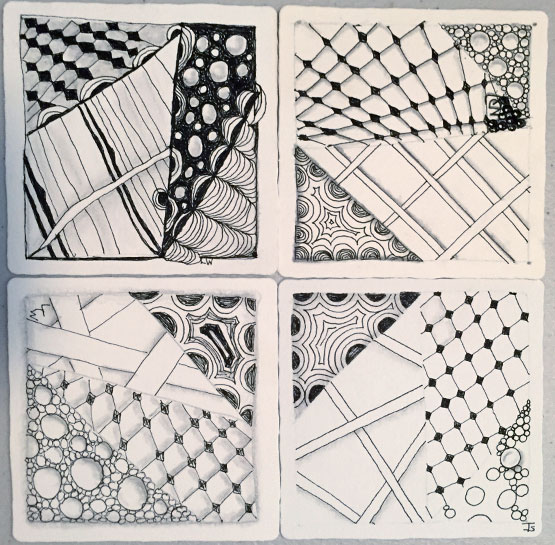
This is my finished tile from the Tuesday Beginner’s Class. I rarely finish my tile during the sessions because I’m busy helping the students. However, I do always finish them eventually. I don’t mind having many tiles with the same design.
I can always create my own, personal mosaic!
Zentangle drawn on a white, Official Zentangle tile using a black, Micron pen. Shading done with graphite pencil.
Tangles: Bales Florz Hollibaugh Tipple
Another Beginner’s class last Tuesday!
I love introducing the Zentangle Method to new students. Their excitement and enthusiasm is so contagious!
Tangles: Crescent Moon Florz Hollibaugh Tipple
Perhaps, the Universe is pointing the way?
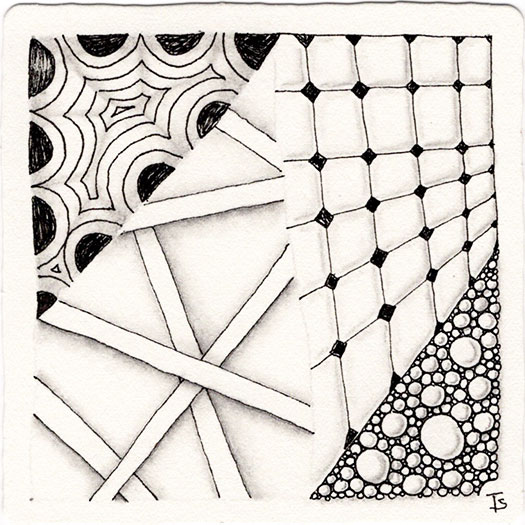
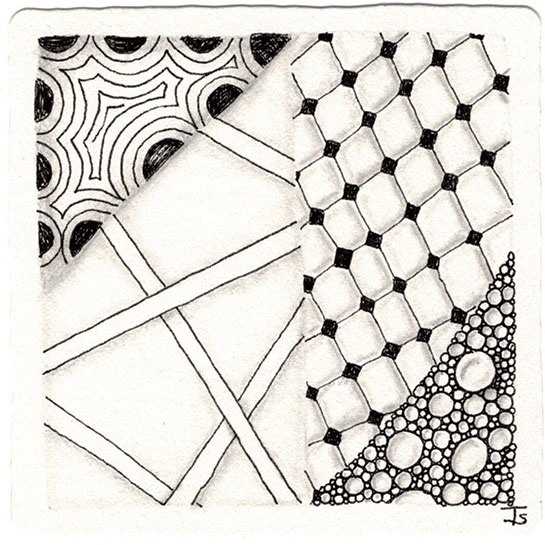
The next step of Beginner’s tangles evolving.
Zentangle drawn on an Official Zentangle tile using a black, Micron pen. Shading done with graphite pencil.
Tangles: Bales Ennies Fescu Printemps
Into the center. The weaving falls into dynamic patterns. Forming. Collapsing.
Which way will she take the ship.
Unknown.
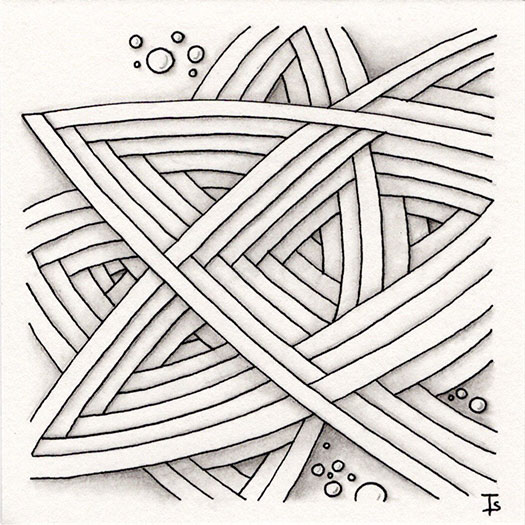
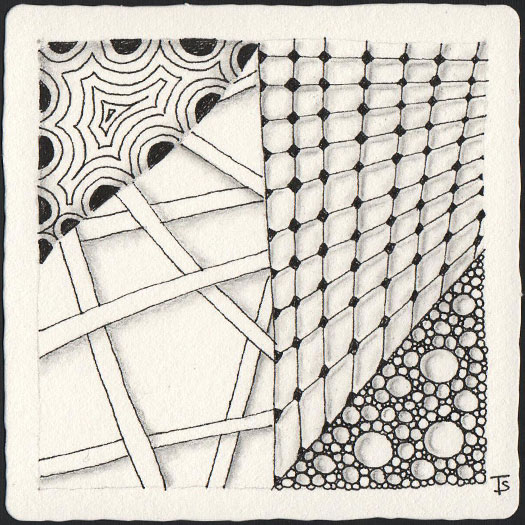
This tile was created by following instructions in Eni Oken’s Crazy Gold Auraknot lesson. You can find it and many more fabulous lessons by joining her Art Club !
Zentangle drawn on Strathmore Vellum Bristol using a black, Micron pen. Shading done with graphite pencil.
Tangles: Crazy Auraknot Perfs
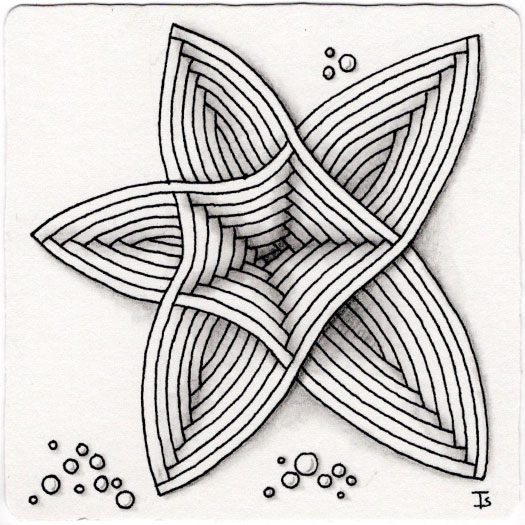
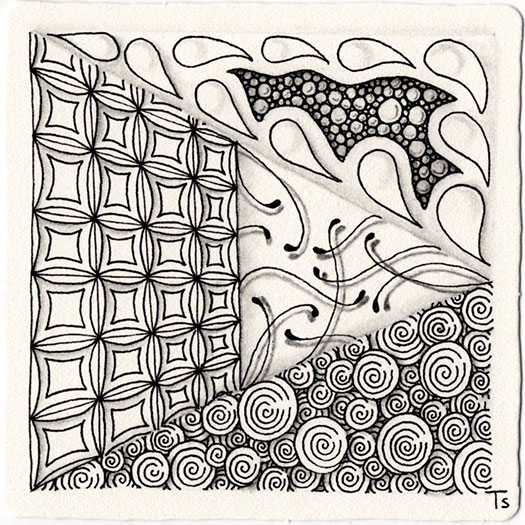
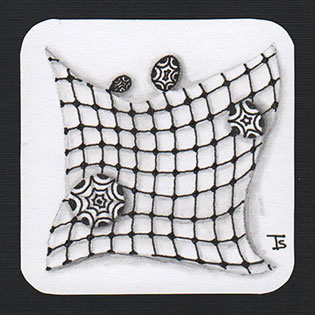
star light star bright weave your way through the night light the sky let us fly this is the day away we hie Zentangle drawn on Stonehenge white using a black, Micron pen. Shading done with graphite pencil.
Tangles: Aura Knot Perfs Monotangle
Yesterday, a friend and I got together so I could show her how to replace the pages of an existing, hard-covered book and create a Junk Journal.
I did one a couple of weeks ago. In the first post , I showed you how to remove the original pages and cut and fold new ones.
In the second post , I showed how easy it is to attach the new pages to the empty cover.
Another tile from a Beginner’s Class this week. I may have enough of these to create my own Mosaic!
I never get tired of drawing these. Each time, while they always have the same plan, they come out somewhat different. It depends on the day, the artist, and what they feel like doing.
It’s one of the wonderful things about the Zentangle Method!
Zentangle drawn on an Official Zentangle Tile using a black, Micron pen. Shading done with graphite pencil.
I taught another Beginner’s Zentangle class yesterday. What a wonderful time we had sharing our drawing and life experiences with each other!
Zentangles drawn on Original Zentangle tiles using a black, Micron pen. Shading done with graphite pencil.
Tangles: Crescent Moon Hollibaugh Florz Tipple
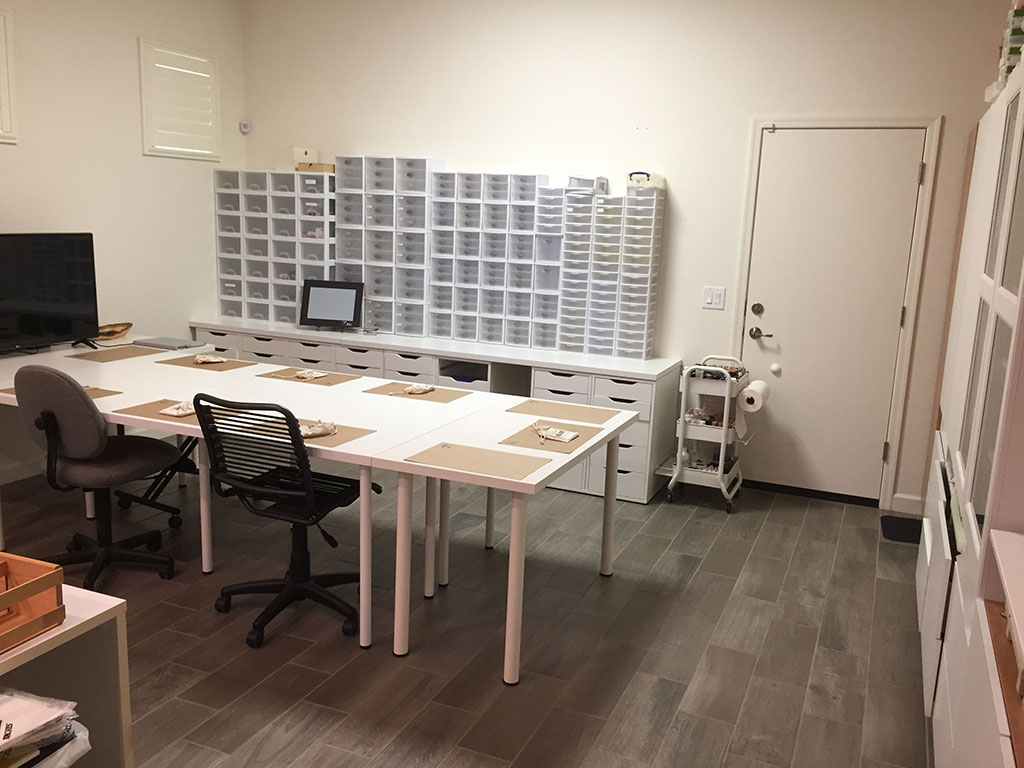
A couple of weeks or so ago, there was a post about rearranging Studio One so that it would work better for wet media and teaching.
I ordered some new storage from Ikea, which arrive on Friday. In this picture, you can see the Alex units all put together, and in place under the countertop. (Except one drawer bottom was missing, which I will deal with today.)
I also now have the center tables set up for classes! I still need to put in the chairs, but they will be in place soon. I am also planning on removing all of those plastic drawers. Then I can turn that wall into an art display for student’s work, examples, etc.
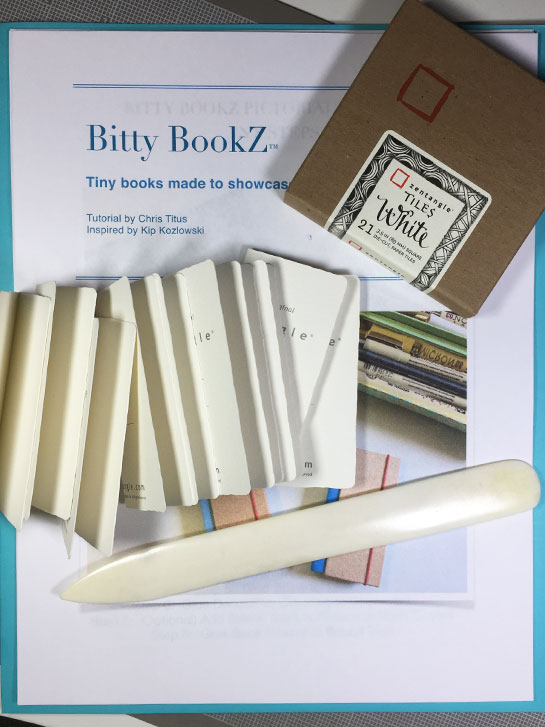
Tanglers are always looking for new ways to carry tiles with them on the go. Others want a way to save, share and protect finished tiles. And some are looking for projects that incorporate tangling alternatives.
I am making a Bitty BookZ , following the instructions from Chris Titus . These instructions are very clear and easy to follow. The end result is a finished book, containing ten Zentangle tiles!
If you make this from standard tiles, the book will be just a bit larger than 3-1/2 inches tall by 1-5/8 inches wide. Made from Bijou tiles, your tiny book would be a bit larger than 2 inches high by 1 inch wide.
I had an introductory class with a private student yesterday. We had a wonderful time together. This is the tile I created while teaching.
Every so often, I think it is very important to go back to the very beginning and do that “first tile” again. Every single person who has taken a class from a CZT creates this tile, or one very similar with the classic “Z” string. Sometimes the tangles used vary slightly. But there is so much to learn and remember from that Beginner’s class!
I have taken a lot of time off from traditional tangling. Basically, since the beginning of 2019. Sometimes, you need to take a break to evaluate where you have been… and where you are going. Sometimes, roads take off in unexpected direction. Sometimes we set off the road entirely to explore new territory.
And then the roads, the paths, the discoveries come around to a new understanding of where you were before.
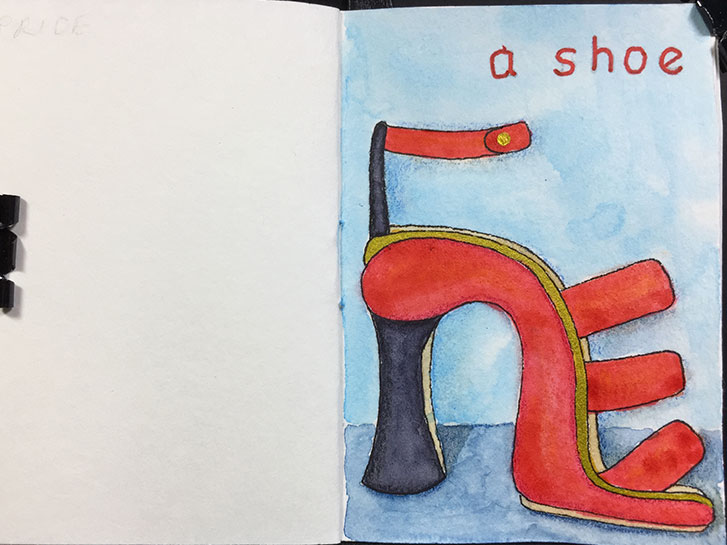
For the month of June, the Micro Art Journaling Facebook Group is doing an interesting challenge. There is a “cloud” of prompts. When you have a list, people usually start and the top and work their way down. With a cloud (the prompts are placed randomly positioned in an image) there is no starting, ending, or ordering. You can just choose randomly.
So, the first one I’ve done, is “a shoe”. I thought it would be fun to just do a super-high, bright red, strappy women’s high heel! It wasn’t difficult and lots of fun.
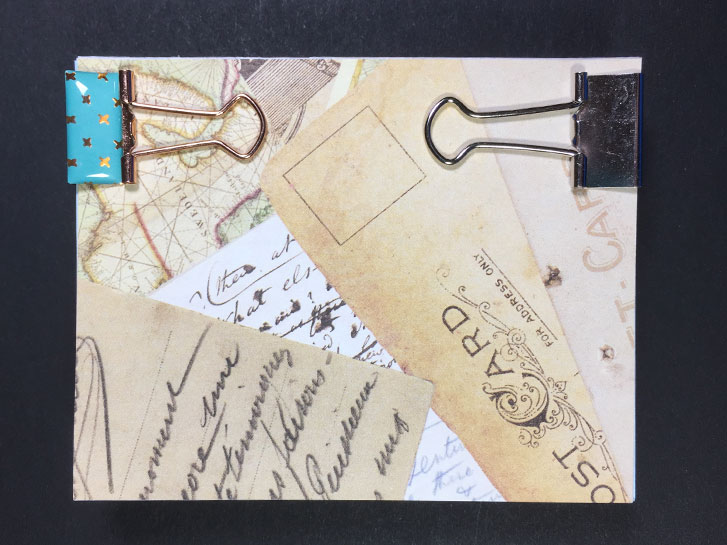
In yesterday's post , I showed you how I was changing a small book into a type of junk journal. Today, I’m continuing with how I created the new book. We left off with cutting out a number of new pages from all different kinds of paper.
The next step is to stack up all of the pages, and align them at the spine. Then use clothes pins or binder clips or something similar to hold all the pages tightly in space near the spine edge.
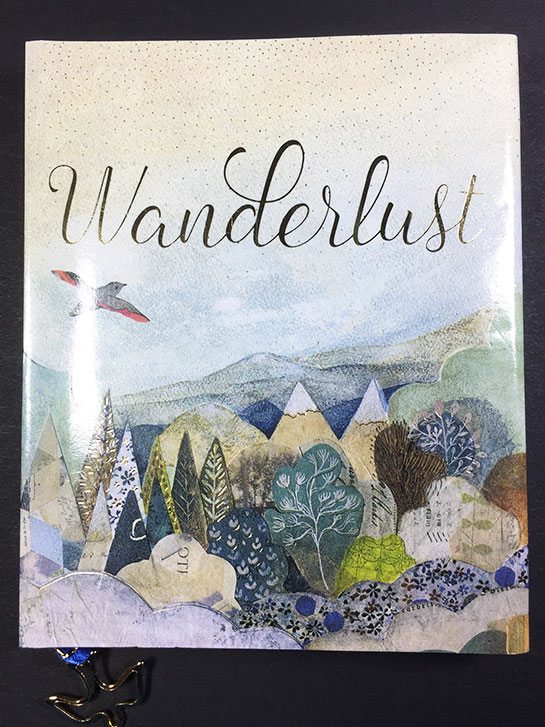
This is a small gift book.
It measures 82 mm wide by 11 mm high.
Here, the dust jacket has been removed and set aside to be used in this or another project! As you can see, the word “Wanderlust” is imprinted on the cover. I liked it and I think it will work well for a journal!
A major critera for making this kind of Junk Journal is that the pages must not be glued to the spine. When you open the book, there should be a space, as shown in the picture.
Remember this? (If you don’t, the post is here ).
If you’re already a member of the Micro Art Journaling group on Facebook, make sure you have a blank tiny art journal ready…. we’re going to challenge you during the month of June!
If you’re not already a member, but would like to play along, join the group (be sure to answer the question when you sign up!) There are tutorials to get you started in the Files section, including one on how to make a very basic, simple art journal!
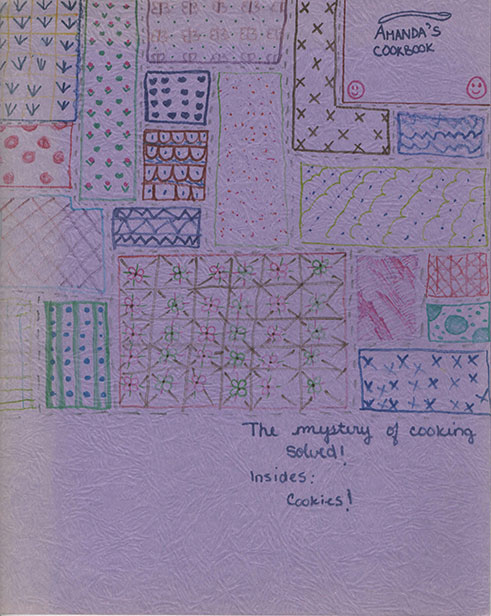
This is an old, standard, school folder that I found in the process of rearranging the studio. I got quite a chuckle out of it.
You can see my daughter was into drawing blocks of patterns even when she was in grade school. Both of the girls had an assignment from me to begin creating their own cook books (folders of recipes they were learning to cook). To make this “fun”, they were encouraged to decorate the front of their folders.
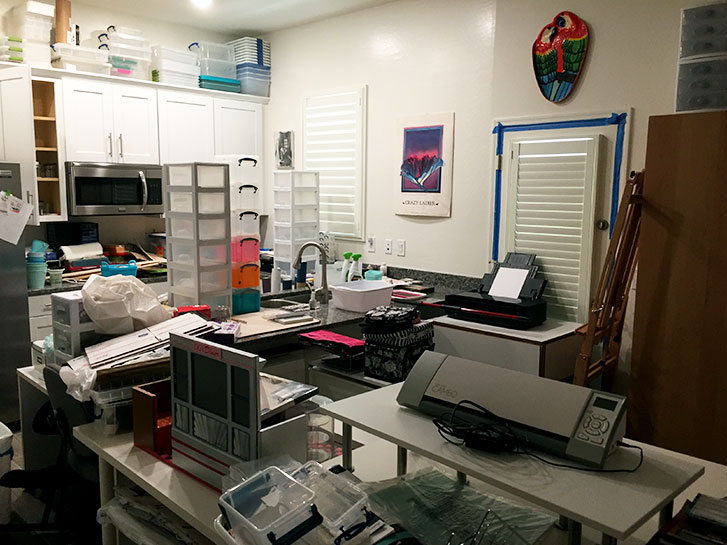
Oh my! Studio One is somewhere under all this mess… I think!
I am taking advantage of the 3-day weekend to reorganize the big studio. Since I’ve been working in the smaller studio/office since the beginning of the year, things have gotten out of control.
I want to work on some larger paintings. It’s better to do wet media in the larger studio where there is a sink. So I want to set up all wet media in the big studio and dry media/paper projects in the smaller, office one.

Congratulations Matt! Class of 2019. Graduated with Honors in Art! I am so proud of you!
Occasionally I post some of Matt’s art. You can find it in the guest gallery.
One of my favorite things to do is use colored pencil to add depth and definition to a page.
If you compare today’s image with the one posted yesterday, you can see how the page is coming to life.
I used Koh-I-Noor Hardmuth Polycolor pencils. They tend to be a bit more opaque than some of the others. In addition, they will blend a bit if rubbed with a stump.