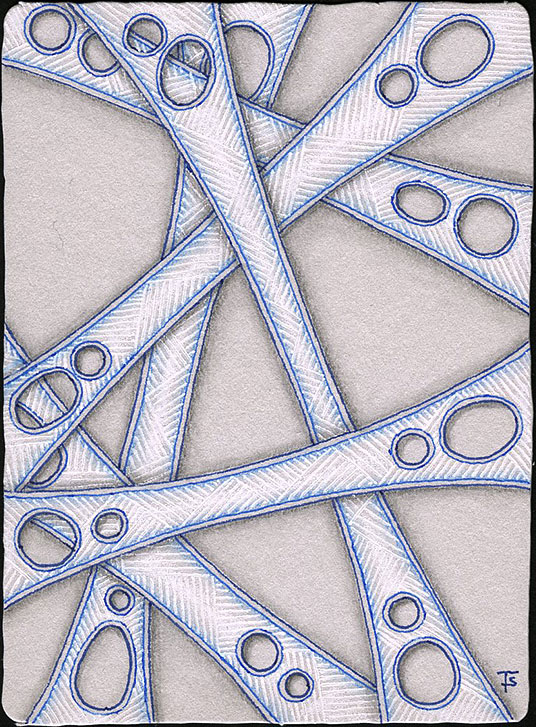
Sometimes the simplest tangles can have a powerful impact. It depends on how you treat them.
Here, I used Hollibaugh, but gave it a bit of a curve. Then I made it holey!
And a little touch of blue just makes it magical.
ATC #11
Zentangle drawn on a cut down, grey, Official Zentangle tile using a blue, Micron pen, cobolt, Copic Multiliner, and white Gelly Roll. Shading done with graphite, Copic marker and colored pencil.
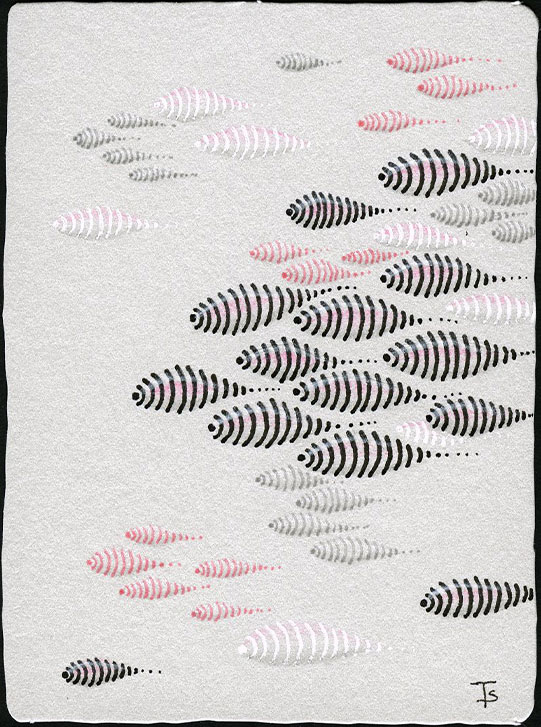
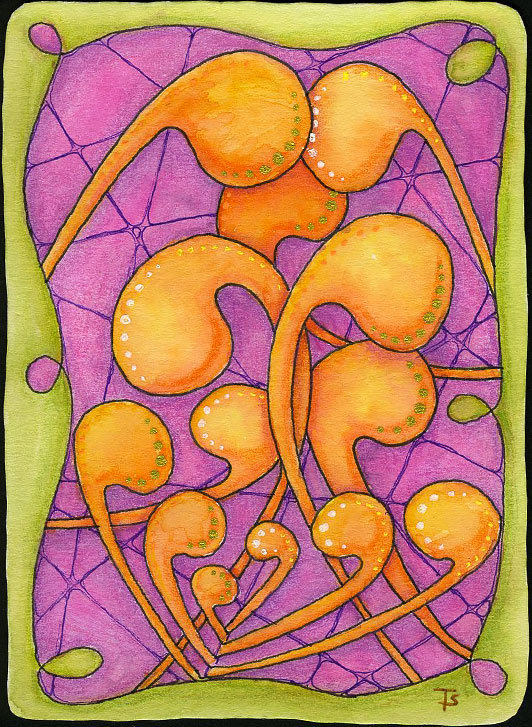
“Fishy, fishy in the brook, Daddy catch him on a hook, Mommy fry him in a pan, Johnny eat him like a man.”
– Unknown
Looking for a simple tangle that can be use in a variety of ways? Take Indy-Rella out for a spin!
Depending on how you draw it, you can suggest flames, or fish. You can add them to the ends of Fescu, turning them into some kind of plant, or follow various contours to create a nice, organic fill.
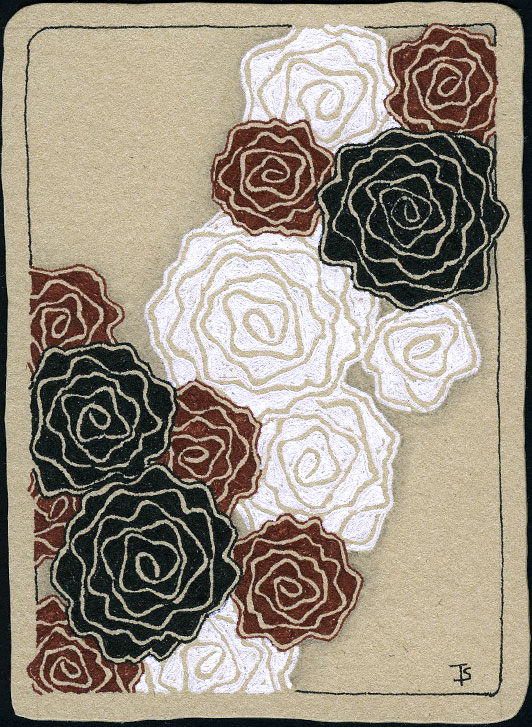
Diva Dance is such a fun tangle. Although the concept is very simple, it can morph to fit almost any shape. Or, it can take on a life of it’s own, depending on the variation.
Here, it has been wrapped around itself in a spiraled style that gives the appearance of full-blown blossoms.
ATC #9.
Zentangle drawn on sahara, Fabriano Tiziano using a black and tan, Micron pens and white Gelly Roll. Shading done with graphite pencil.
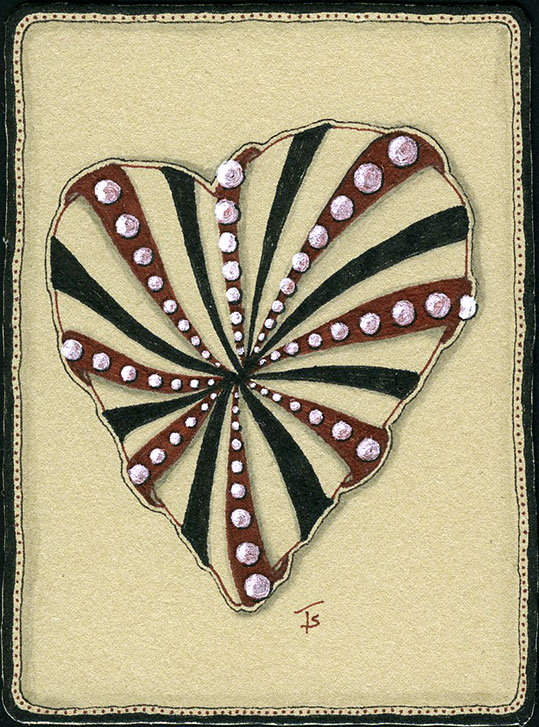
Aquafleur, the tangle used on the heart-shaped string was one that I didn’t understand well for a long time. I tried it, as it was shown to me, and I just couldn’t figure out how those ribbons wrapped a given string.
Finally, one day, I just sat and played with it in my sketch book. And all of a sudden, it just “clicked” for me.
Here, it is used in an elegant, but simplified version. It’s easier to understand when wrapped around a single, simple shape.
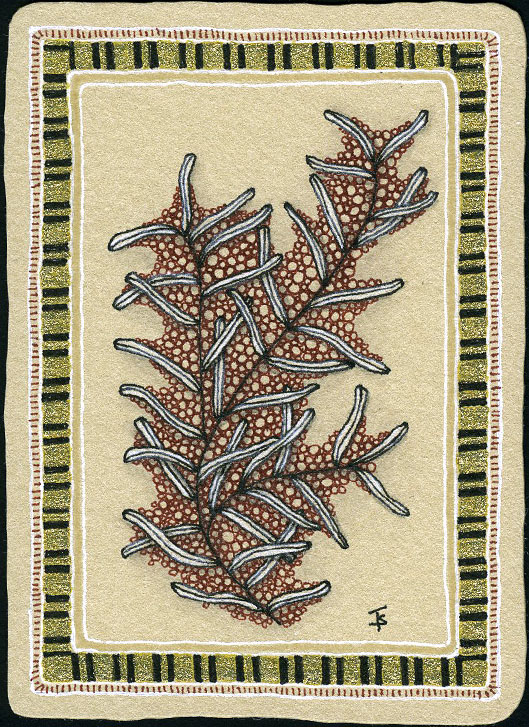
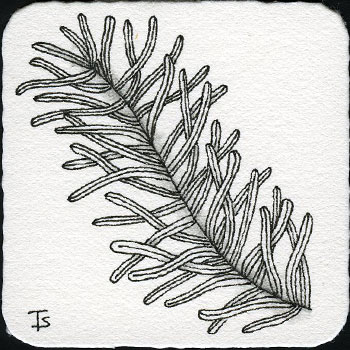
If you follow me, then you know I’ve done this tangle, which can look like a sprig of Rosemary, or a pine bough, or a feather, many times before. I enjoy drawing it and it’s one of my favorites.
ATC #7.
Zentangle drawn on sahara, Fabriano Tiziano using a black and tan, Micron pen and gold gel pen. Shading done with graphite pencil.
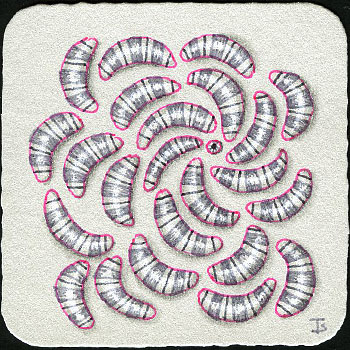
Tangles: Marasu Tipple Verdigogh
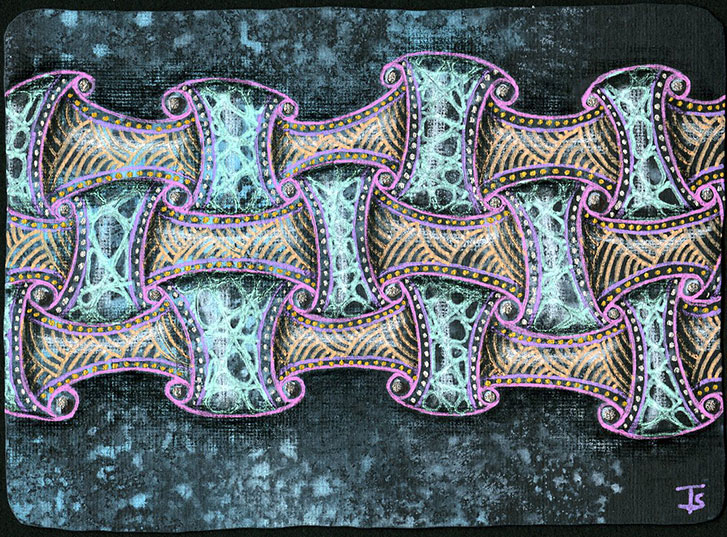
Note: Some of the inks used did not scan well. There are silver and copper dots which here, appear to be orange and white.
There are a lot of differences in composition when you work on a rectangular piece, as compared to a square. However, this one works on either. The only difference is that I like it better with a horizontal emphasis. On the square version, I liked it better with a vertical emphasis.
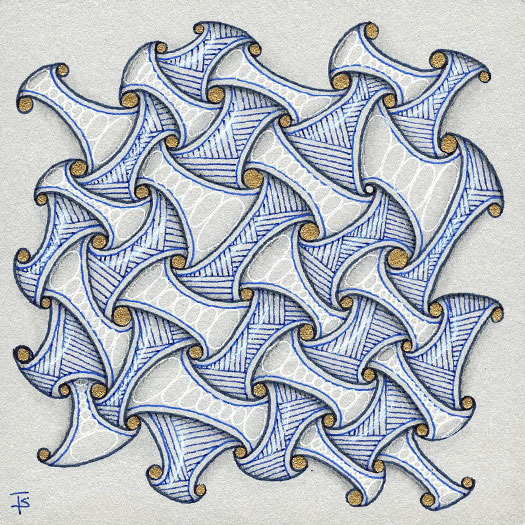
Printemps is one of my favorite tangles.
It can be made large, with a heavier hand and used as central motifs. It can be drawn small and numerous to fill in a background.
You can completely cover an area with it, overlapping where needed, or you can leave negative space around and between each fragment.
No matter the over-all concept, it’s a wonderful tangle to draw for the Zen flow!
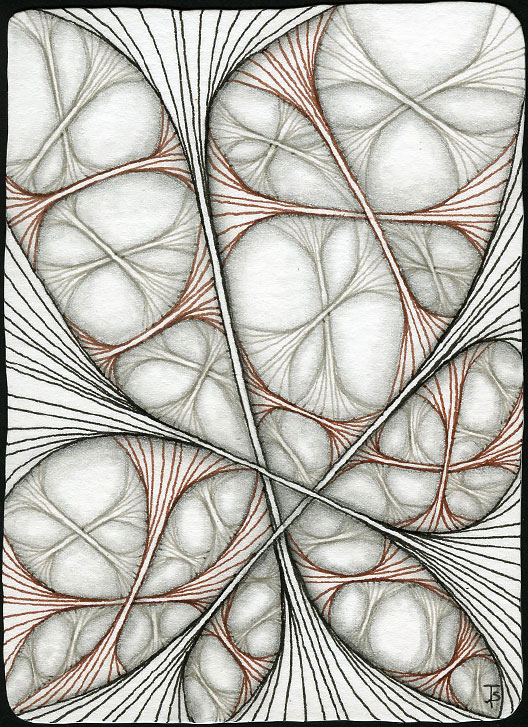
Ruutz, a tangle created by Eni Oken, is a wonderful subject for tangle fractalization. I chose, in this example, to use a different color ink for each iteration. My hope was that the designs would appear to fade out going into the background.
If you want more information about this tangle technique, check out Eni Oken's Fractalized Tangles Lesson Bundle !
ATC number three… done!
Zentangle drawn on Strathmore Vellum Bristol using a black, Micron pen and a brown and grey Copic Multiliner. Shading done with graphite pencil.
Perhaps those pumpkins are taking on a life of their own; creating a ballet as they rise up. They leave the garden trellises behind as they creep around the Halloween garden!
Another ATC.
Zentangle drawn on Strathmore Vellum Bristol using a black, Micron pen. Shading done with Distress markers and colored pencil. Decorative elements added with various gel pens.
Tangles: Crazy Nzeppel Mooka

The Hunter’s Moon has passed. The pumpkins are ready for picking. Soon, there will be the smell of freshly baked pies in the air!
This ATC was created with these in mind!
Zentangle drawn on Strathmore Vellum Bristol using a black, Micron pen. Shading done with graphite pencil. Highlights created with colored pencil.
Tangles: Gourdgeous Icanthis
Pink and grey is one of my favorite color combinations. So I thought I would give it a try on one of the new, grey tiles from Zentangle.
Here is a quick study on a Bijou tile, using Molygon, wrapped around a central orb and filled with Marasu.
I think it’s interesting enough that I may repeat something similar on a standard-sized tile.
Zentangle drawn on an Official, grey, Zentangle Bijou tile using a pink, grey and dark grey, Uniball Signo pens. Shading done with graphite pencil. Highlights created with white colored pencil.
On Saturday, I participated in a Studio Tour for the Artist’s Group that I belong to. My studio was the second one in this particular tour.
I created a Zentangle “make and take” project for the visitors to give those in the group who were not familiar with Zentangle to either sit down and do while here, or to take with them and do at home.
I used the tangle Verdigogh because it looks a bit like a sprig of Rosemary, which is a symbol of remembrance.
This is my first Zentangle created on a new grey Zentangle tile. This new color was just released by the company this week.
The color is a soft, light grey, that looks good with the entire range of Zentangle tools. I love having a grey tile because it allows me to add both shading and highlights for a full range of values.
Right now, you can get the tiles in various sizes from your local CZT.
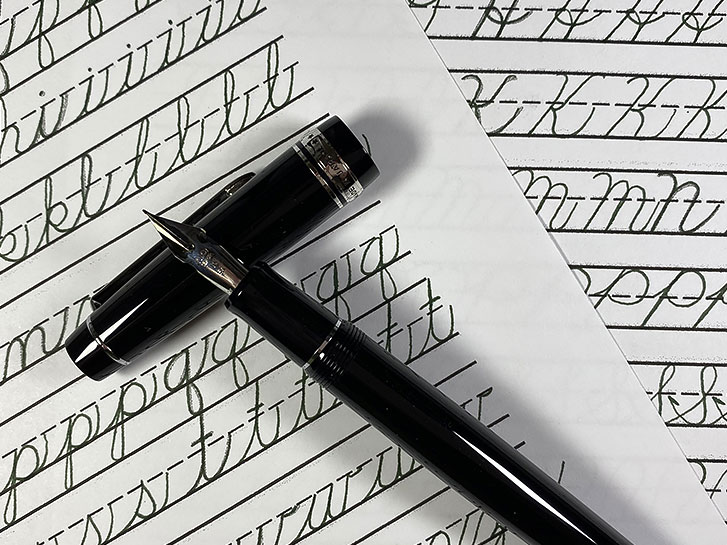
My handwriting is really bad. Actually, it’s so bad that I print everything. So, I’ve decided to do something about it.
I recently purchased a new fountain pen. It is a Pilot Custom 92. It has a really nice, flexible nib which is great for adding line weight while drawing. I also purchased a bottle of Noodler’s Zhivago ink. This is a beautiful, very dark green color.
So, I decided to combine my need to improve my handwriting with time to break in and use my new pen every day.
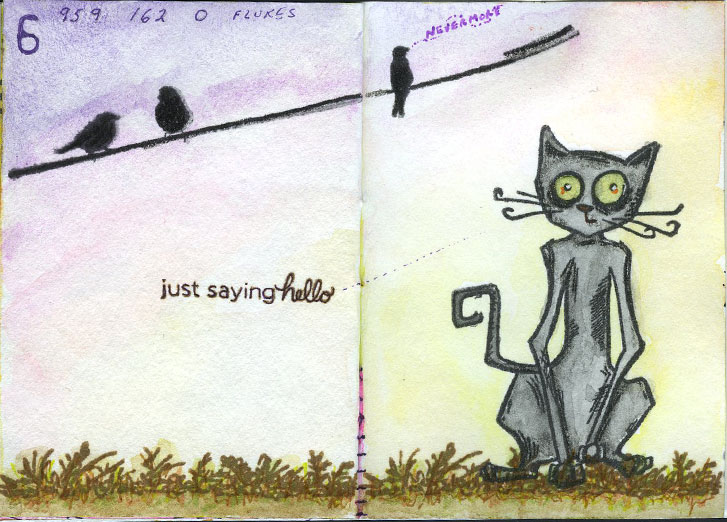
Meow!?
I don’t think you can have a Spooktacular Celebration without the traditional, familiar, black cat.
Here, our favorite feline was apparently contemplating dinner when one of the vittles decided to speak up for itself!
Perhaps our furry fiend will contemplate a nice bowl of kibble instead!
Images were stamped and then watercolor was applied. Colored pencil and gel pen were added for color and emphasis.
#microart #microartjournal #miniatureartjournal #miniartjournal #miniatureart #tinyjournalnation #allthingstiny #allthingsminiature #microartjournaling #tinyartjournal #travelersnotebook #inktober #spooktacular2019
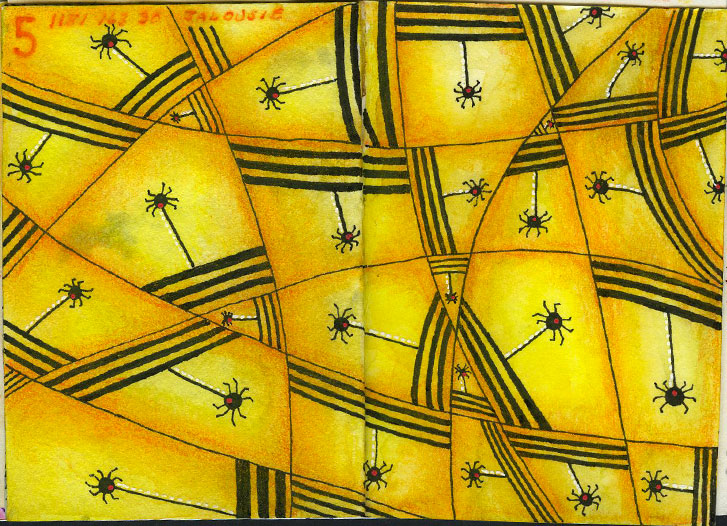
Jalousie? Teensy spiders just hanging around…
I’m so happy with how this came out! I wasn’t sure my idea would work. And it was still a bit mundane until I added the red dots to the spiders and the white dots next to their strings!
This was created using the tangle Jalousie, which was drawn first with black, Pigma Micron pens. Then watercolor was applied to establish the basic color range. Colored pencil, smoothed out with Copic Blender added depth to the colors. The red dots were added with a red, Posca pen. White dots were created with a white, Pentel, Juice Up gel pen creating a highlight along one side of the spiders’ strings.
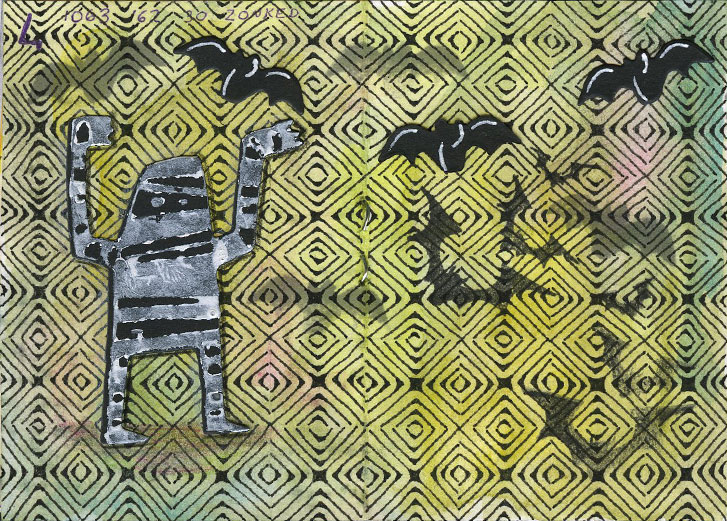
Zonked!
Every so often, I get a wild idea to try something… and it ends up taking much longer, or being more complicated than I thought it would be. This layout is one of those.
I probably should have drawn the Zonked larger. But I wanted the scale to be small so that the mummy and bats wouldn’t get totally lost in the design.
However, I don’t think I’ll be drawing this tangle again for a while!
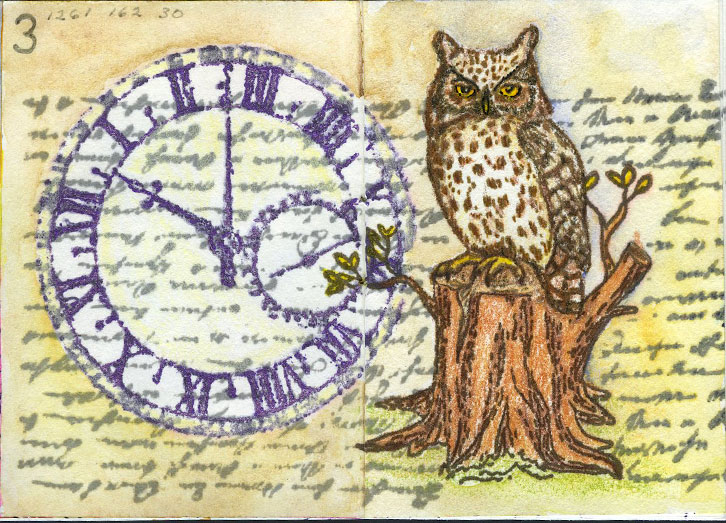
Whooo has the time?
Everyone who wants to make art, no matter your experience or education should make a little time each day to “just do it!” A tiny art journal is perfect because you can fill it quickly and the smaller size is less intimidating.
I wanted to create a layout with the feeling of the passage of time, and how we gain wisdom as we get older. So I chose these particular stamps with that in mind.
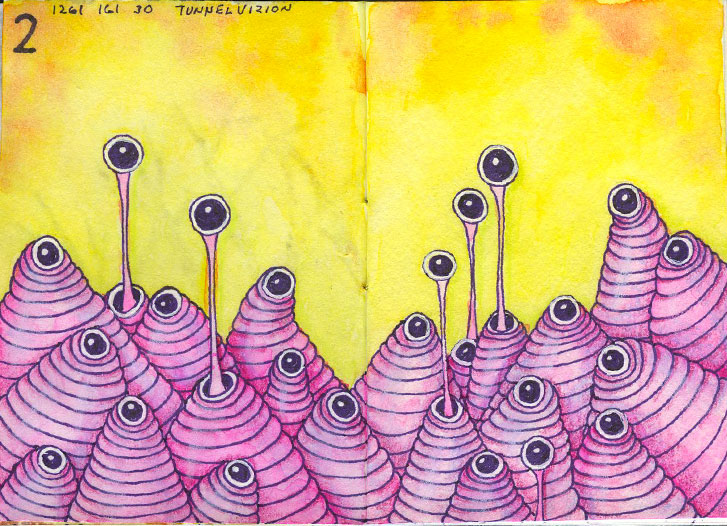
Today’s Inktober Zentangle prompt was TunnelVizion. I think this tangle makes a wonderful, creepy-cute critter that could be found on the Halloween forest floor!
Tangles drawn with purple, Sakura Pigma Micron pen. Watercolor was added to the background and each of the tangle elements. Colored pencil was used to give more dimension to the individual parts and a bit added to the background to intensify the green.
#microart #microartjournal #miniatureartjournal #miniartjournal #miniatureart #tinyjournalnation #allthingstiny #allthingsminiature #microartjournaling #tinyartjournal #travelersnotebook #inktober #spooktacular2019
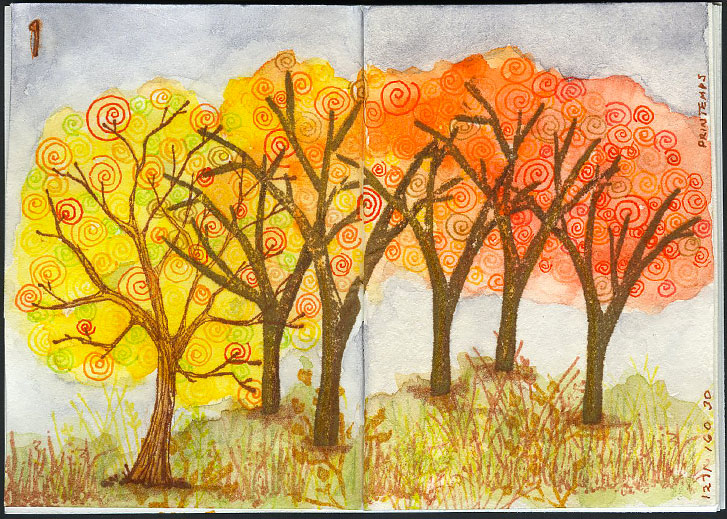
On the first day of Spooktacular2019, I incorporated the Inktober Zentangle prompt, which was Printemps in my tiny art journal layout. Here, I used them to make the brightly colored foliage in the trees.
The tree trunks were stamped on the page, then the tangles were added. Watercolors were applied and the foreground was stamped. Additional watercolor was added to the background and foreground. Finally some colored pencil was used for shading, color and texture.