Experimental.
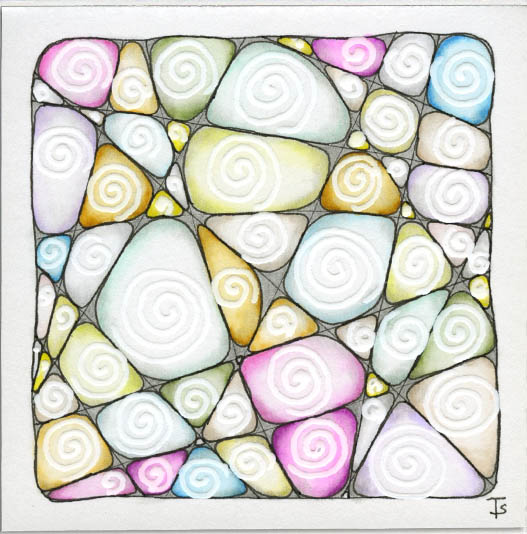
I had this idea of using a Souffle pen on top of watercolor to create a design within another tangle.
To test my concept, I chose Crazy ‘Nzepple as the initial tangle because it would give me a variety of blob shapes that I could play with.
After coloring all the sections and using pencil to darken the places where all the lines crossed, I drew a single Printemps spiral inside of each blob. I tried to make it the largest size that would fit. This turned out to be an issue in the very small shapes, so they just turned into a puddle of ink.
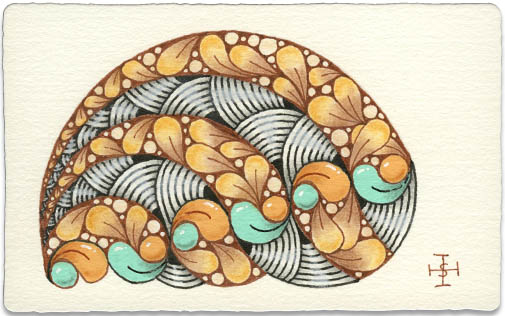
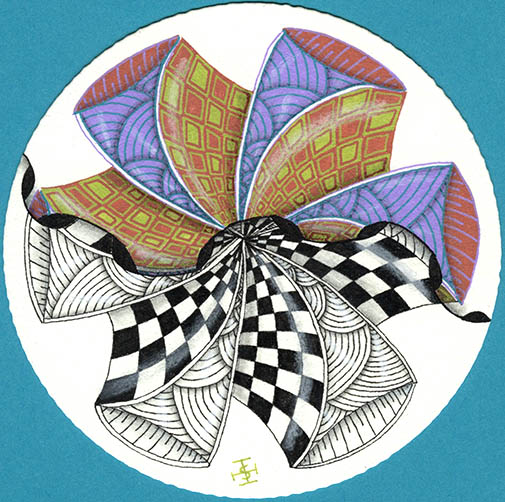
Project Pack 22 - Day 1
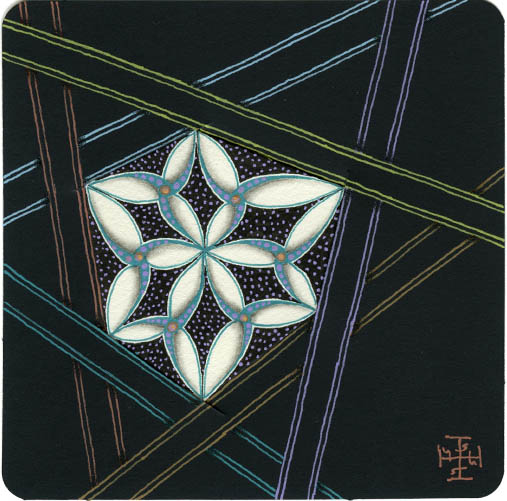
For the first lesson of this project pack, (video located here ,) Rick takes us down the path of using a pre-strung Phi tile to make a beautiful spiral design.
I loved the design and it was not difficult to do. Coloring in the various orbs and petal shapes was fun since the Gelly Roll pens just flow out ink that you can kind of push around to make an even colored area.
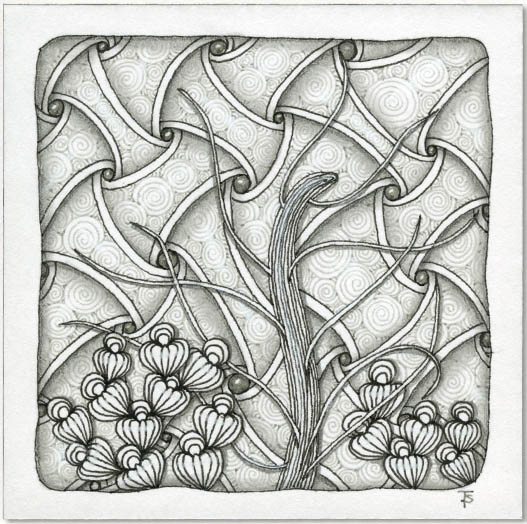
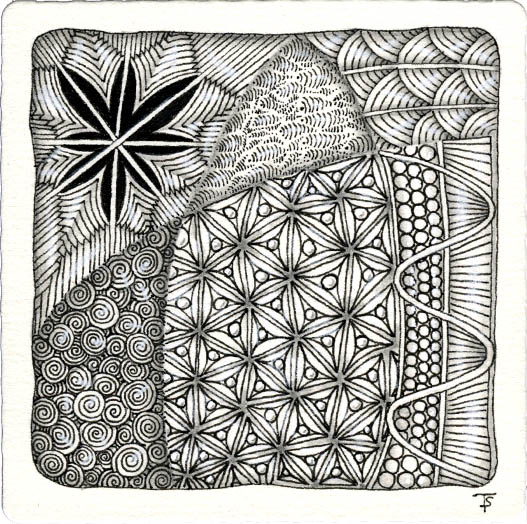
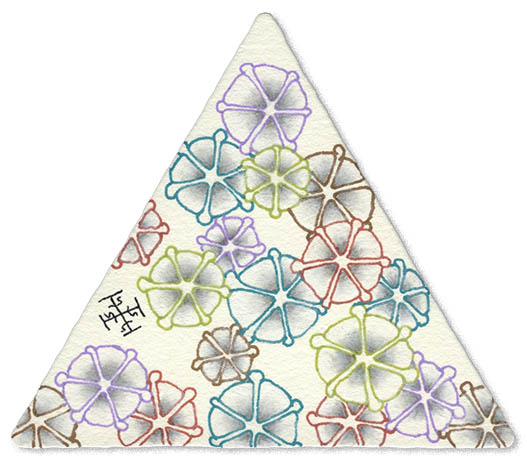
I recently saw an article about Neurographic art. After a little research, I decided to create a string on today’s tile that takes inspiration from this psychological art form.
Note: This is an example of artwork inspired by Neurogenic art. It is not meant to be an accurate representation. I enjoyed rounding all the corners on the complicated string. It was also a lot of fun filling in all the sections.

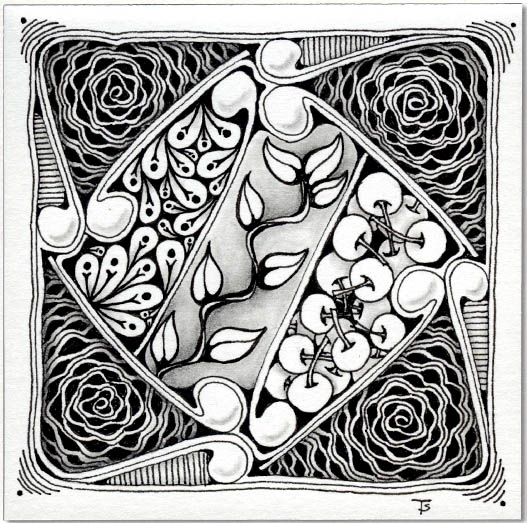
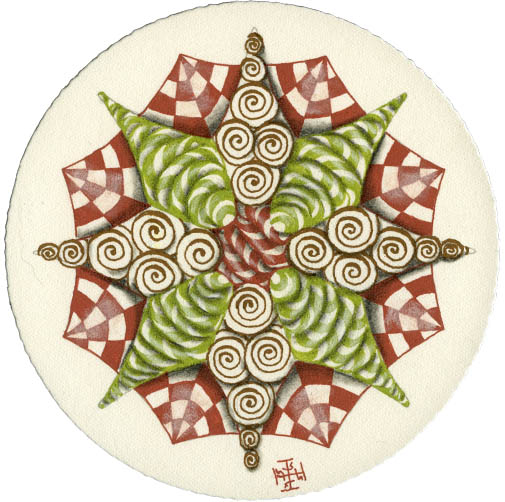
I’ve had this idea floating around in my head for a while. This was the day for it!
No border, a large, off-center spiral string, main object using colored pens, using reticula, surrounding support in black and white. I also used much heavier graphite on the spiral… at least heavier for me.
I think I am happy with the results!
Zentangle drawn on Strathmore Vellum Bristol using a black, dark brown and brown Micron pens. Shading done with graphite pencil. Highlights done with white chalk pencil.
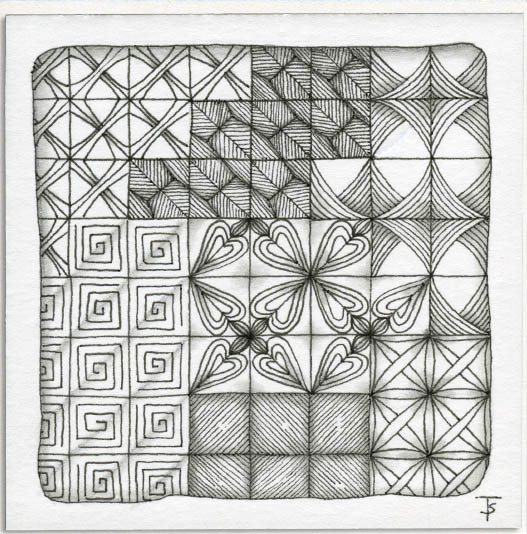
I did a grid tile previously, which you can see here . I think this is going to become a “go to” string when I am really busy or can’t think of what to do! They are fun to do, but don’t require a lot of figuring out! However, I will need to do a little better selecting tangles… since I duplicated two of them between the tile above and that previous one!

I usually manage to get some tangling time, even if I am having a really busy day. One method I use use when time is limited is to tangle on a Bijou tile. Since they are only about two inches square, it doesn’t take long to complete one. A few fit nicely in a thin pencil case along with a tangling board and a few tools, so I can tangle anywhere.
I wanted to do something with Dingbatz today, rather than using my standard daily method. I pulled out my copy of "Zentangle Dingbatz" by Brian Crimmins, CZT and started flipping through the pages.
The first thing that attracted my attention was the border on the tag on page 124, so, after drawing a simple border around my tile, I added the Mooka design. Then I decided to repeat the Mookas and create a kind of square in the center of the tile, which also created the triangles in the corners. The corners were a perfect place for Diva Dance!
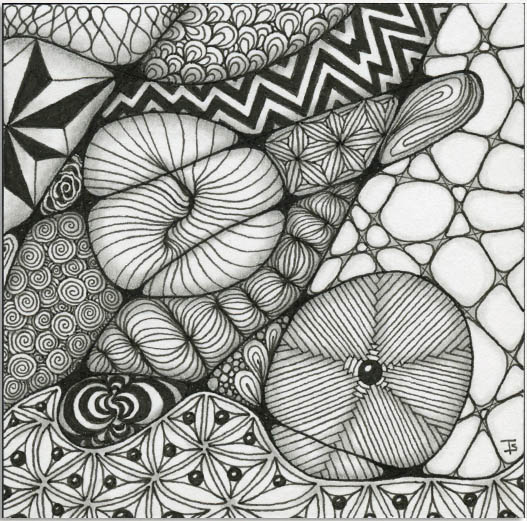
Random tangles. No string.
This is the first time that I’ve tried using the grey pens for tangling. I don’t like the little dark “dots” that are left behind when you end a stroke. This is done on Strathmore Bristol paper, so I will reserve judgement until I try these pens on a Zentangle tile. But if they do the same thing on those, I may not be using them very much!
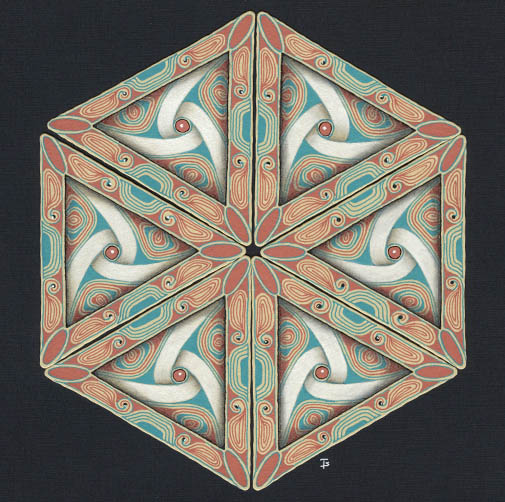
PP08 - Day 8 - The Last Day, The Last Project
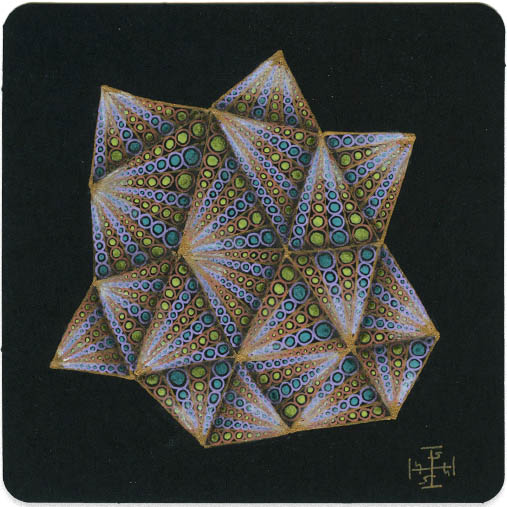
In the final video for Project Pack 8, Maria takes us through creating a hexigonal design created using six 3Z tiles.
While all these tiles appear the same at first glance, there are two different center designs, three tiles with the “arms” of the center going clockwise and three with the “arms” of the center going counter clockwise. The direction of the tiles alternates going around the hexigon.
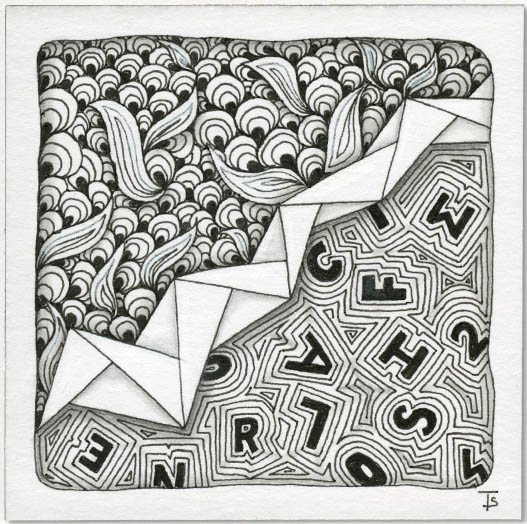
Randomly selected tangles. Although there were 5 tangles, I decided to use only three of them.
I really like, Ing, but for some reason, I rarely use it. After this, I may think of it more often. I haven’t used Vermal in years, that I can remember! I really like drawing Sharalarelli… but maybe not this much of it one one tile in the future. I got a little tired of it before I was done.

Sometimes a collection of randomly chosen tangles can create an imaginative image that evokes a specific theme.
For me, this makes me think of being in a decorated apartment. I see shades on the windows, a shiny tile floor, hanging lamps, a fascinating plant in the corner, and a large rug!
Tangling is so much fun… every tile is a new surprise!
Zentangle drawn on Strathmore Vellum Bristol using a black, Micron pen. Shading done with graphite pencil. Highlights done with white chalk pencil
The final lesson for Project Pack 8 involves drawing on six 3-Z tiles. Since this is also the week of registration and sports tryouts for school, it will take me a few days to complete the set.
In the interim, here is a standard completed tile, using my standard method of randomly choosing tangles and filling in a string. I did incorporate a few new variations of traditional tangles that I’ve recently learned. It meant a lot of line work, but these tiles generally finish quickly.
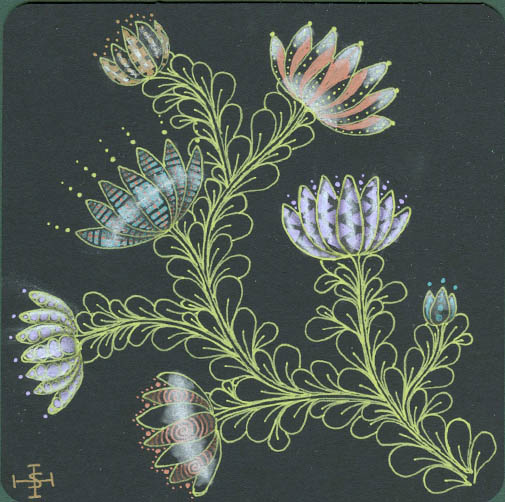
PP08 - Day 7 - Using a Flower-shaped Reticula
In this video Martha and Molly show us how to create a lovely garden beginning with blossoms and ending with Flux leaves.
This whole tile was a lot of fun to create. I actually wished the tile was larger so that I could add even more flowers!
Zentangle drawn on a black Apprentics tile. Drawing was done using several colors of Sakura’s Moonlight gel pens. Shading done with black colored pencil. Highlights created with a white chalk pencil.
PP08 - Day 6 - Doo Dah, Knightsbridge, MI2, Shattuck
The video for this tile is located here .
To begin this project, I had to recreate this particular string on a white Zendala tile. I didn’t have one in my stash that I could use. Fortunately, it turned out to be fairly easy to do.
I found it interesting to divide the tile with the MI2 tangle. In the end result, I’m not sure I like it. I was certainly uncomfortable to work this way.
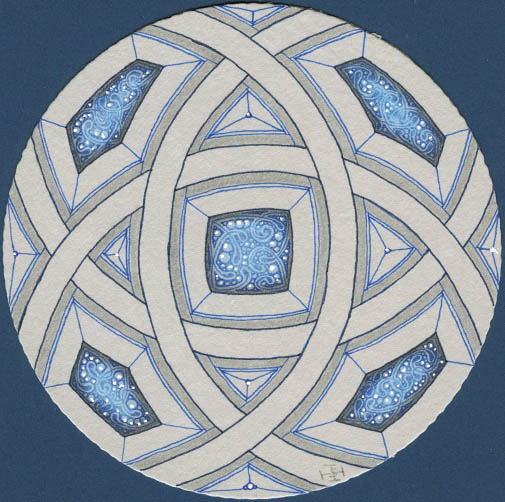
Project Pack 07 - Day 12
In today’s video, located here , Maria shows us how to create an architectural-style design using Holibaugh. Some of the coffered sections are transformed into an almost stained glass look using Fescue and various pencils.
This was an interesting exercise for me, and not one I would have ever thought of on my own. Auras play a prominent element in this design. They are used over and over in different widths to build each section. The end result looks almost like a dome ceiling.

PP08 - Day 5a - Fescu, Fife, Gourdous, Tripoli
At this point in this project pack Maria tackles a large project: Creating on nine different black Zendala tiles. This is shown across two different videos, Part One and Part Two .
If you bought the Project Pack 8 kit, you have a single, black Zendala tile with a random string. You will have to scroll through the videos to find the parts that apply to the tile you have.
PP08 - Day 4 - Bunzo, Printemps and Knightsbridge
According to the instructions, this was to be done on a prestrung tile. As it happened, I didn’t have a tile with this string on it. I could have used a differeent string, but it wouldn’t have looked the same! So I sat down and figured the string out and drew it on a blank tile.
I copied the colors and tangles used in the video, which you can see here .
PP08 - Day 3 Tripoli
This tile was drawing following the instructions in the video here .
I absolutely love Martha’s version of Tripoli on this project! She says it was inspired by a trip to the local aquarium with her kids. While it doesn’t exactly look like a jellyfish, it certainly invokes the “feeling” of them! I am keeping this tangle in my repertoire.
I also liked doing this on a 3-Z (triangular shaped) tile. It was very quick to do, but with beautiful results.
PP08 - Day 2
This was an interesting project.
To begin, a white, 3-Z tile is combined with a black Apprentice tile.
After they are put together, the tangling was done on the white tile first, and finished up on the black tile.
The video for this project is here .
It was much easier to do than it looks like and I love the final results!
Zentangle drawn on a Zentangle, white, 3-Z tile combined with a black, Zentangle Apprentice tile. Drawing was done using several colors of Sakura’s Moonlight gel pens. Shading done with graphite pencil and black colored pencil. Highlights created with a white chalk pencil.
PP08 - Day 1 - Muchin
I am currently working through Zentangle's Project Pack No.8. The project packs are a collection of materials and video tutorials. They are often used to introduce new ideas and/or products in a fun, friendly way.
This particular PP was introduced on February 29, 2020. I was unable to do it then, so I am doing it now. If you want to try it for yourself, you can order your very own collection of materials from the link above. You’re also welcome to use whatever supplies you have on hand.